WöschlerOrden

Announcement

Collapse
No announcement yet.

Band Mount Hensoldt ZF4 for G1 In Detail

Collapse
X
 
  • Filter
  • Time
  • Show
Clear All
new posts

    Band Mount Hensoldt ZF4 for G1 In Detail

    All text and images that follow are copyright 2014 and are not to be used without the written permission of the author (me). I recently picked up one of the early band mounted ZF4s made by Hensoldt for the German G1 and I thought I'd do a short essay about this unit since there doesn't seem to be much available on line in the way of detailed photographs. The original case would have been made out of leather since this scope was built and marked for the Bundesgrenzschutz. However, the included case is of canvas covered cardboard which would have been issued with an identical scope only built and marked for the Bundeswehr. As far as I have been able to figure out, these scopes were made from the mid 1950's up until the very early 1960's. At that time the scope was reworked into the "Model 1" (collectors designation NOT the official one) ZF4 for use on the G3. The Model 1 was essentially the same scope internally but with some modifications to the body to make it compatible with the Stanag claw mount developed for the HK G3. The lens covers included are not original to this scope either but came from a Model 1. I do not know what original lens covers looked like but I assume that they were similar. That is only a guess though. This essay will take a few posts and it might take me a few days to fit it all in. So, let's get to work!

    First off, we'll look at the case. It is entirely cardboard and covered in a heavy cotton canvas. it is very much like the plastic cases employed for the later models intended for the G3. Here's the front:
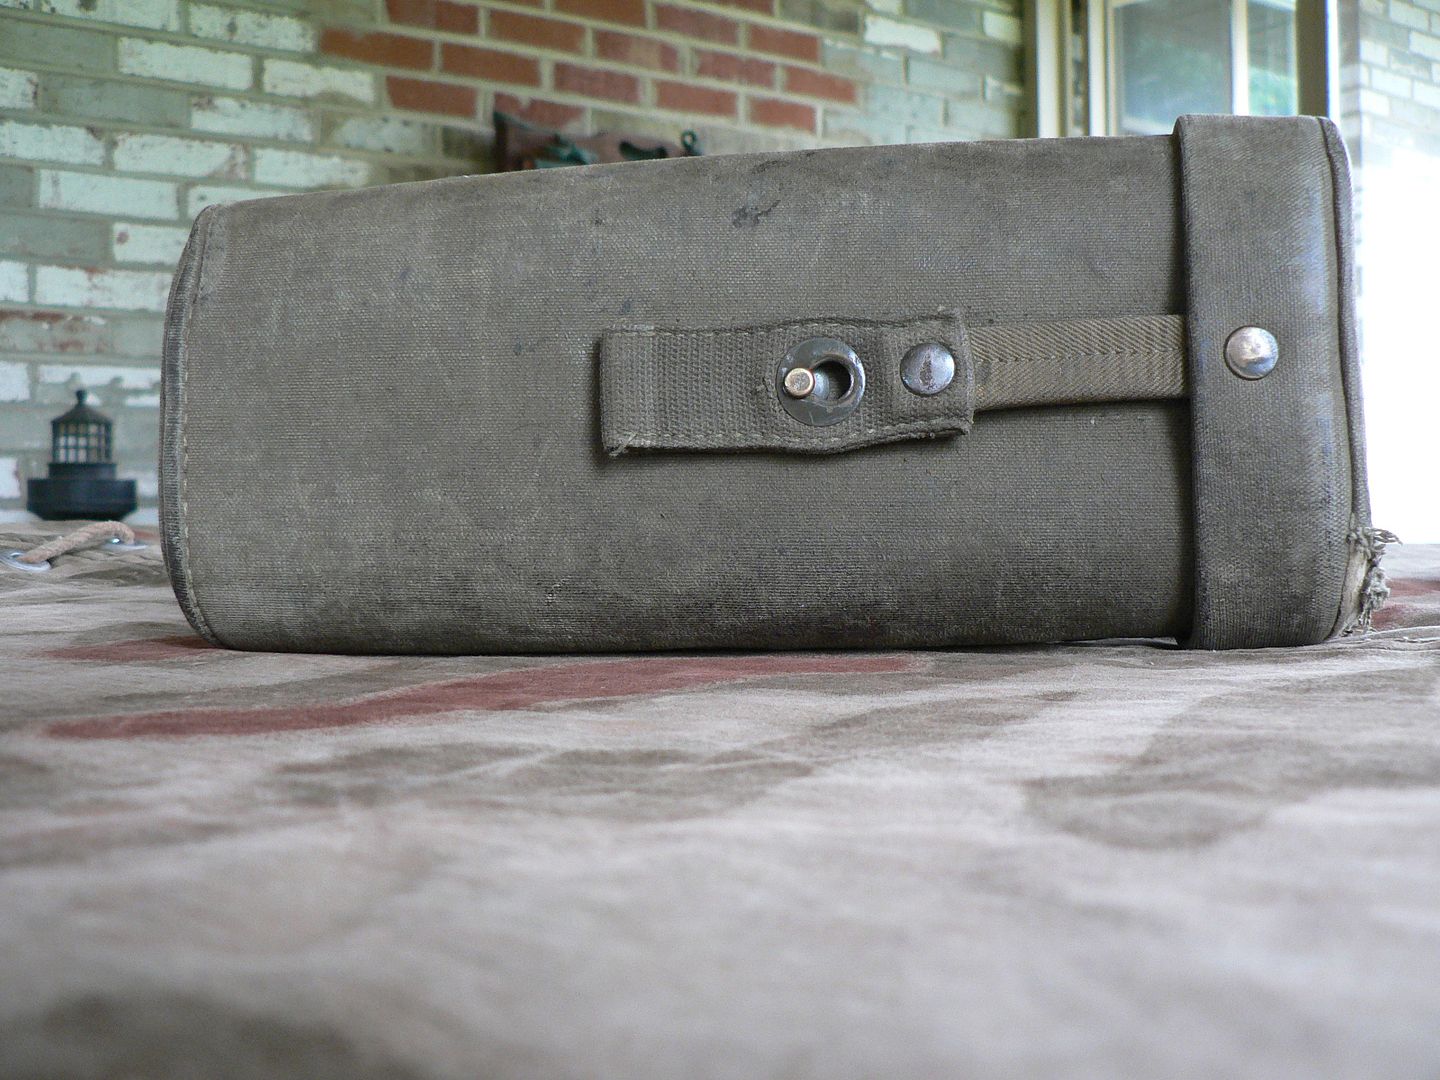


    On the plastic cases, the keyhole clasp has internal springs to pull the clasp tight on the stud. In this case, the skinny strap between the two rivets appears to be canvas covered rubber. It still works fine after all these years. Strangely, the rivet on the lid, the clasp and the stud are all brass but the clasp rivet is steel.

    Here's the back of the case:
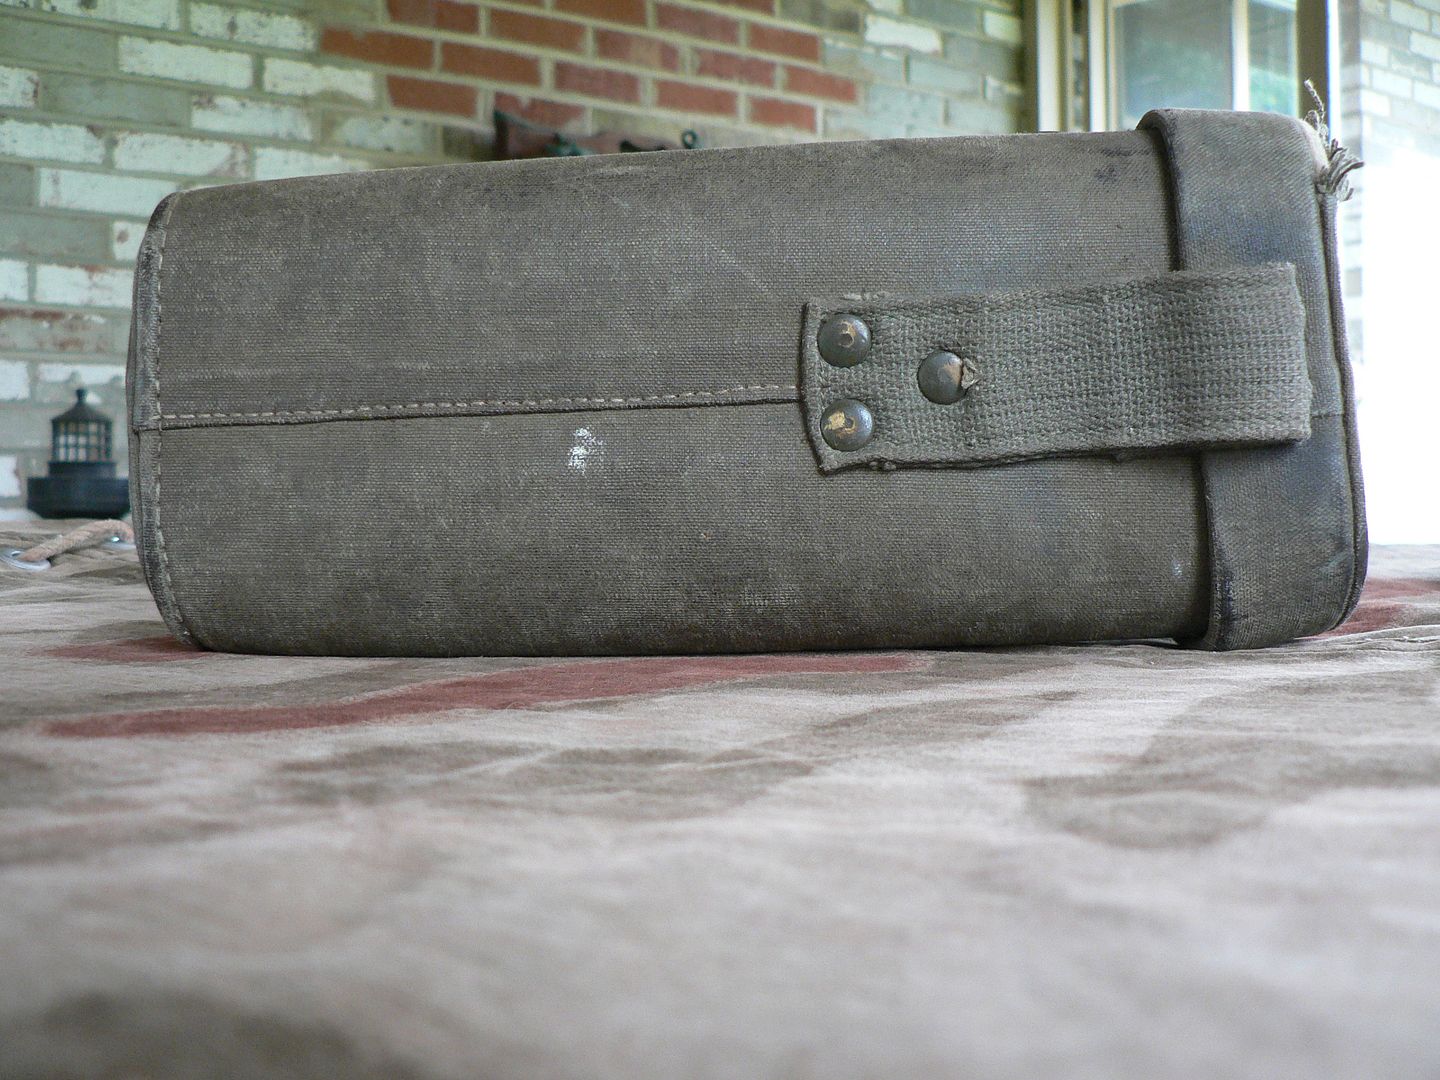


    The belt loop rivets are brass.

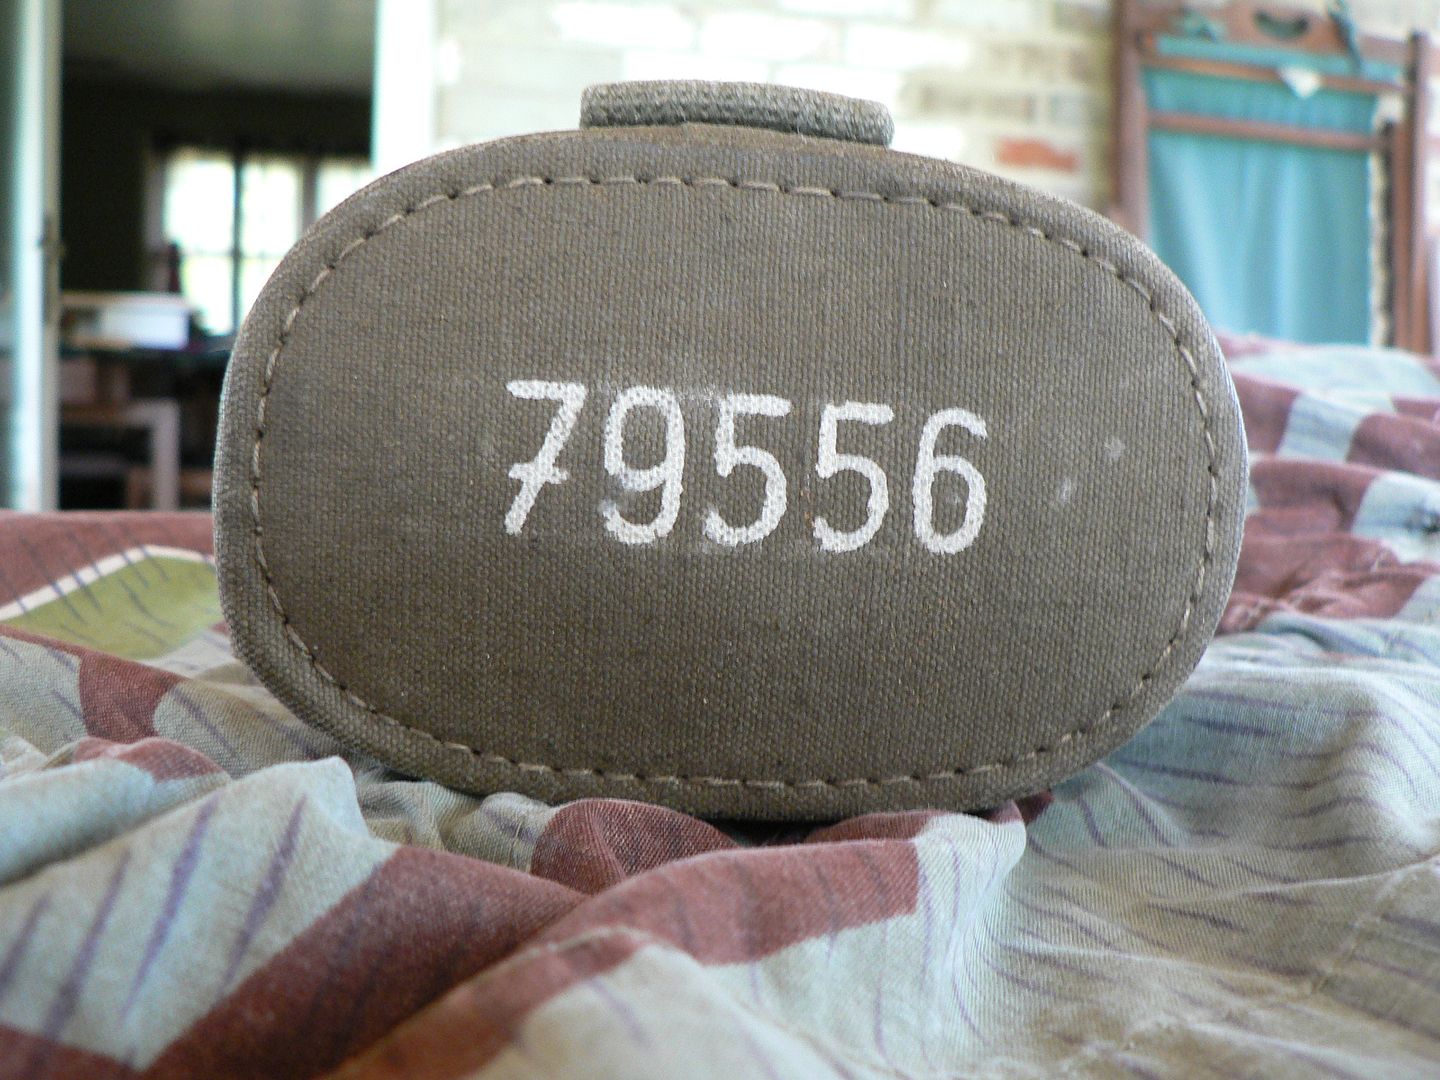
    The bottom:
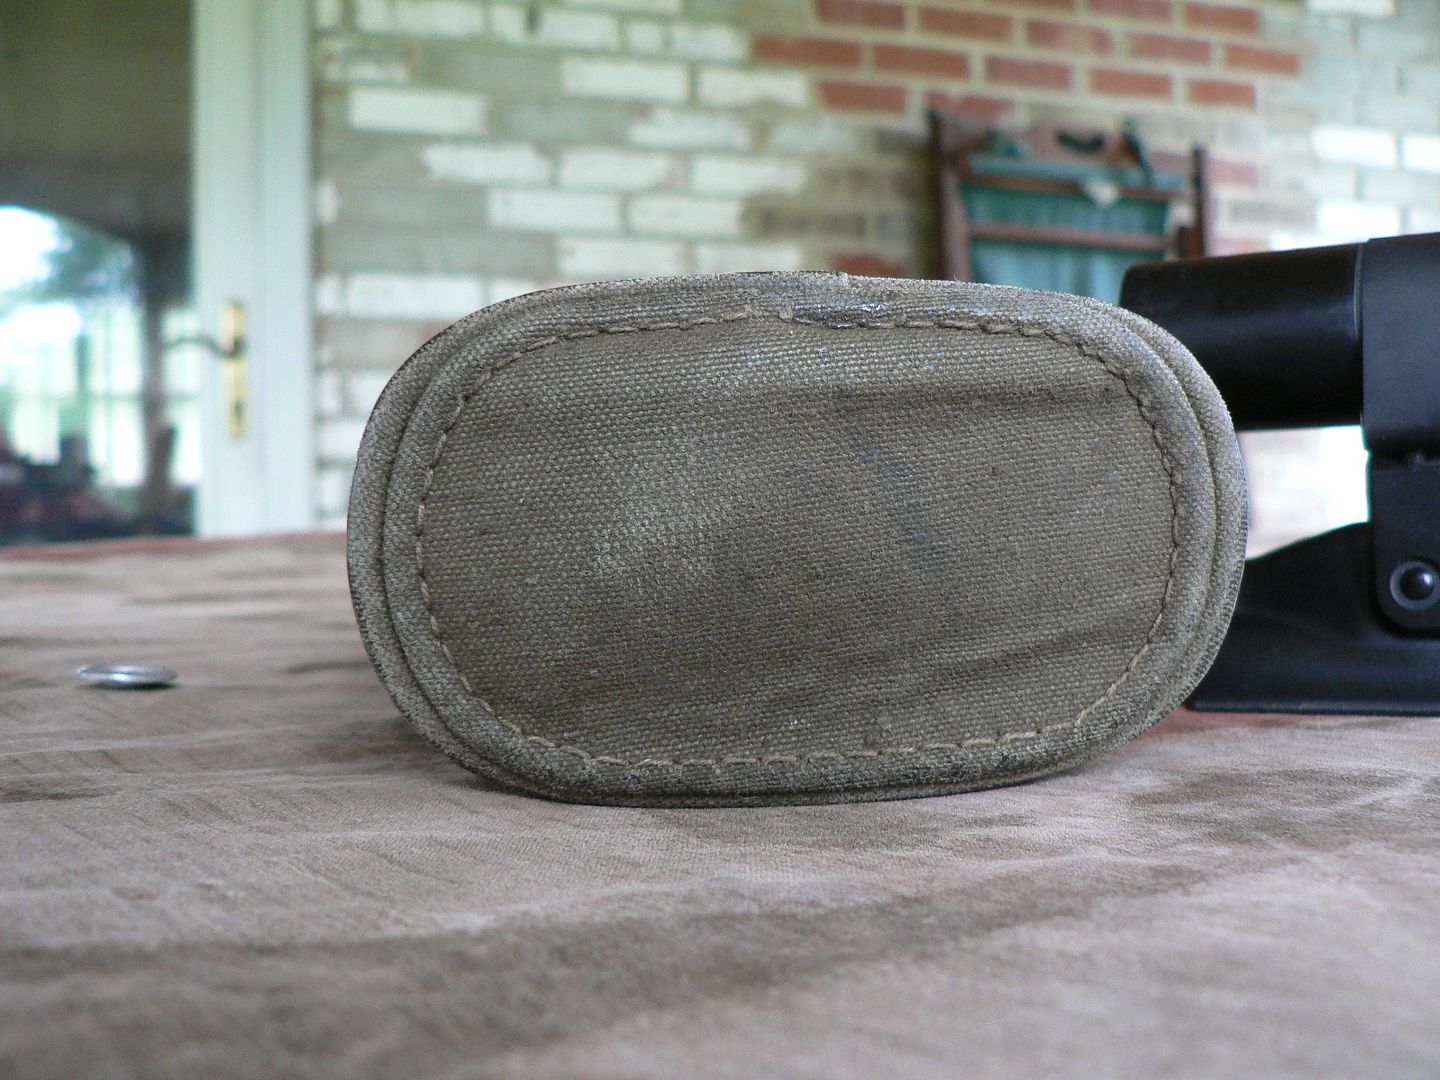


    And the top:
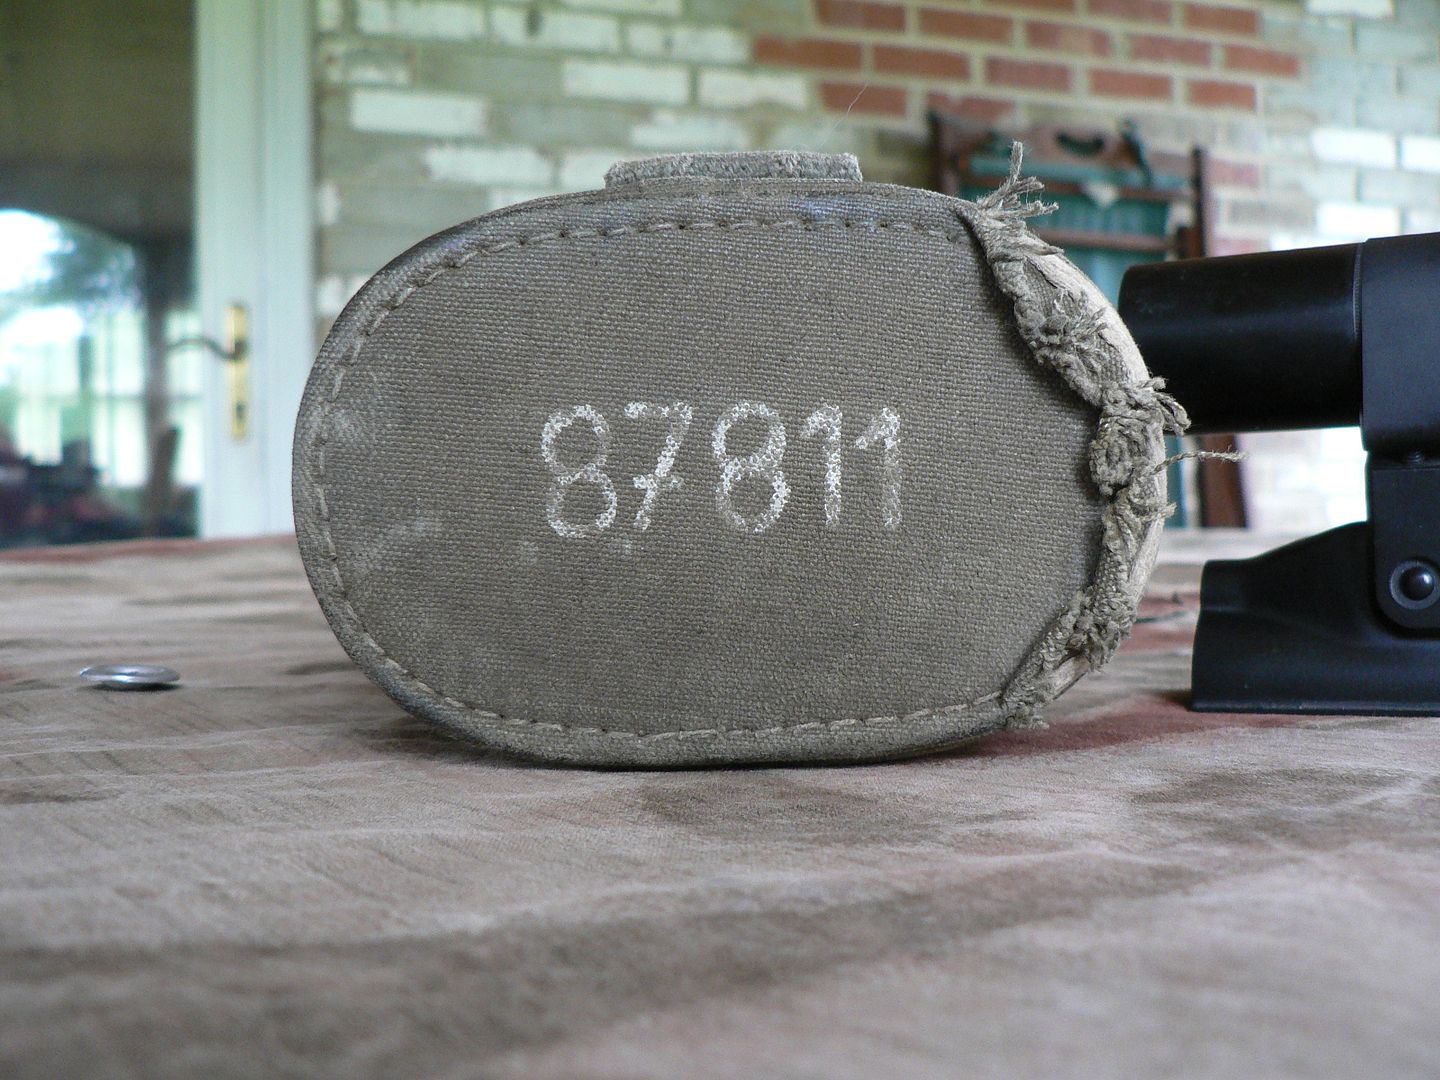


    I assume that the number is the rifle serial number that it was paired with. The fraying on the left is where the canvas has come untucked from the top and the cardboard has been exposed. The stitching is still intact all the way around so I can only assume that the extra was simply tucked under and glued.

    View with lid opened looking down into the case:
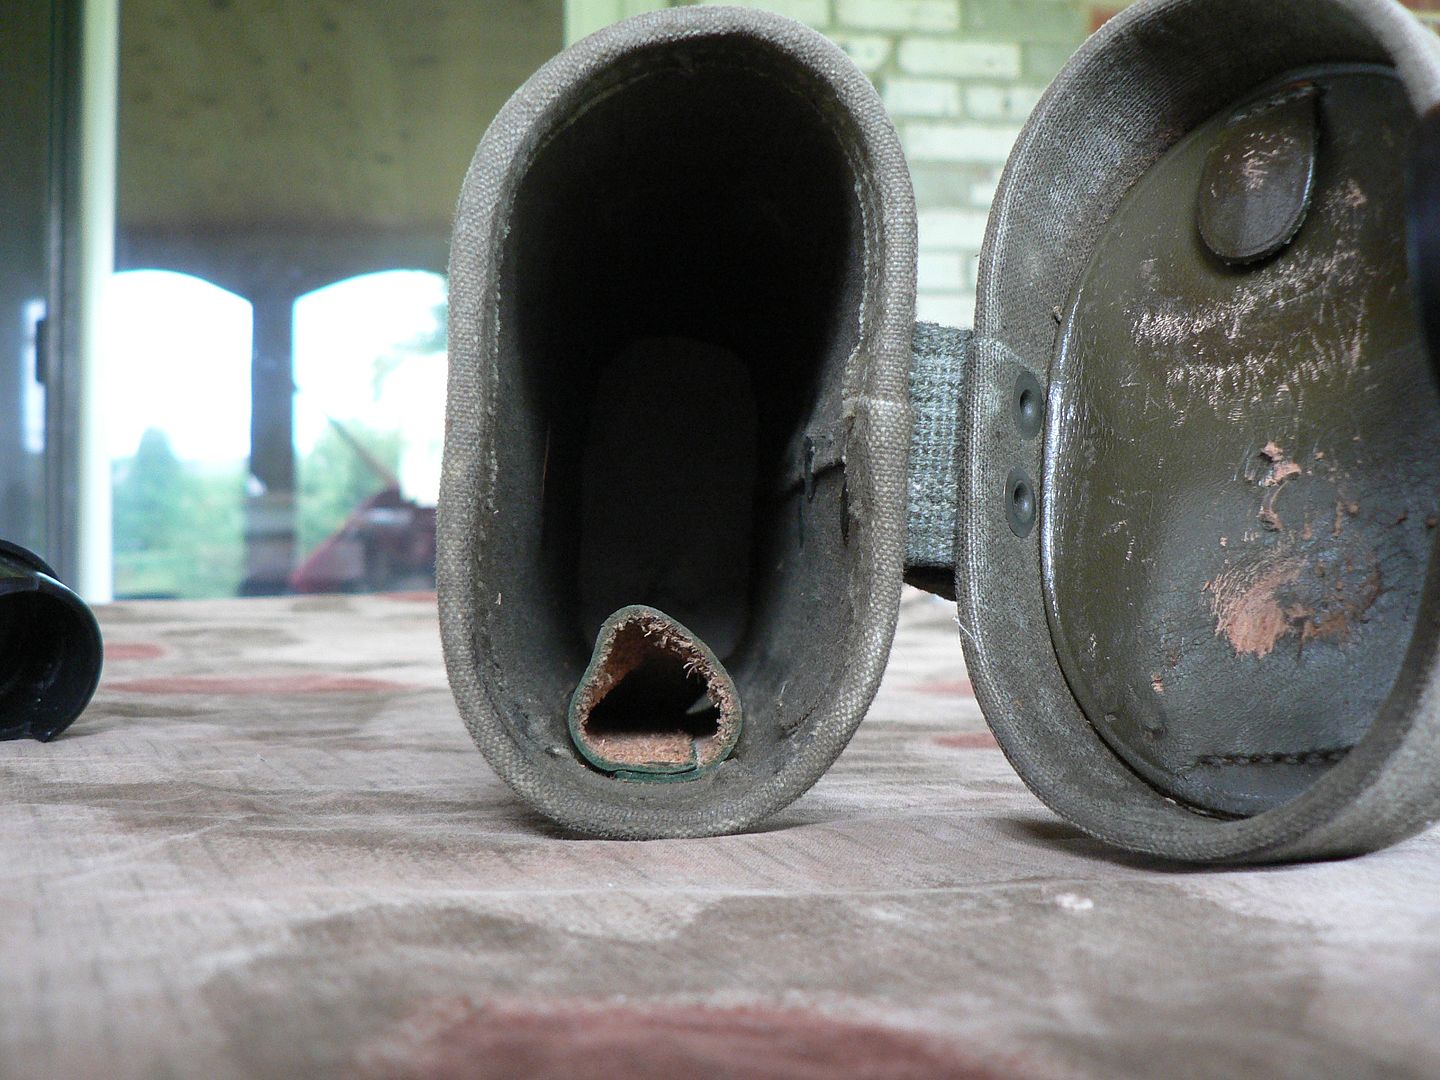


    the leather triangular tube seen inside is held on by two brass rivets with the lower rivet closing the bottom of the tube thus forming a pouch. It might have held the hex wrench used to tighten the bands or perhaps a cleaning brush for the lenses? On the underside of the lid we see a leather flap. This covers an accessory compartment which we'll look at in a bit. The stitching is seen at the bottom of the picture and another small leather flap is seen at the top of the picture. This covers the steel snap used to hold the larger flap closed and also acts as a pull tab to open the flap for access to the lid accessory compartment.

    It's a little hard to see, but look closely at the center of the picture and you will see the "Hensoldt Wetzlar" logo embossed into the leather. In person it's very easy to see:
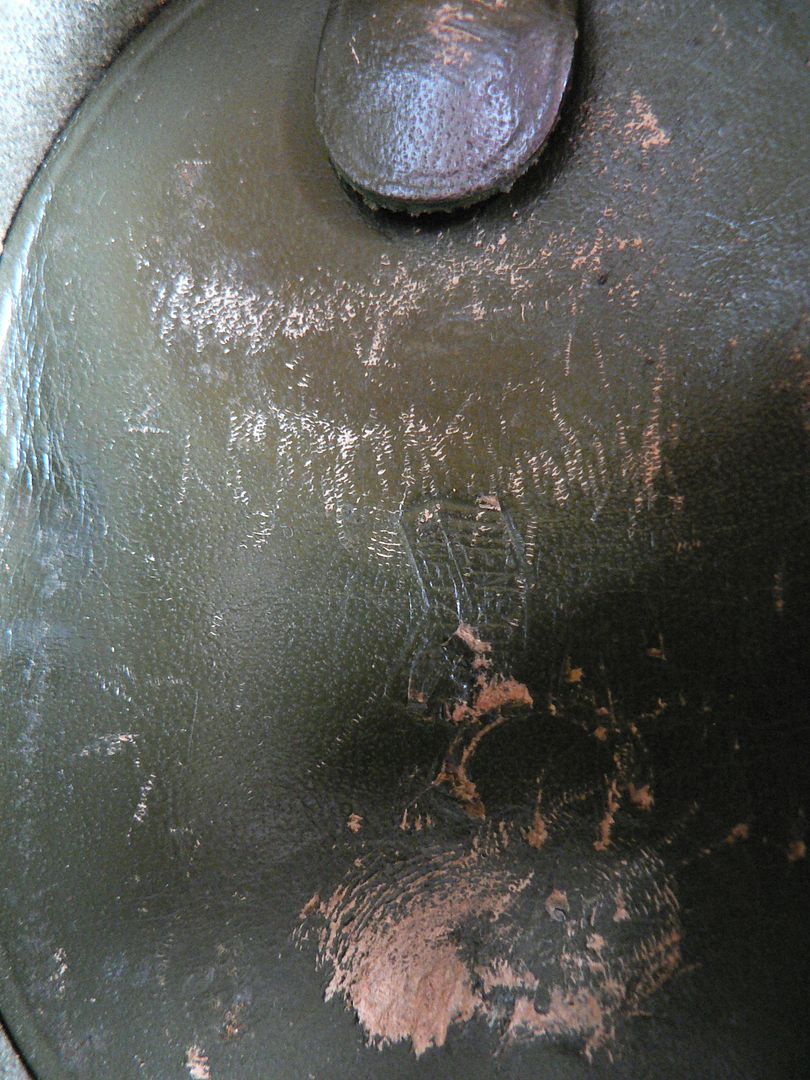


    Here we have the flap opened exposing the accessory compartment:
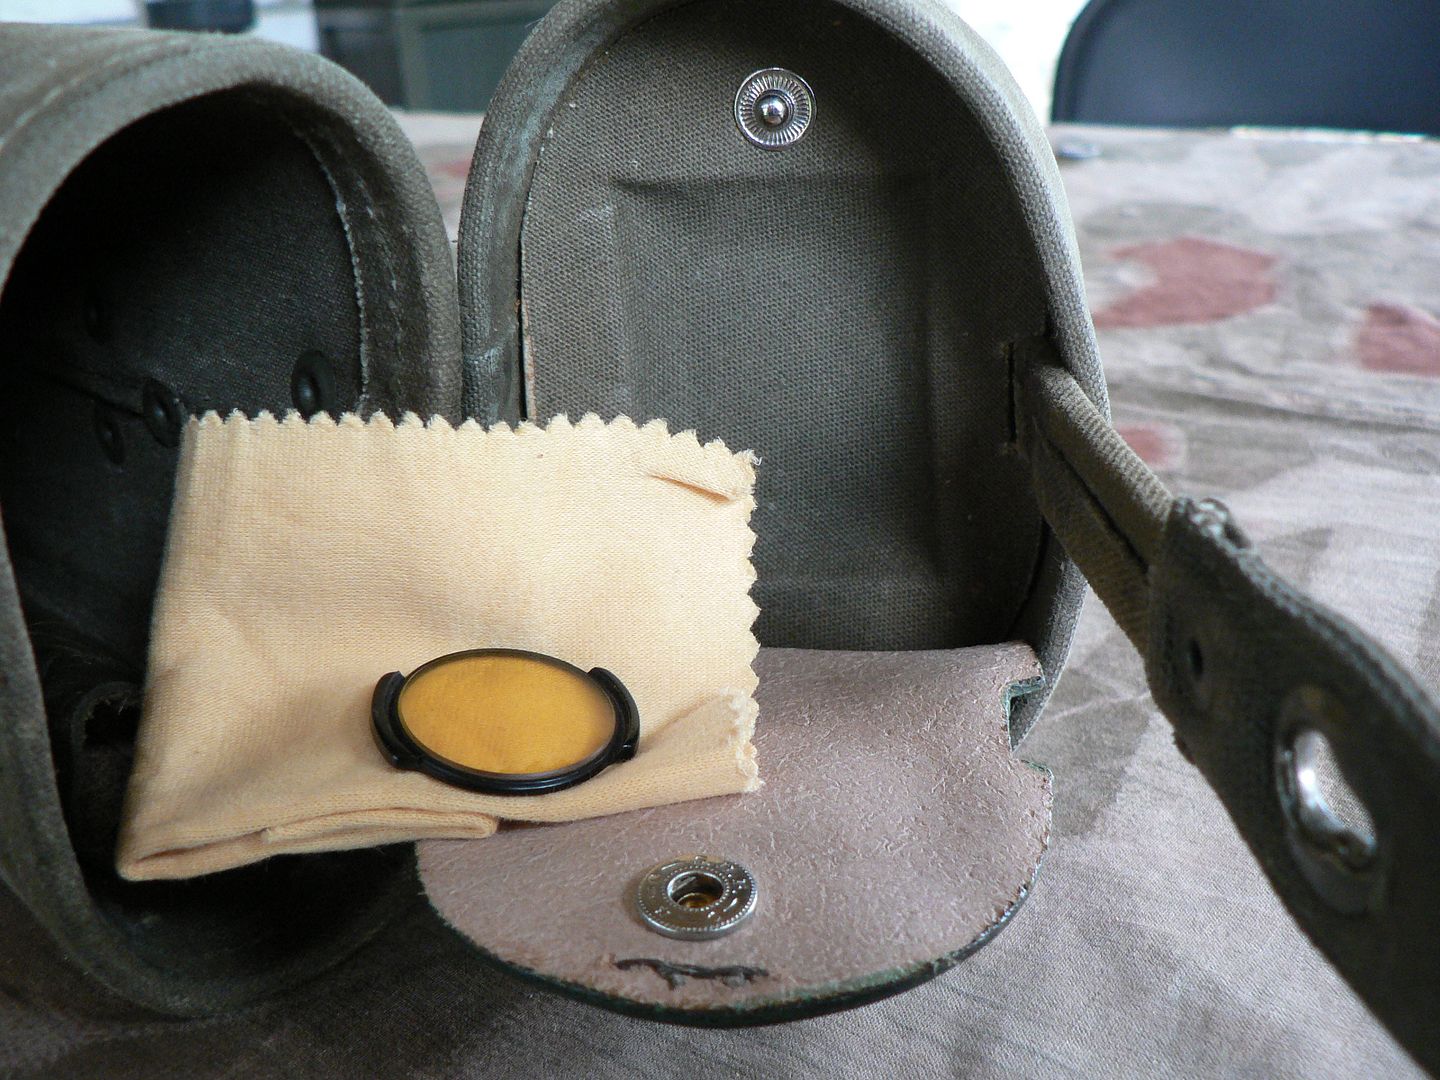


    Inside was a lens cleaning cloth and the yellow filter for use in very bright environments. Whether or not anything else was supposed to be in there I do not know.

    Here's a closer look at the yellow filter:
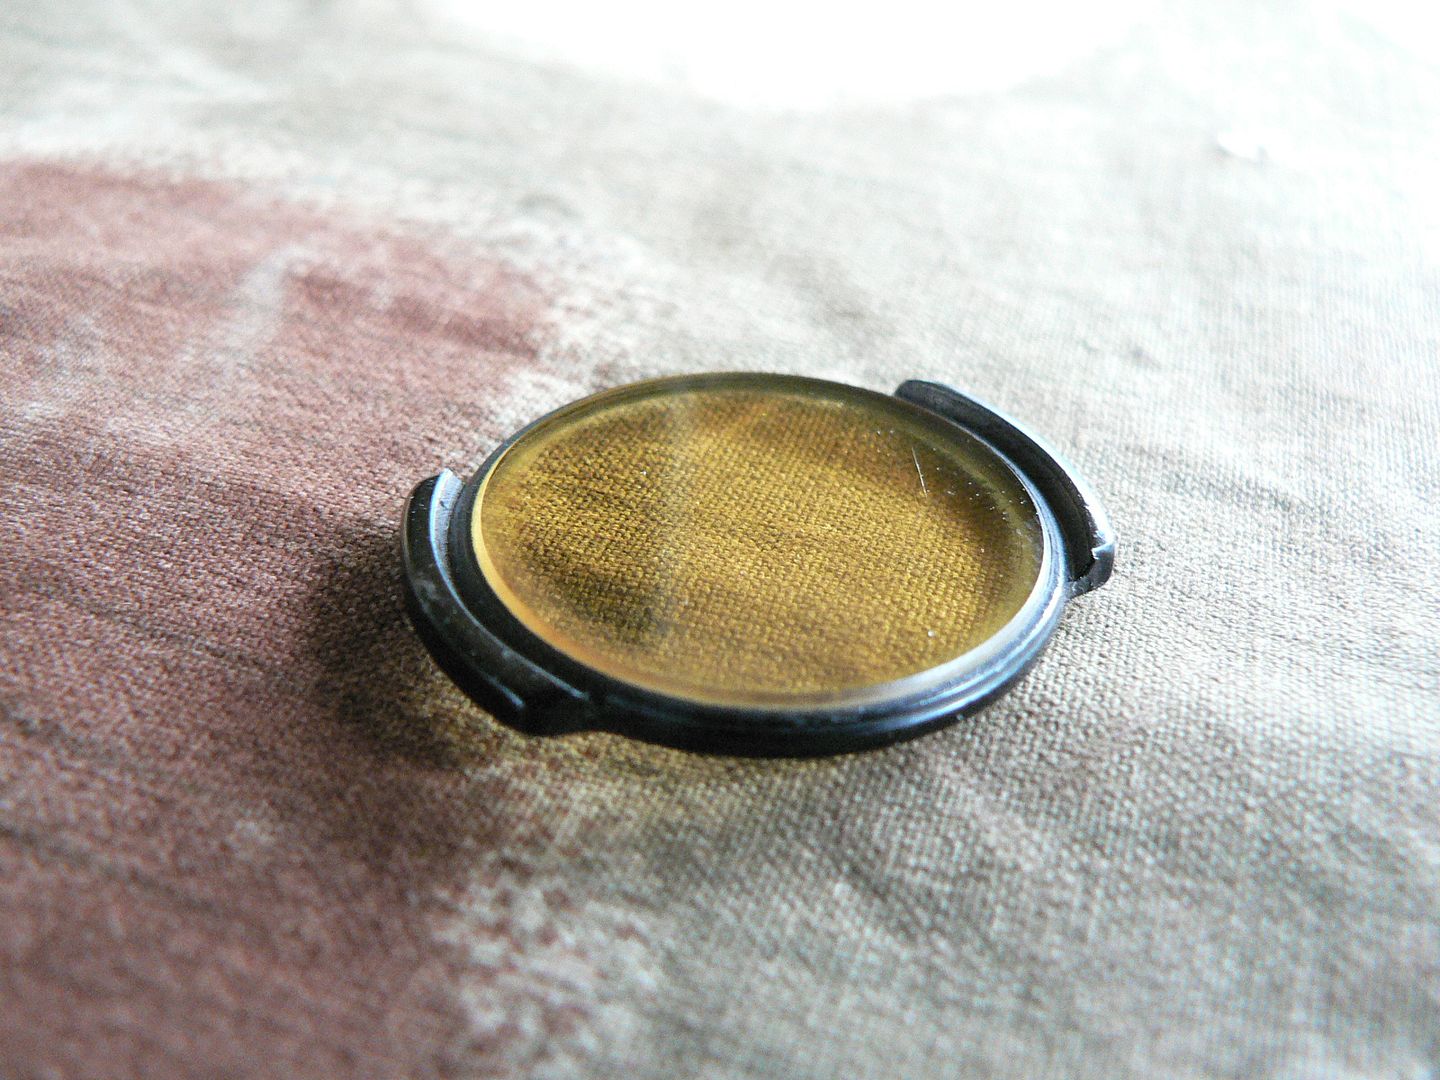


    It is glass mounted into either a brass or steel ring painted black. The grooves in the ring engage the lock ring holding the ocular lens block in place.

    Here is the filter mounted on the scope:
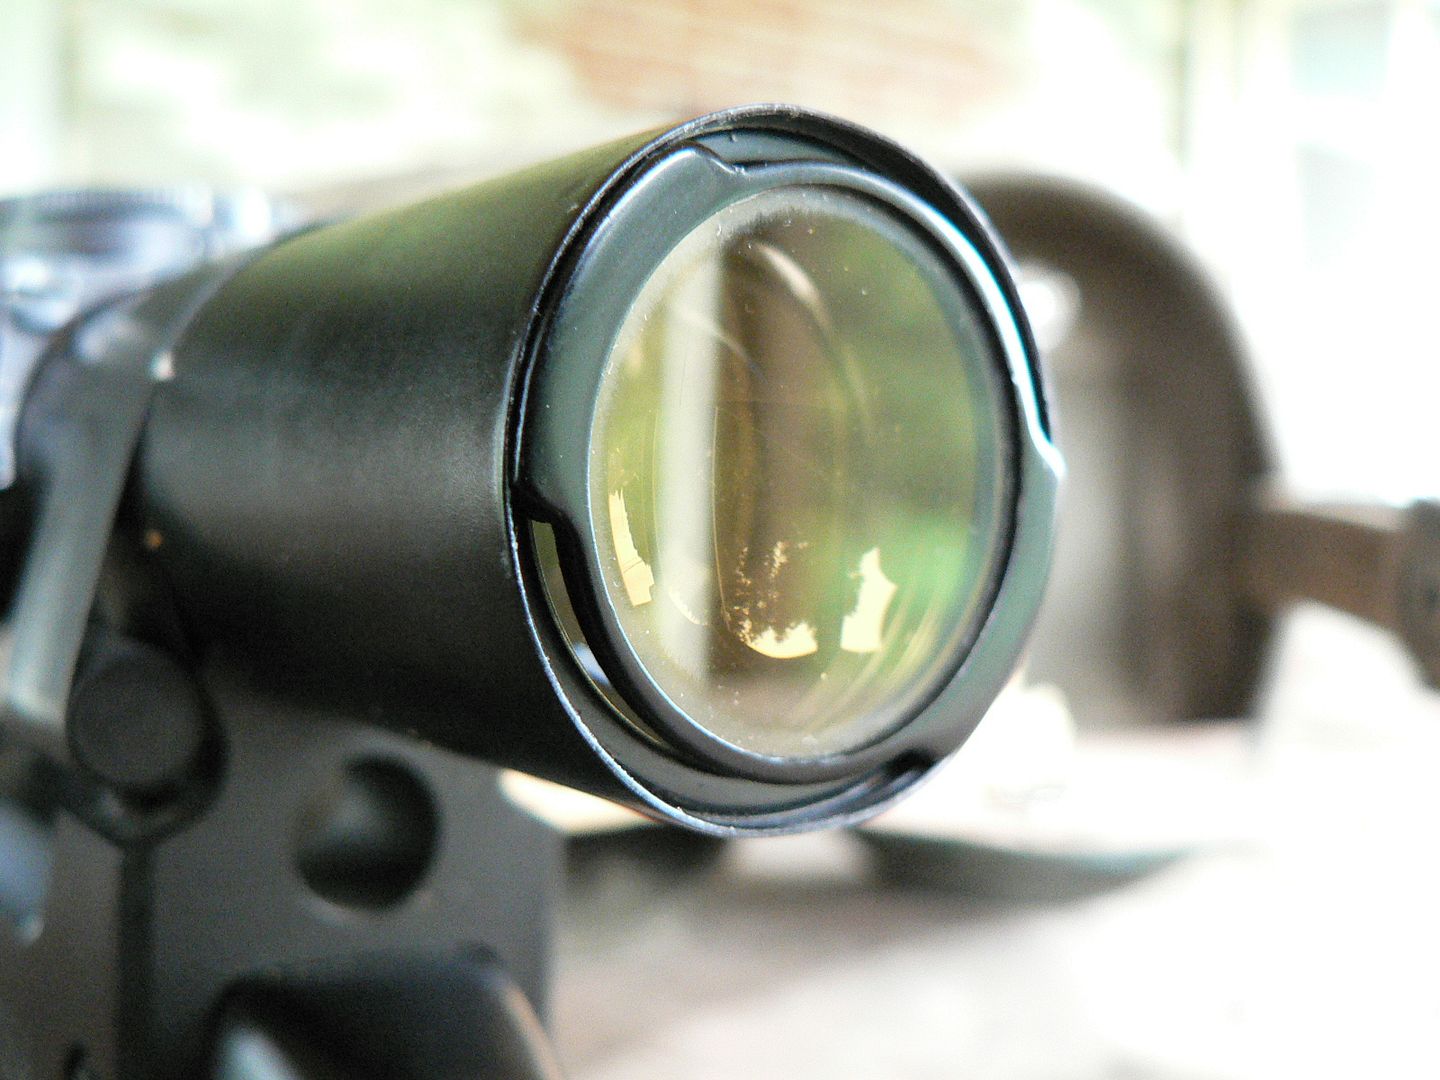


    It fits quite snugly and would be held fast once the rubber end cap/eyecup (or whatever they used) was installed.

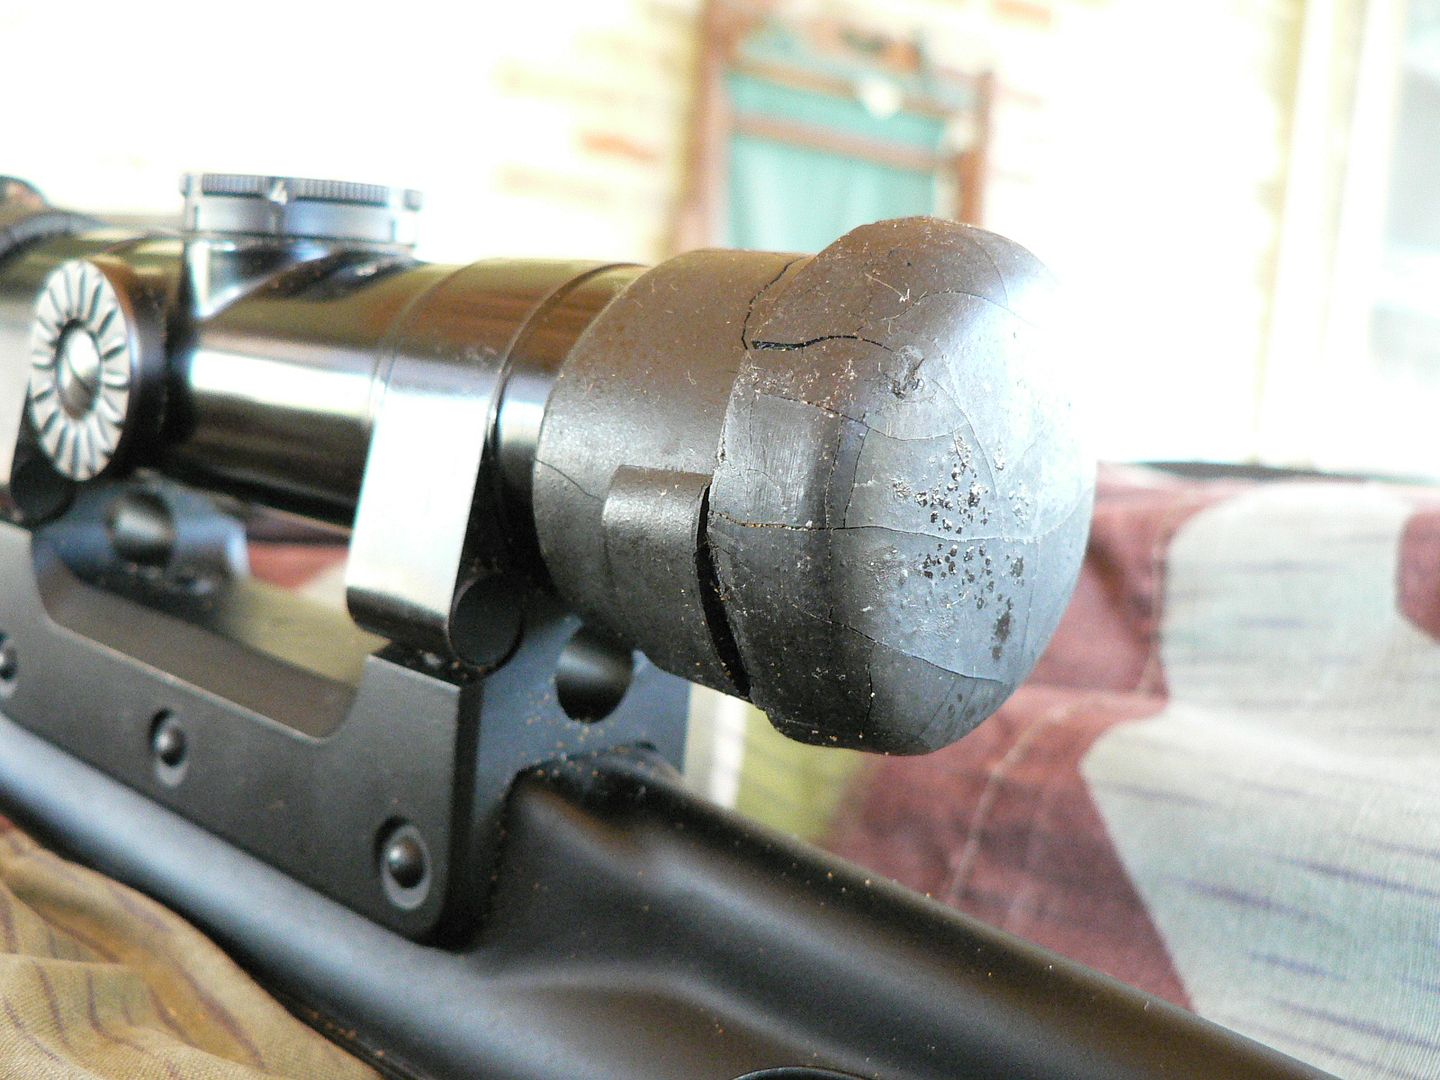
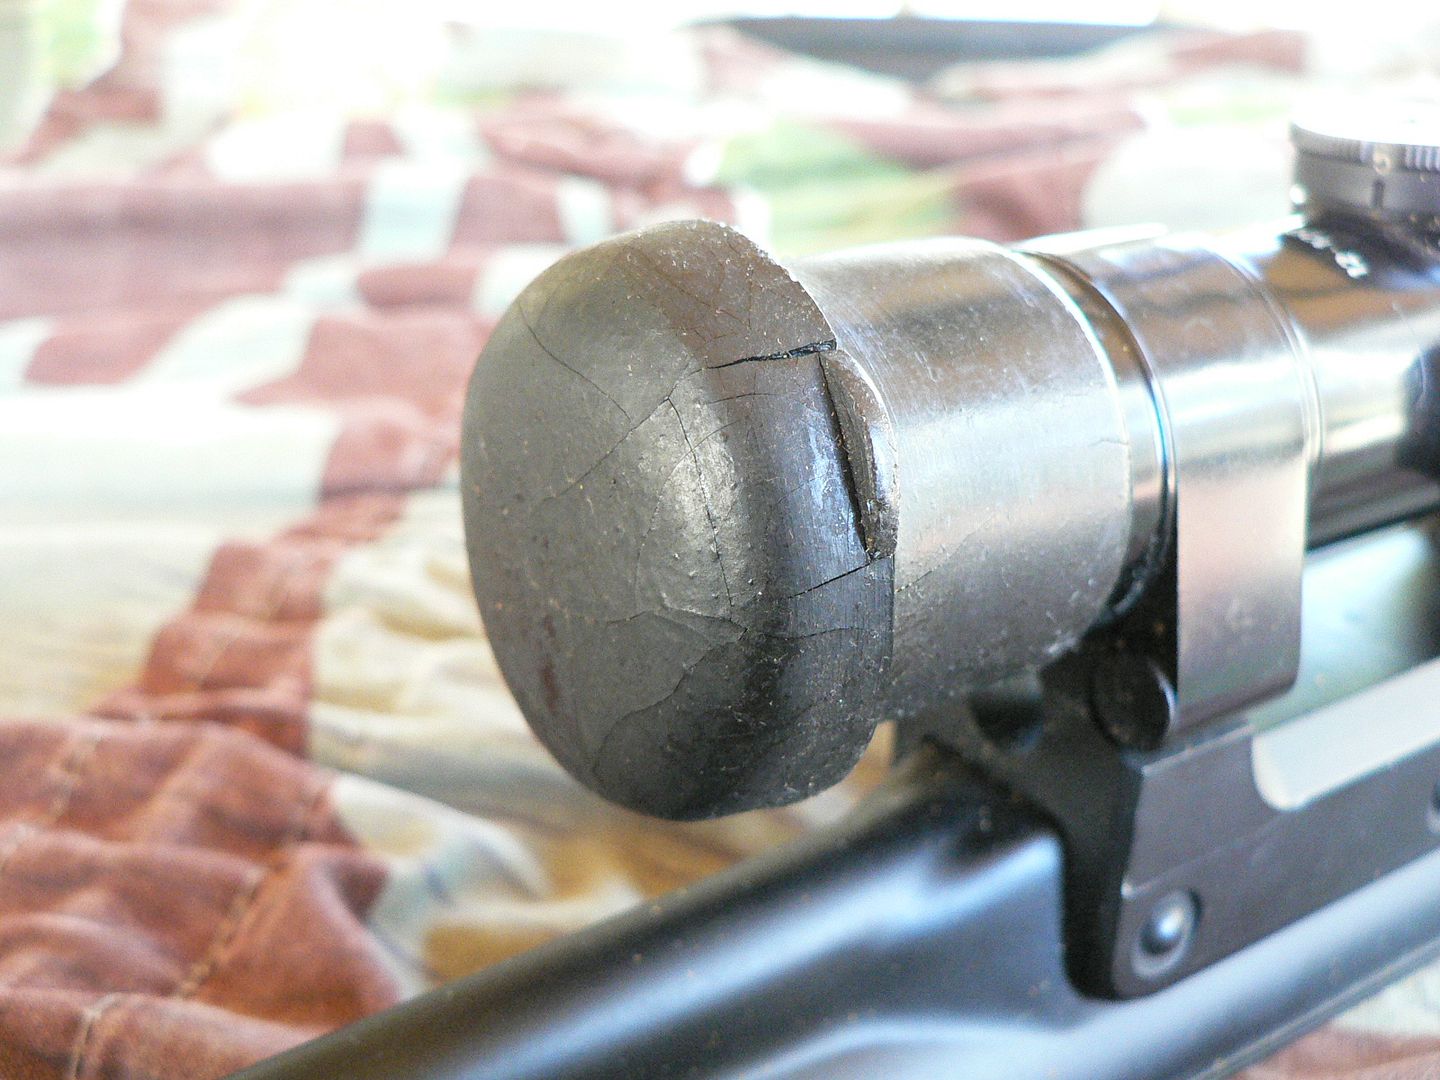
    Here are the lens caps that it came with:
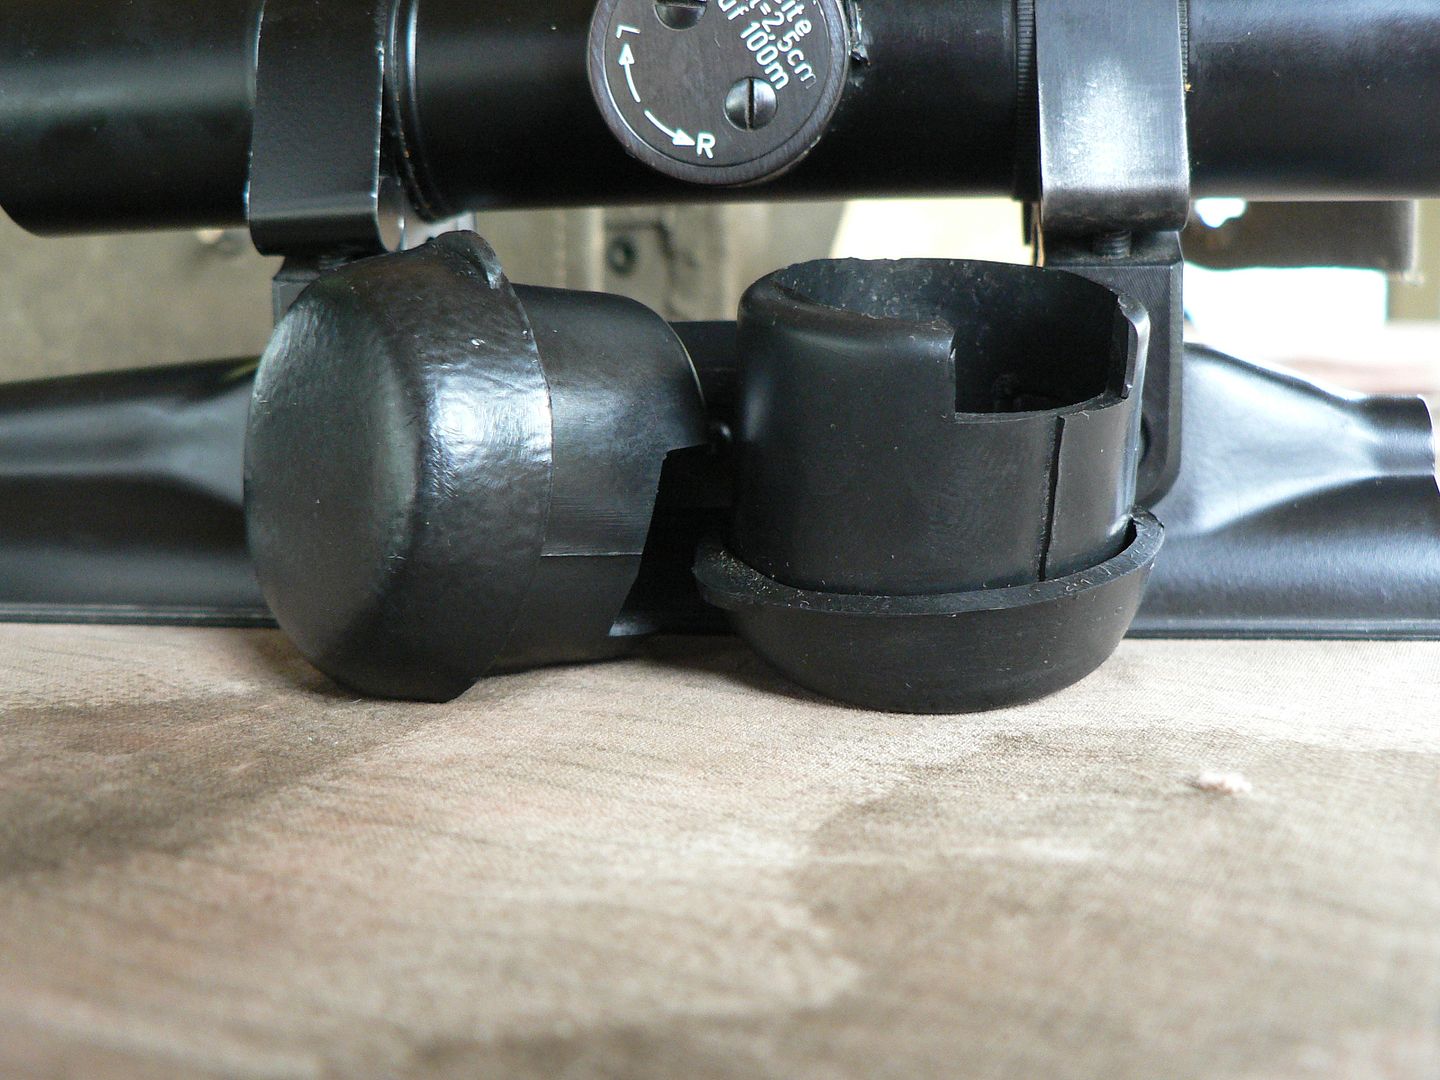


    The sure giveaway that these are not original to this scope is seen in the rectangular notch on each cap. These caps were made for the later Model 1 scope and the notches go around the mounting lug on the HK claw mount.

    That's it for the moment as I am out of time. In the next post, we'll get into the interesting stuff. Namely, the mount and scope. I hope you all find this stuff useful and thanks for your time!

    #2
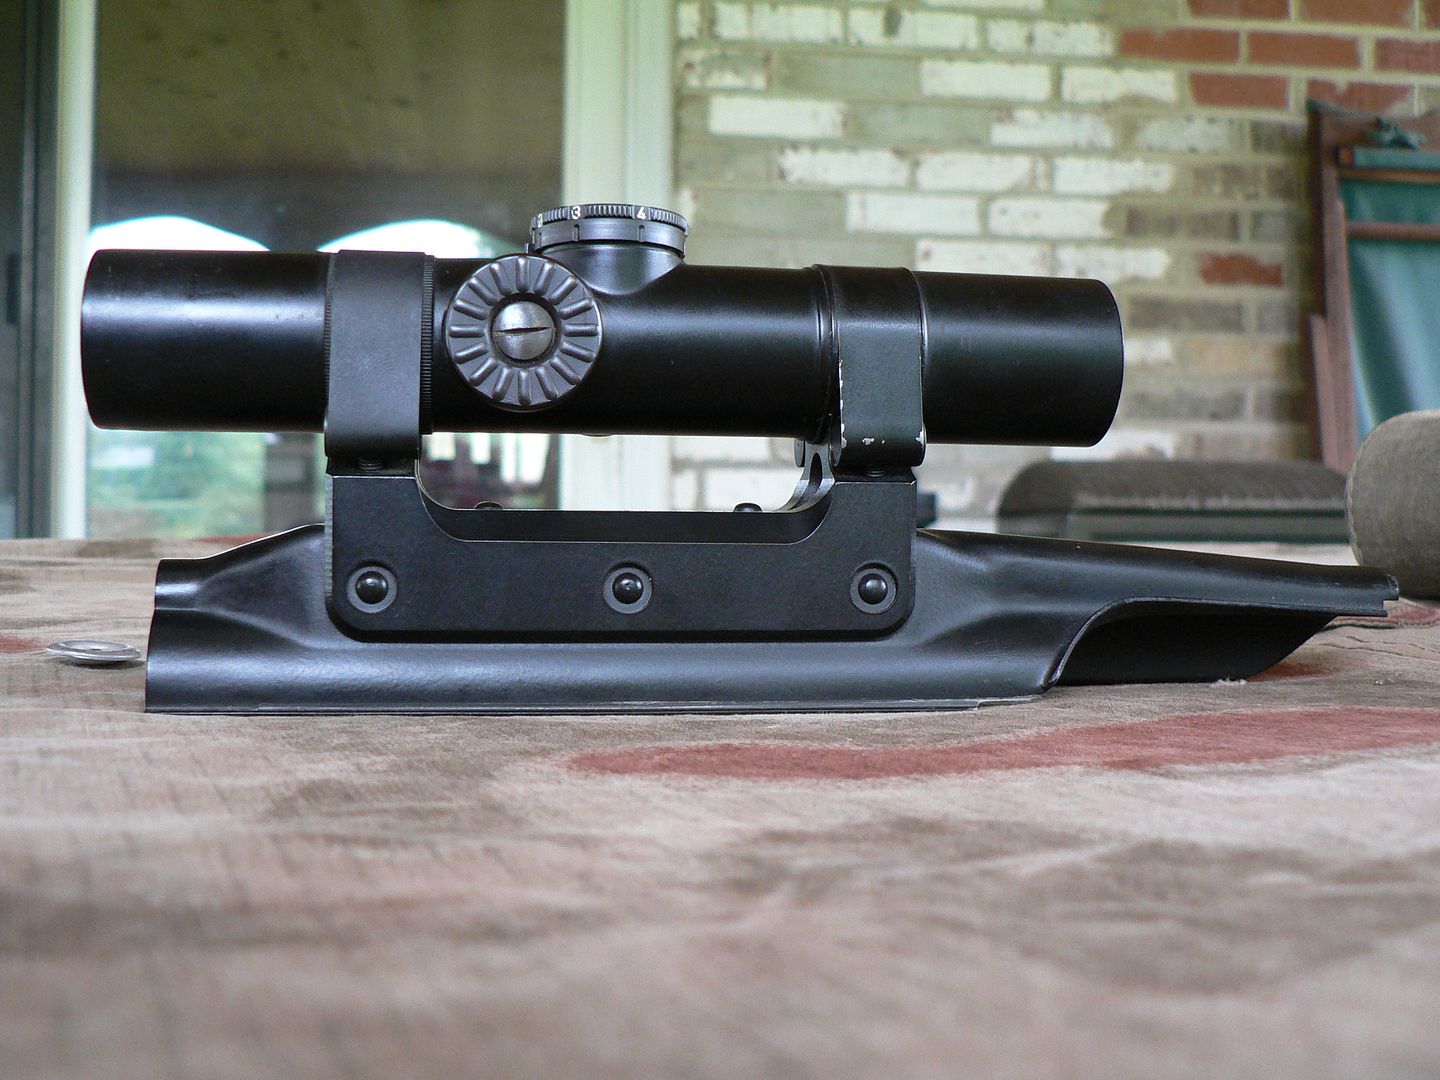
    Now we move on to the scope and mount itself. First up is the right side:


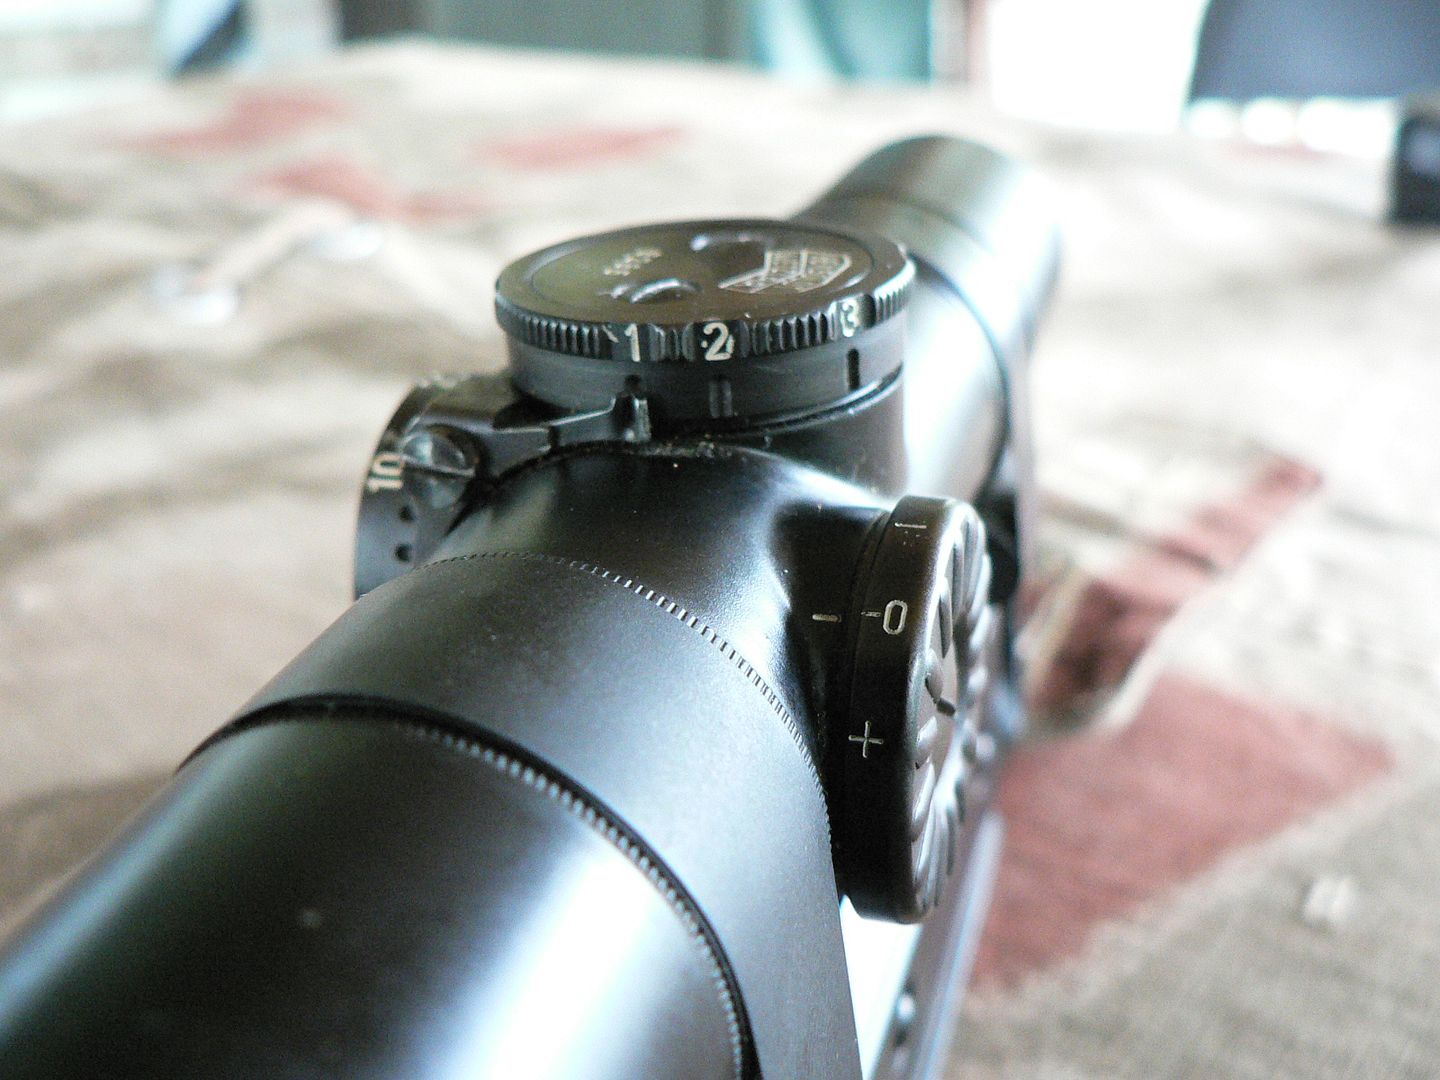
    On the aluminum mount, we see three of the eight steel rivets that hold it to the steel top cover. There are three more on the other side and two on top. The top ones can be seen as two little humps in the picture. The knob on the side of the scope is made of blued steel and is the diopter adjustment. It was retained on the Model 1 and Model 2 but was discarded on the FERO Z24. That's unfortunate and I have always wondered why they did away with it because it can be very useful if you wear glasses. We can see the two steel bands that hold the scope to the mount too. They are not blued but painted black. We'll take a closer look at the bands and how they are attached as we go on. The blued steel elevation adjustment knob is seen on top. It is, of course, calibrated to the 7.62x51 cartridge. Just a few years before, this scope would have been calibrated for the 8mm round. What? Yes, this scope was actually designed by Zeiss late in WWII and was designated "ZFK 43/1" but the war ended before it was put into mass production and it is believed that only about 100 were ever made. That design was reworked into the ZF4seen here. The body was recontoured for the G1 mount and, for some reason, the windage knob and diopter knob were reversed. Otherwise, it is very much the same scope. I have a strong feeling that some of the parts will even interchange between the two models. More information on the ZFK 43/1 can be found here:

    http://claus.espeholt.dk/zf4.html

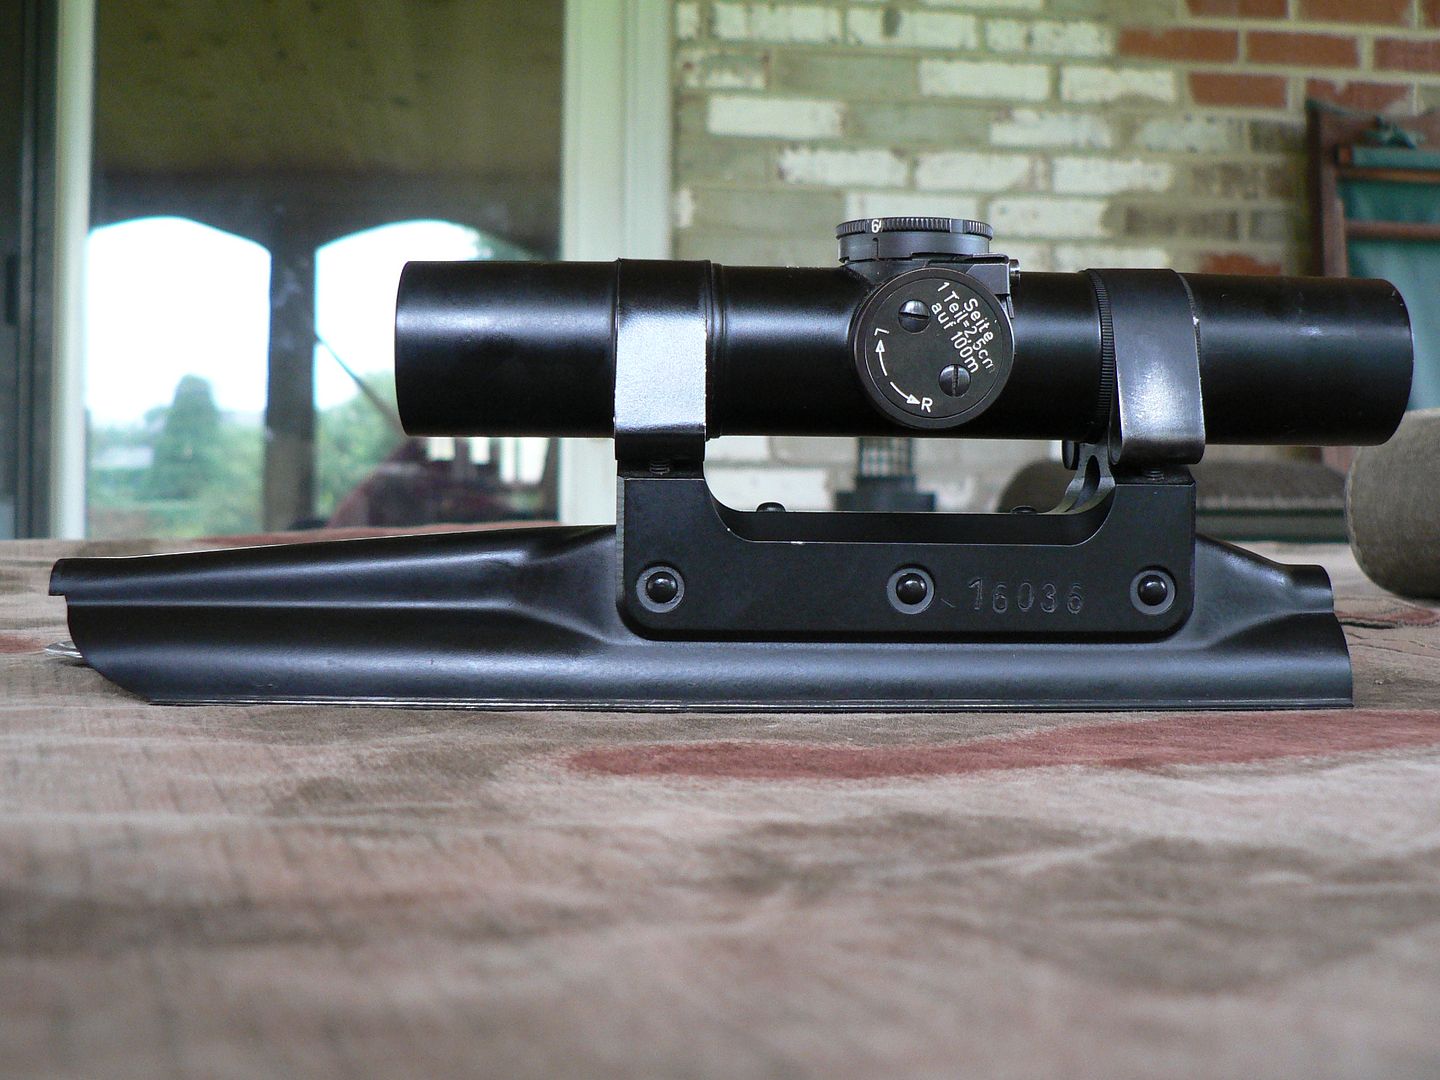
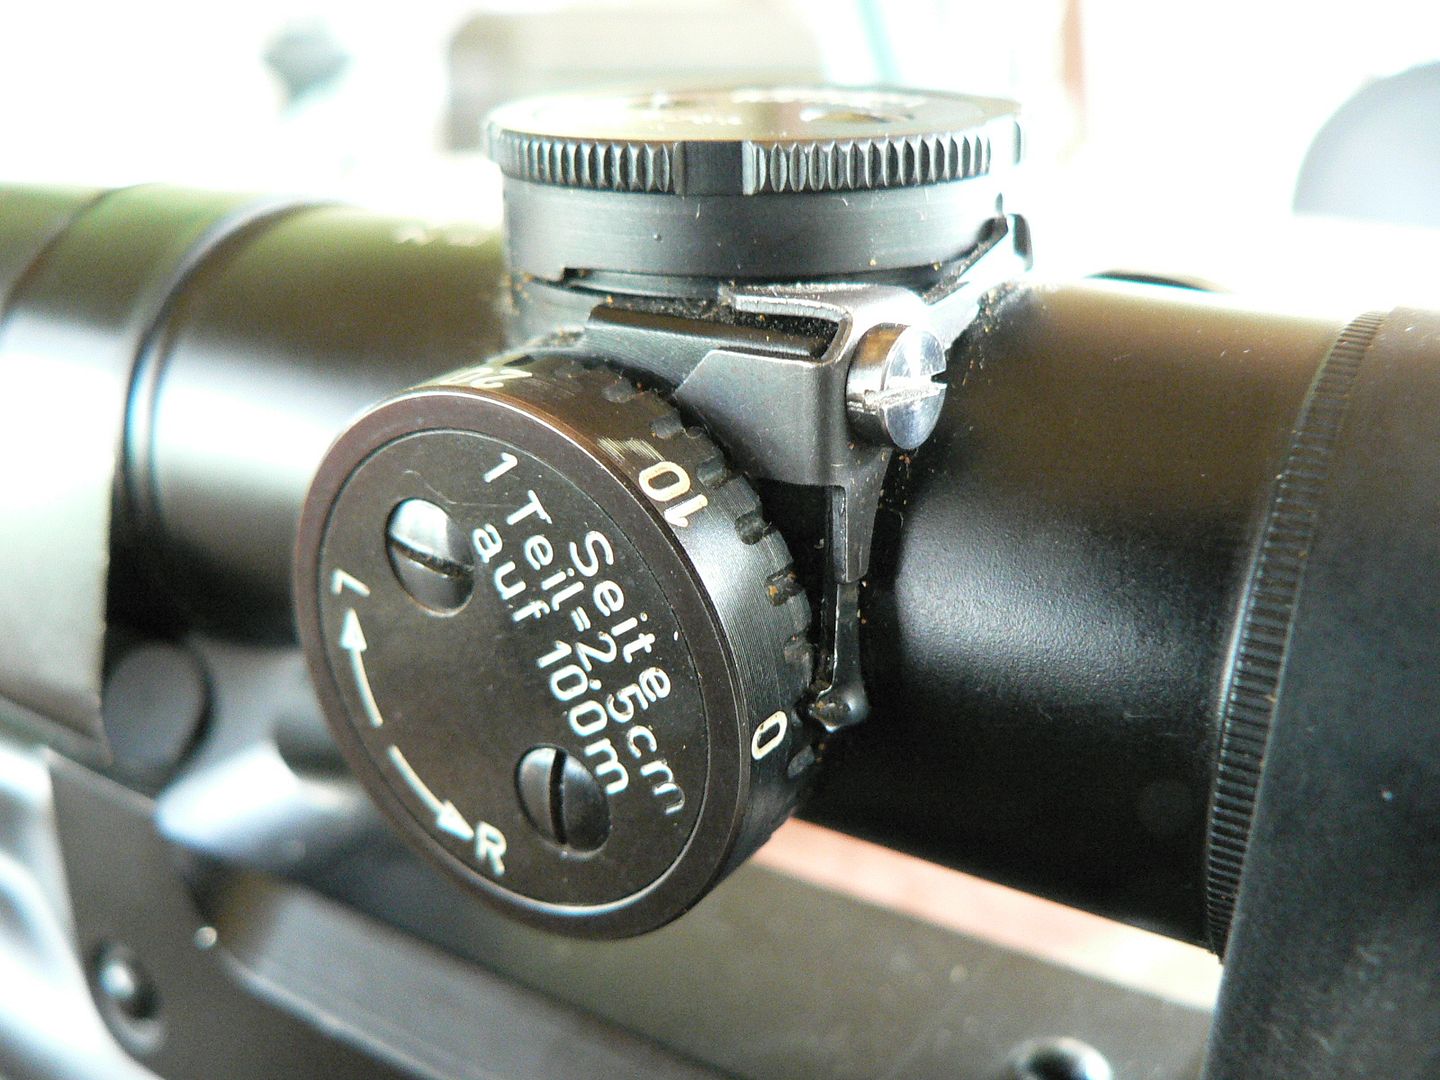
    Here's the left side:


    Three more rivets are seen as well as the blued steel windage knob. One click of the knob moves the point of impact 2.5cm at 100m. Stamped onto the mount is "16036". This would be the serial number of the rifle that it was paired with.

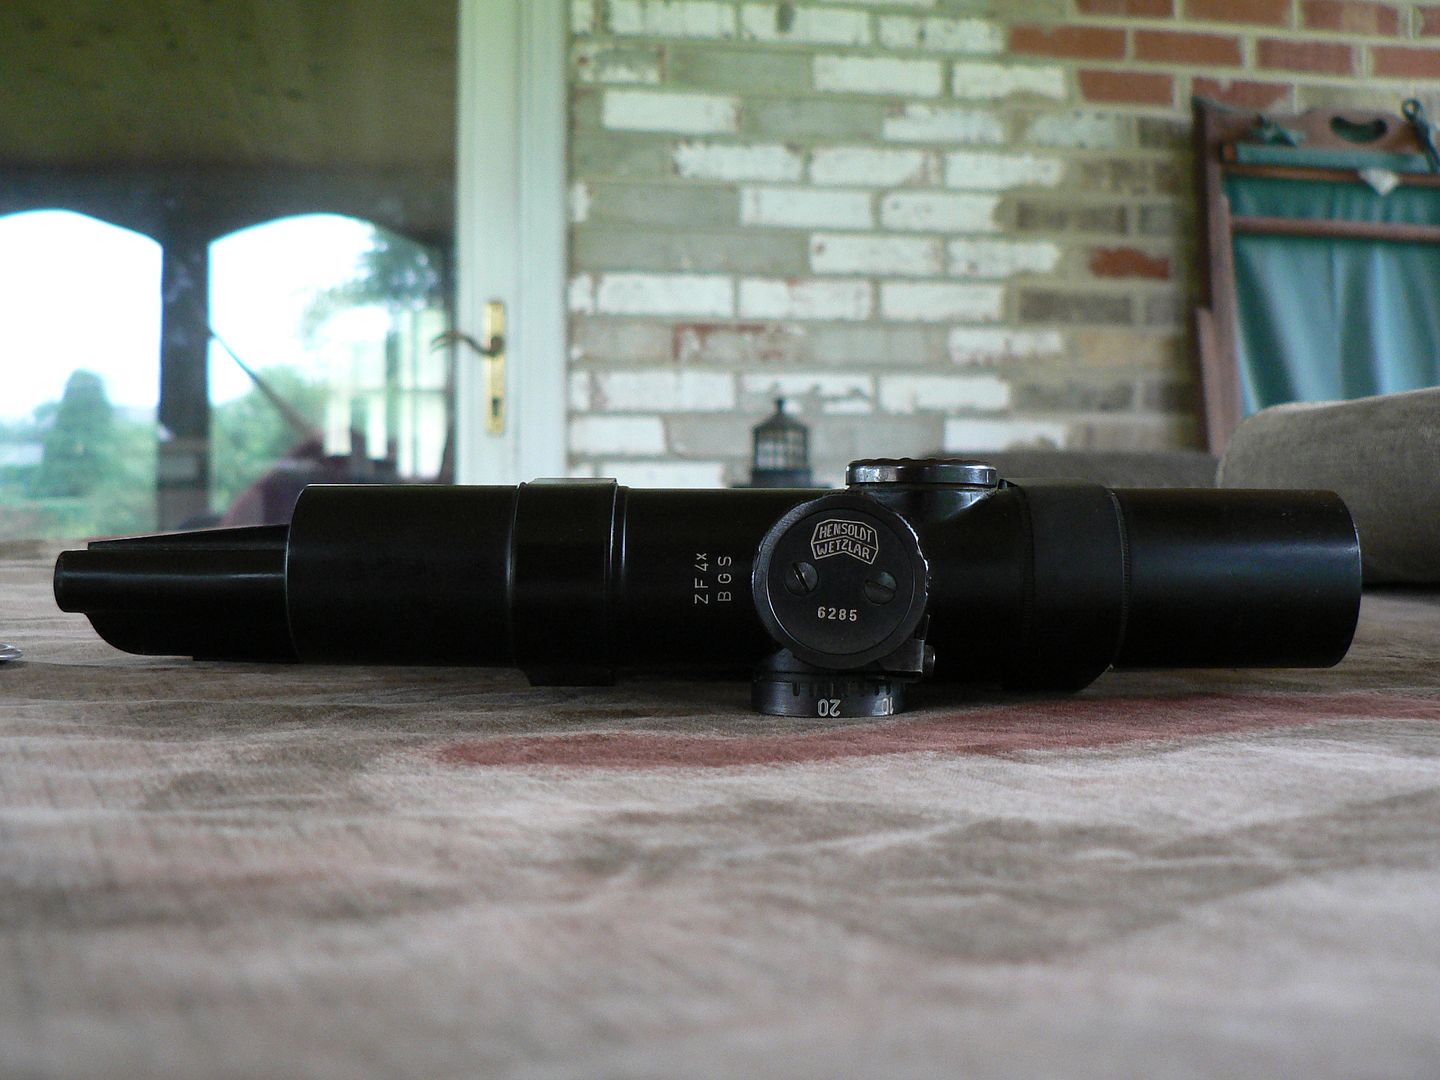
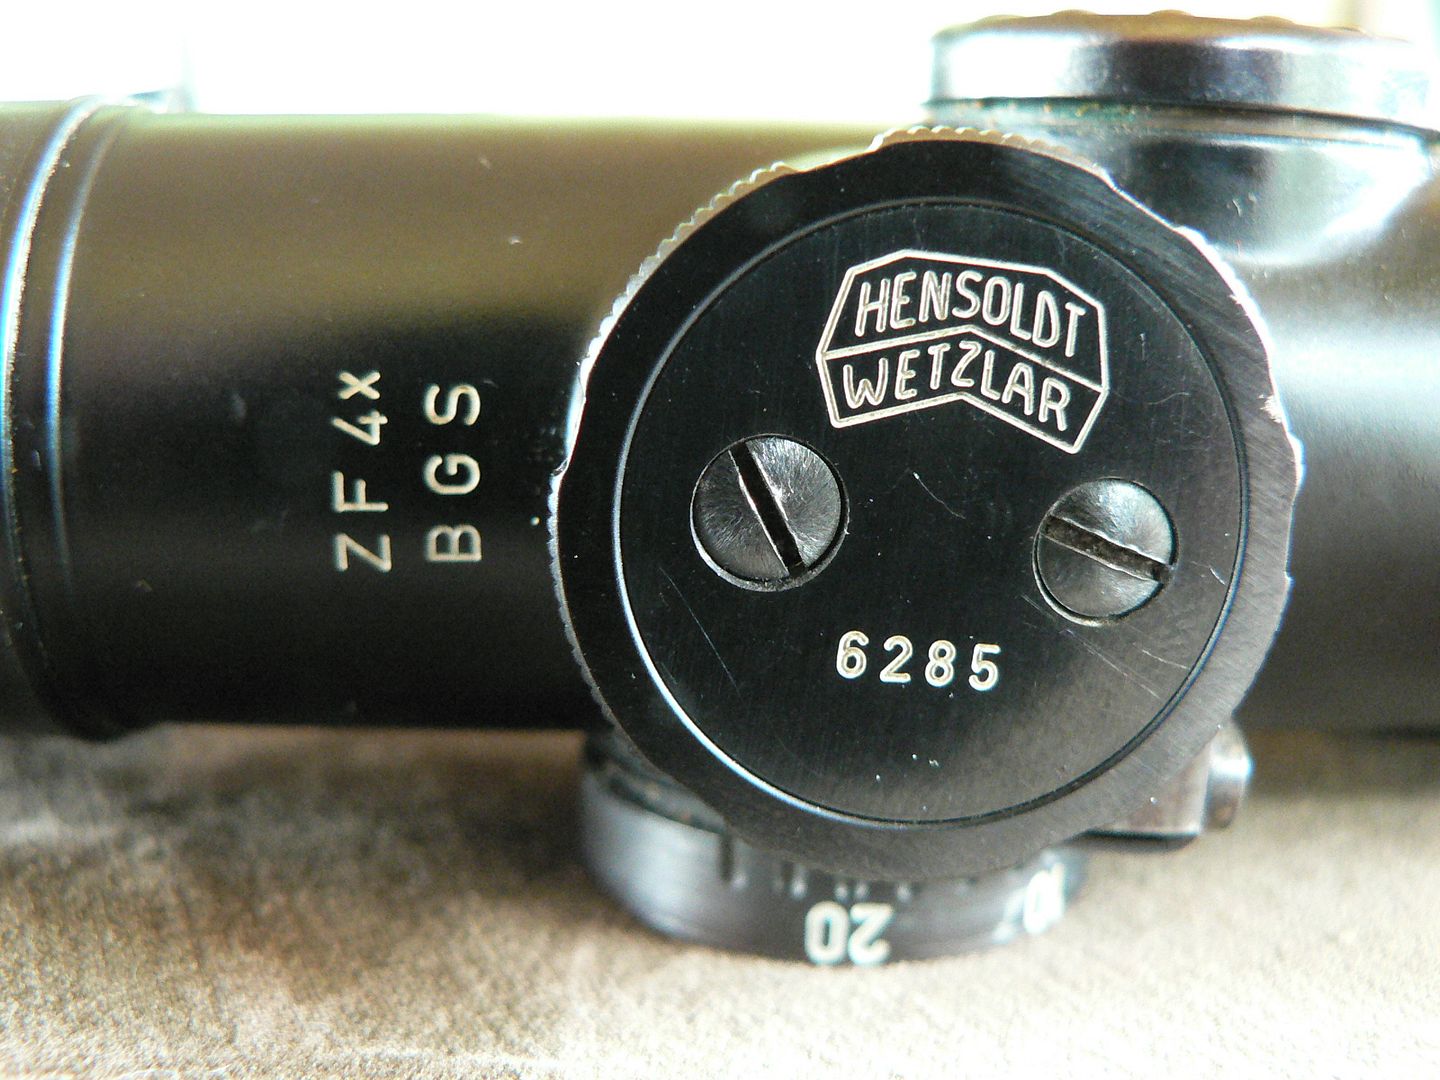
    A view of the top:


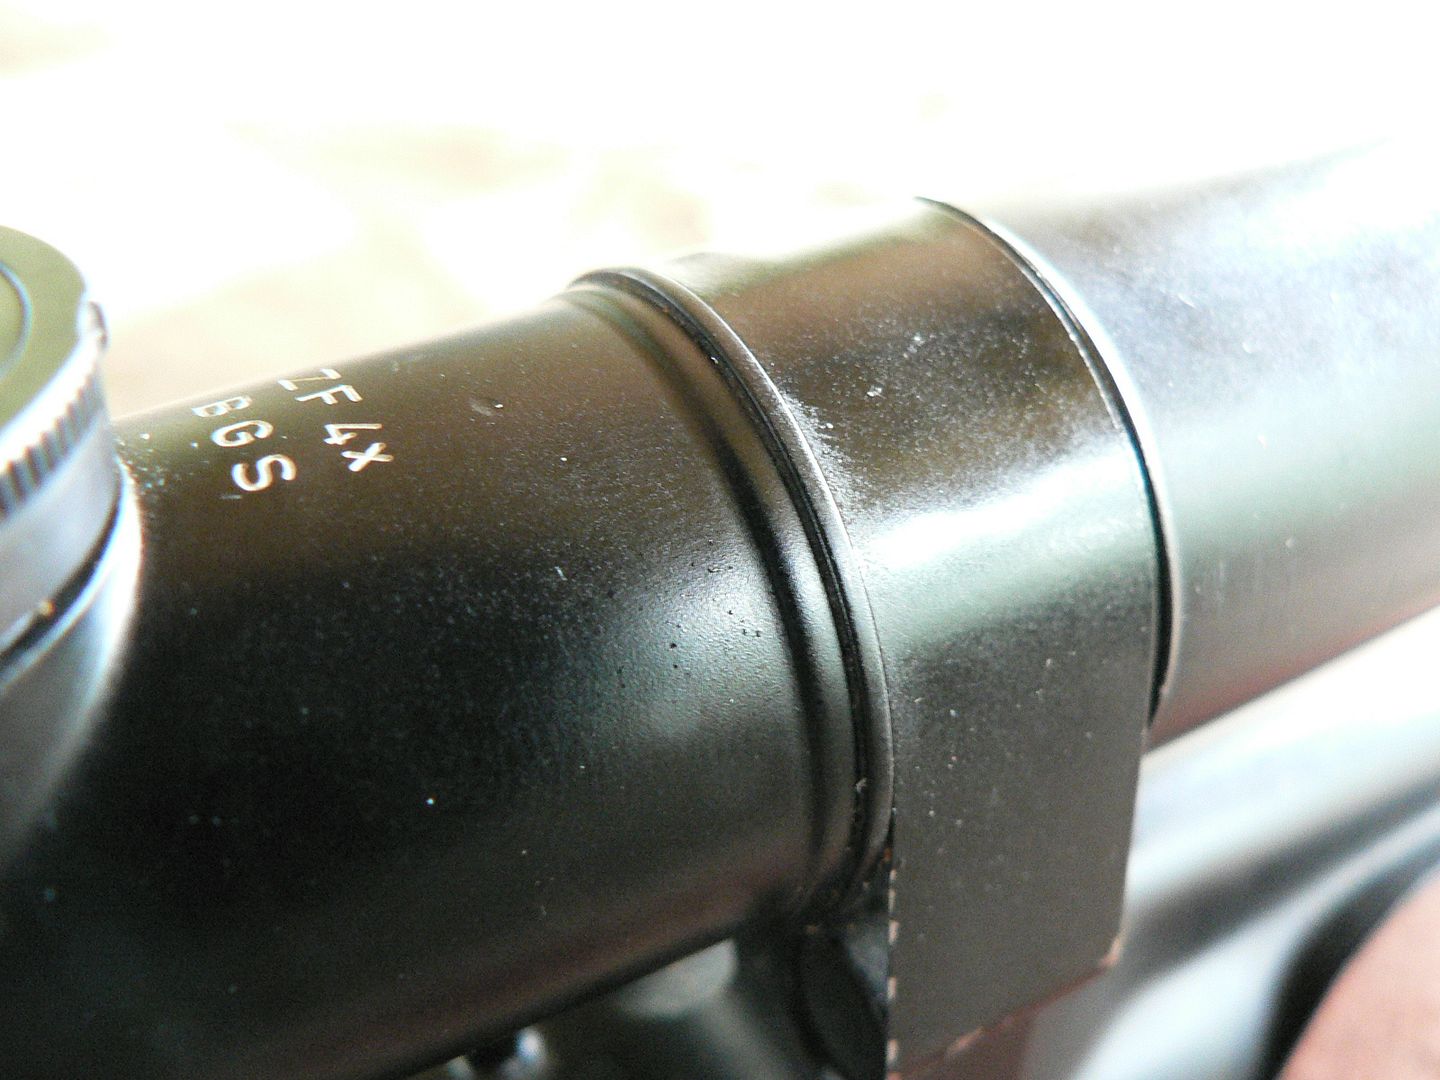
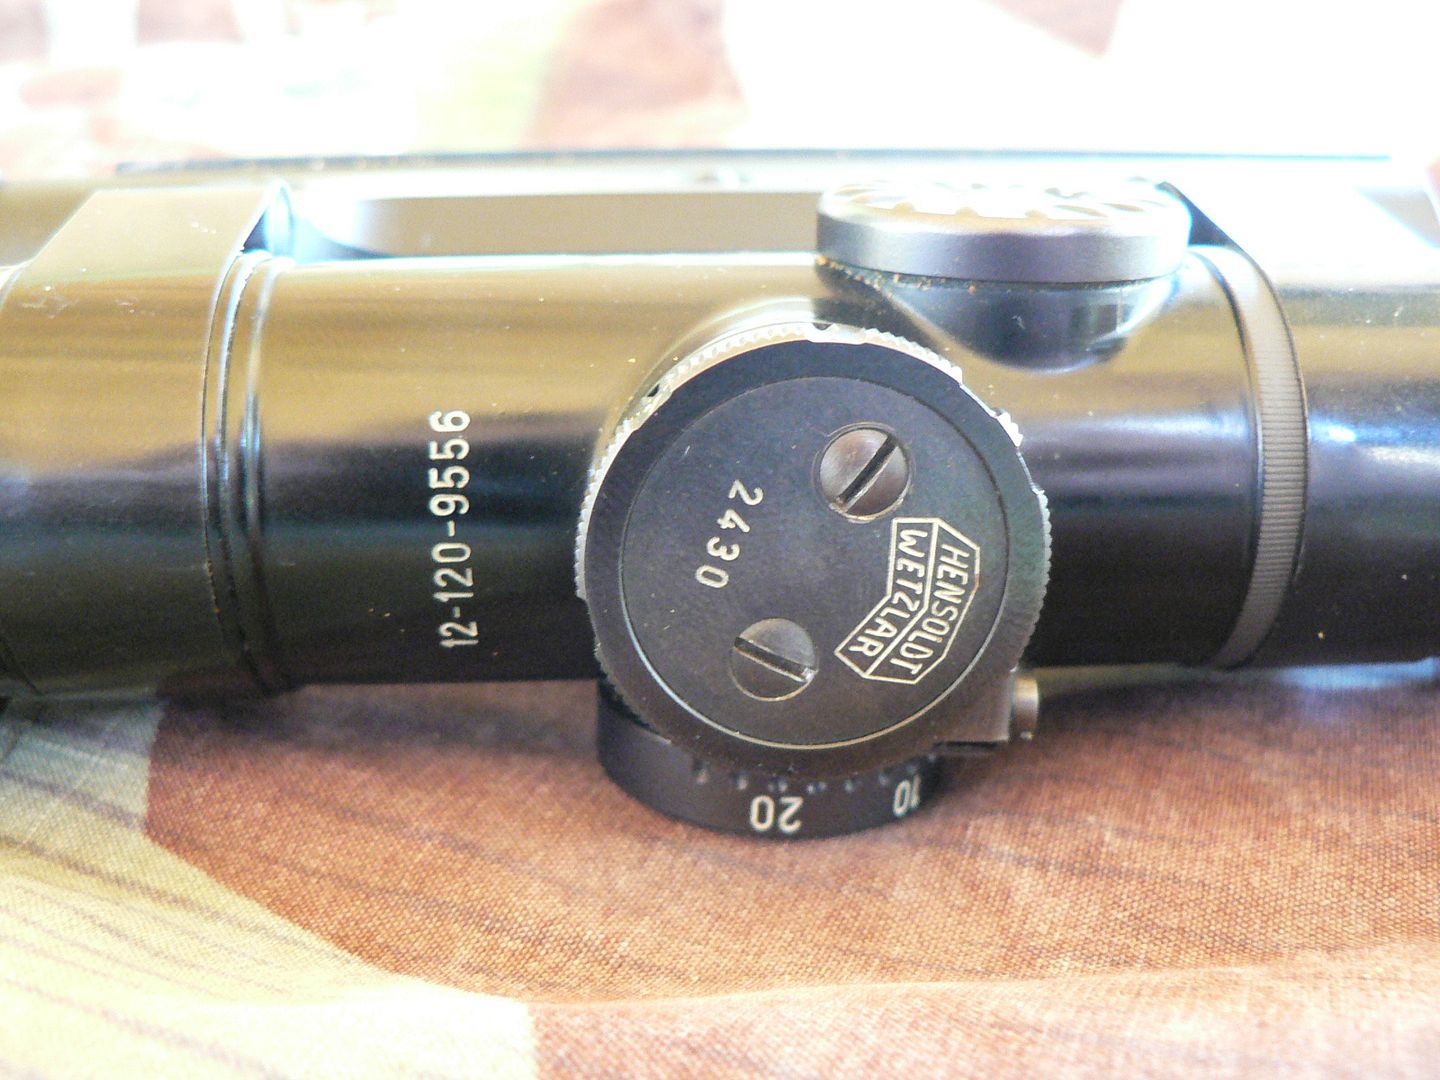
    I assume that "6285" is the scope serial number. The "Hensoldt Wetzlar" logo is stamped on the elevation adjustment cover. During the war, "rln" would be there instead. That was the wartime manufacturer code for Zeiss. In front of the elevation knob is the model and magnification script "ZF 4x" and "BGS" indicating that this scope was manufactured for the Bundesgrenzschutz or Federal Border Guard in English. Had this scope been made for the Bundeswehr (Federal Army) a part number would take the place of the BGS marking.

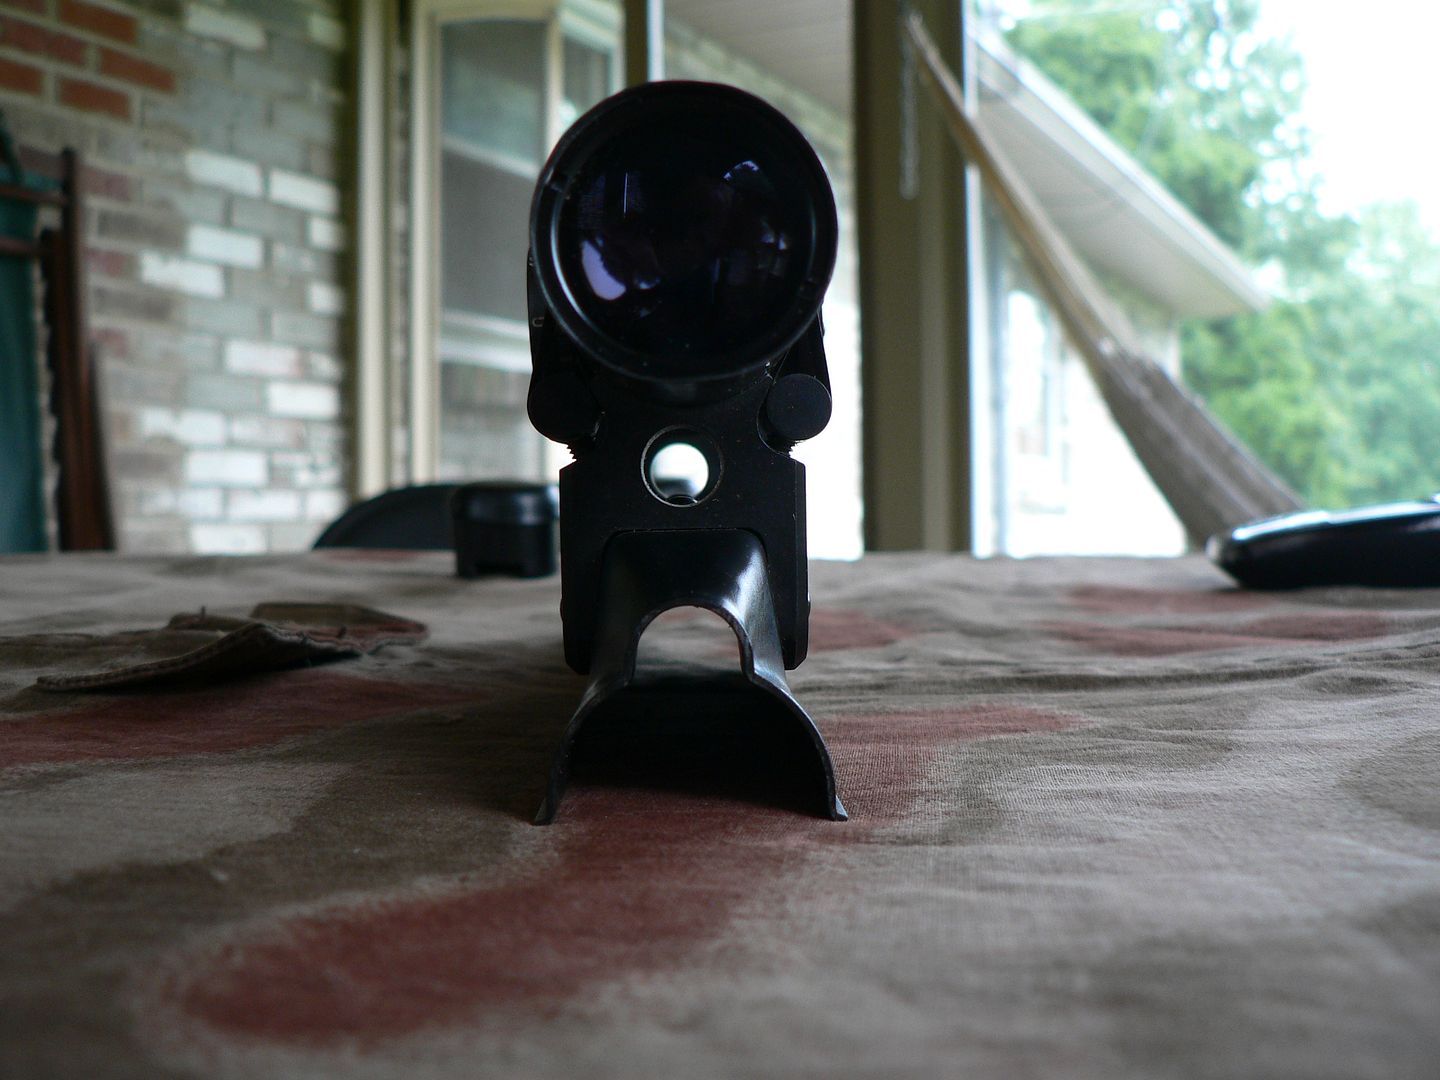
    The rear:


    The hole under the ocular lens allows use of the rifles iron sights.

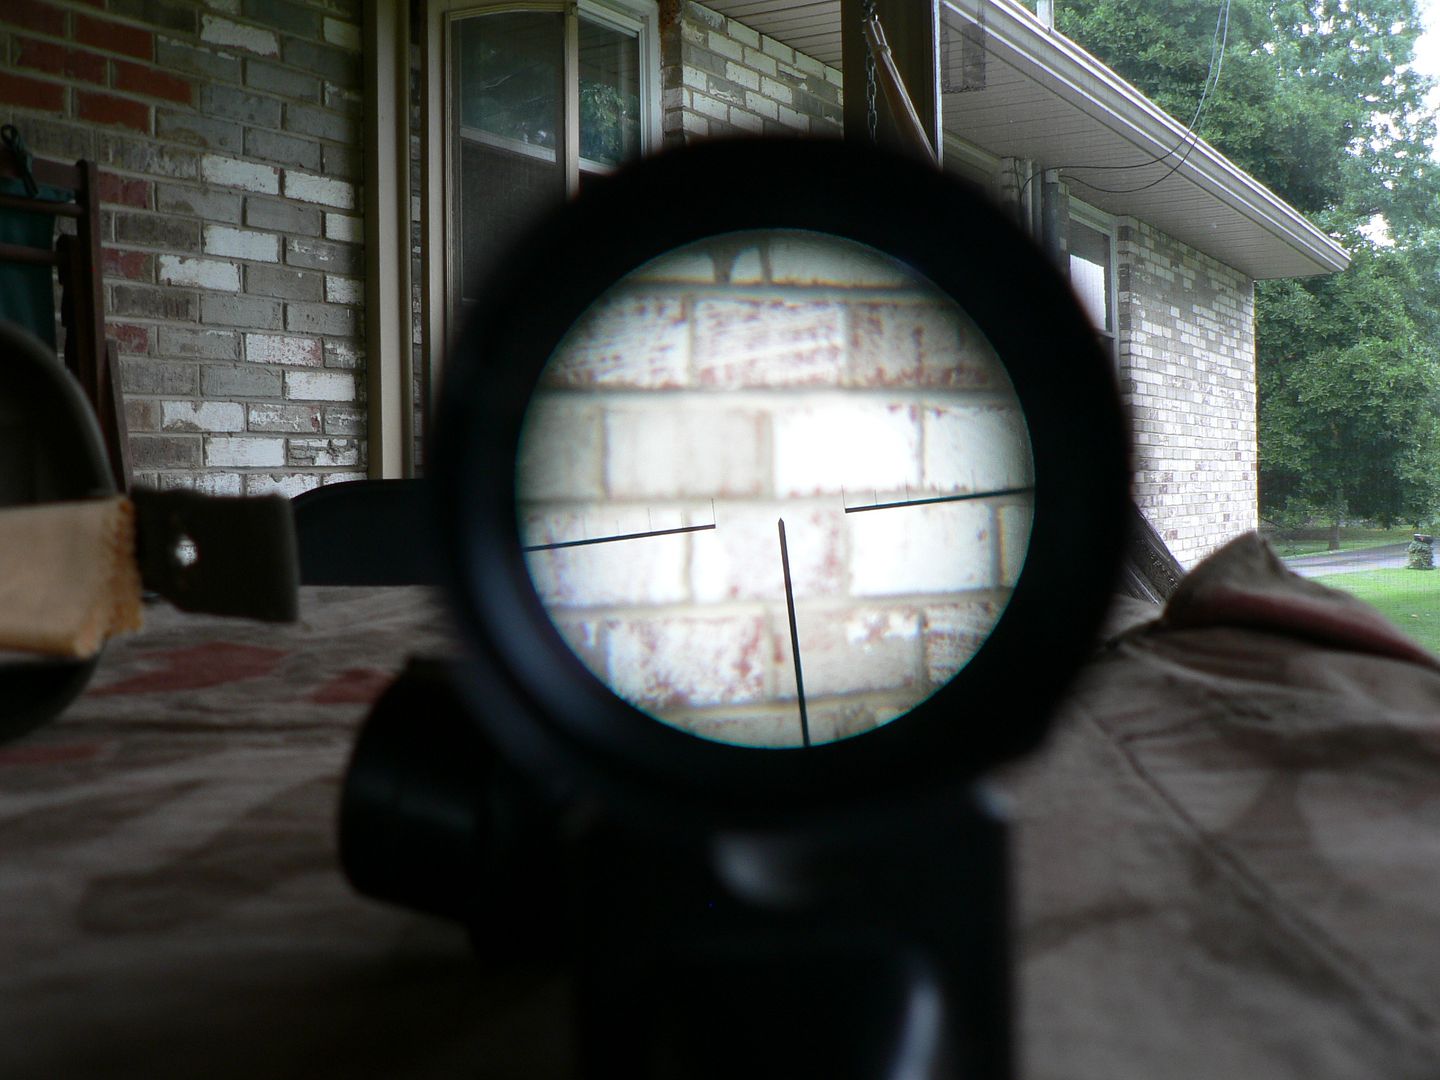
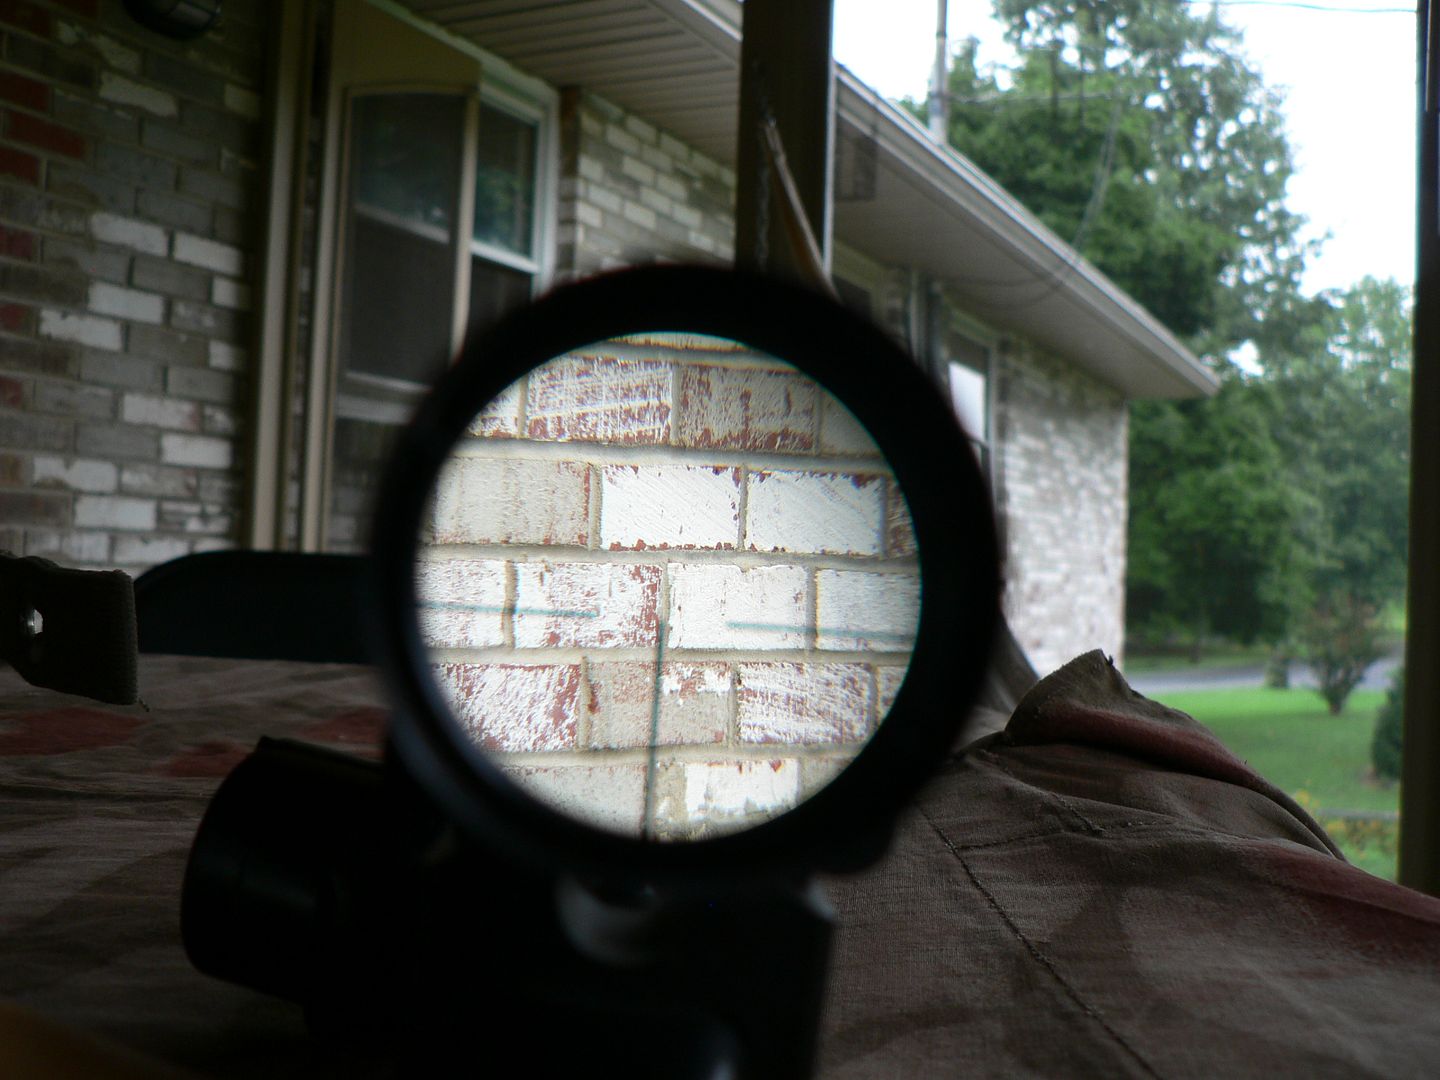
    The reticle:


    I wish I could have done a better job with this picture but I'm no photographer, that's for sure. If you click on the picture, it should take you to a copy of the picture that can be zoomed in and you can better see the windage marks on the horizontal posts as well as the pointed tip of the vertical one. It's the same reticle that is used in all postwar versions of this scope.

    Another shot focused through the objective lens rather than on the reticle:


    I was absolutely astounded by the image quality of a unit that is somewhere between 50 and 60 years old. The clarity is as good as my FERO Z24 made in 1985. I mean it really is crystal clear.

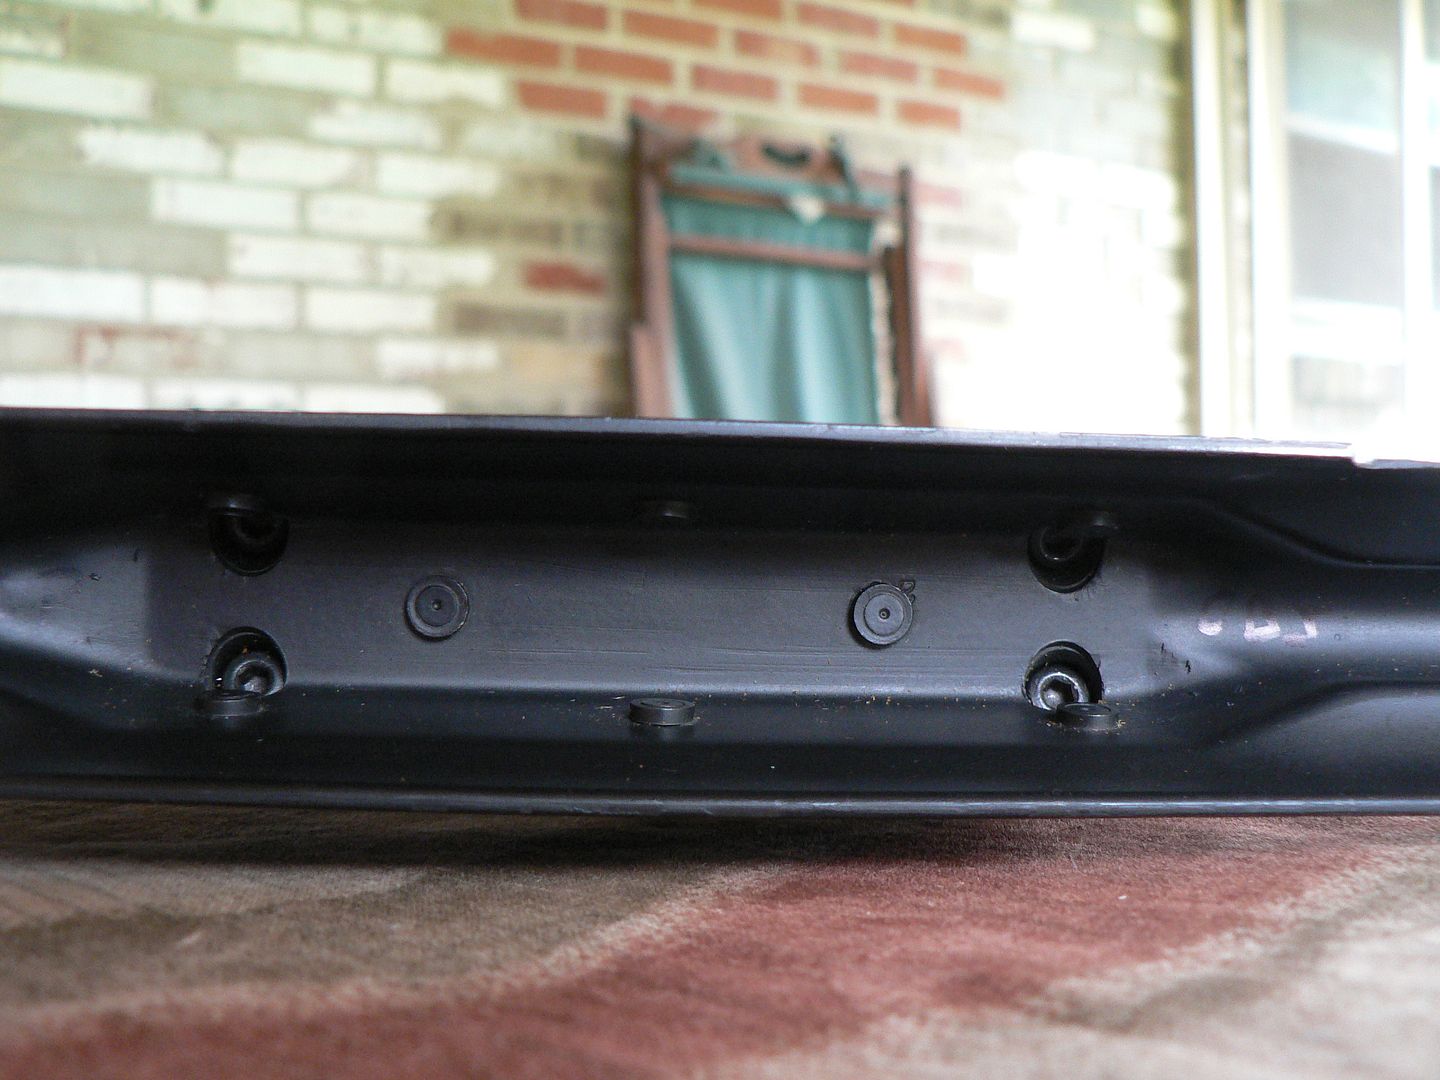
    let's take a look at the underside of the top cover:


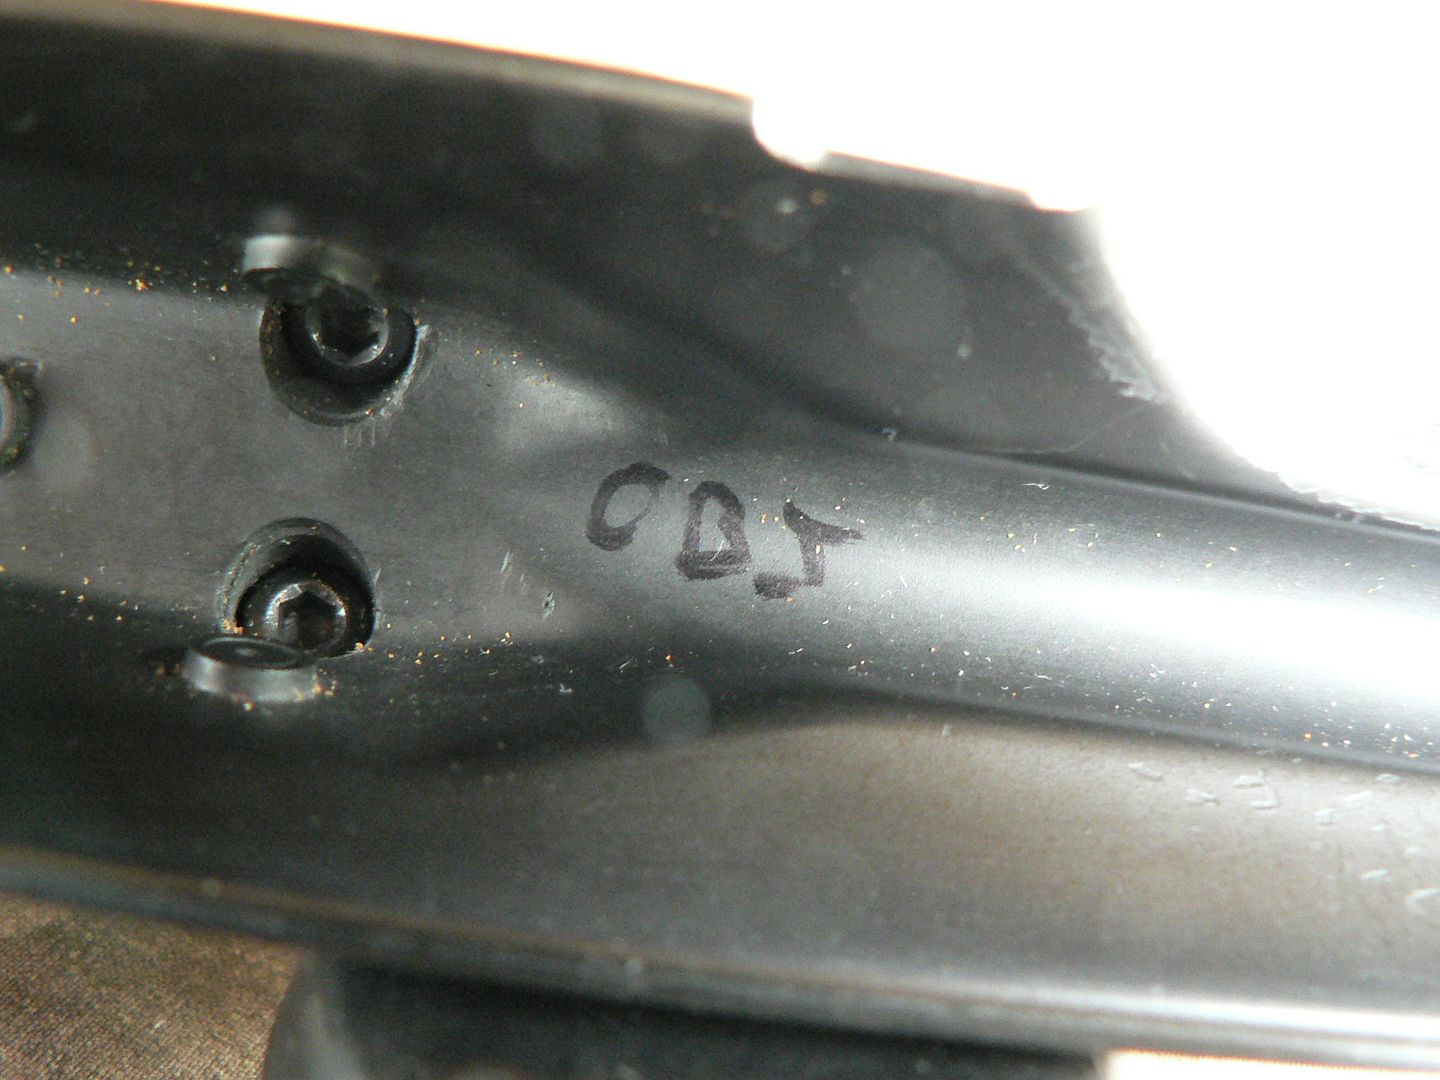
    Front is to the right. we can see the eight rivets. One of them appears to be covering a number "2" stamped into the cover. We can also see the four hex-headed screws that are used to tighten down the steel bands. There is also some writing on the paint towards the front and rear of the top cover. Let's take a closer look at that starting with the writing at the front:


    It looks like "OBJ" whether this was done by an inspector who set this assembly up or by a later owner/collector, I do not know. If anyone has any information on this, please share it.

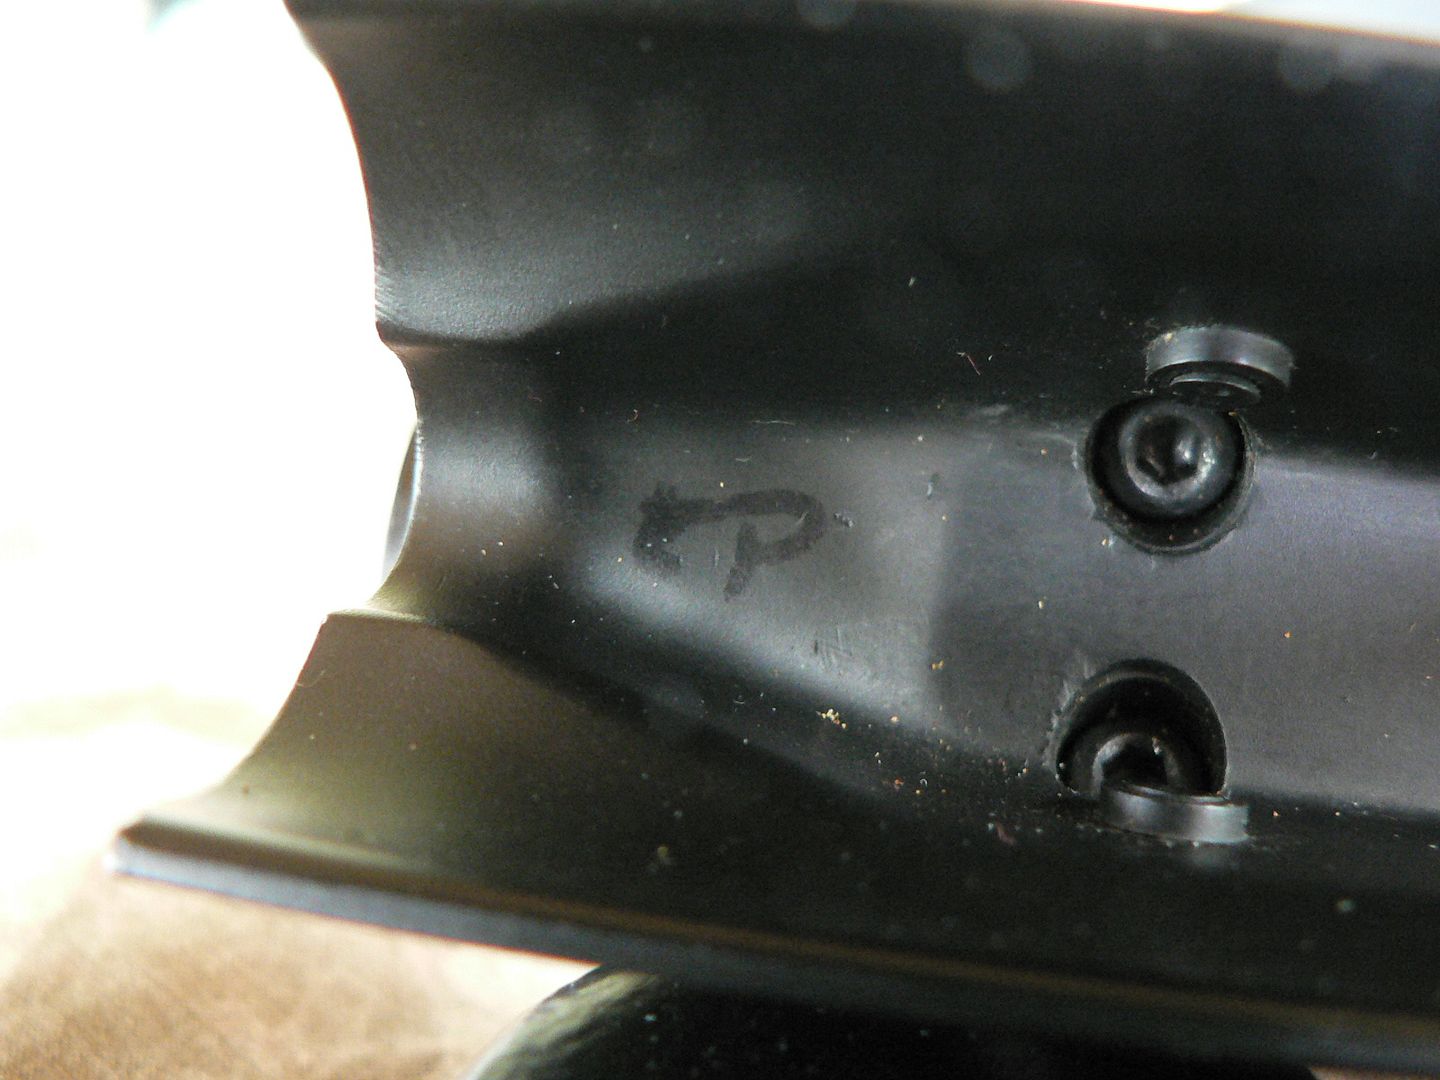
    Here is the writing at the rear of the top cover:


    It looks to be either "CP" or "TP". Again, I really have no idea whether these markings were put there by an inspector or a collector but I figured that I should document them just in case. I don't think this unit has ever seen any real use and they are probably going to disappear once I start using it.

    Here's a close up look at the rear band:


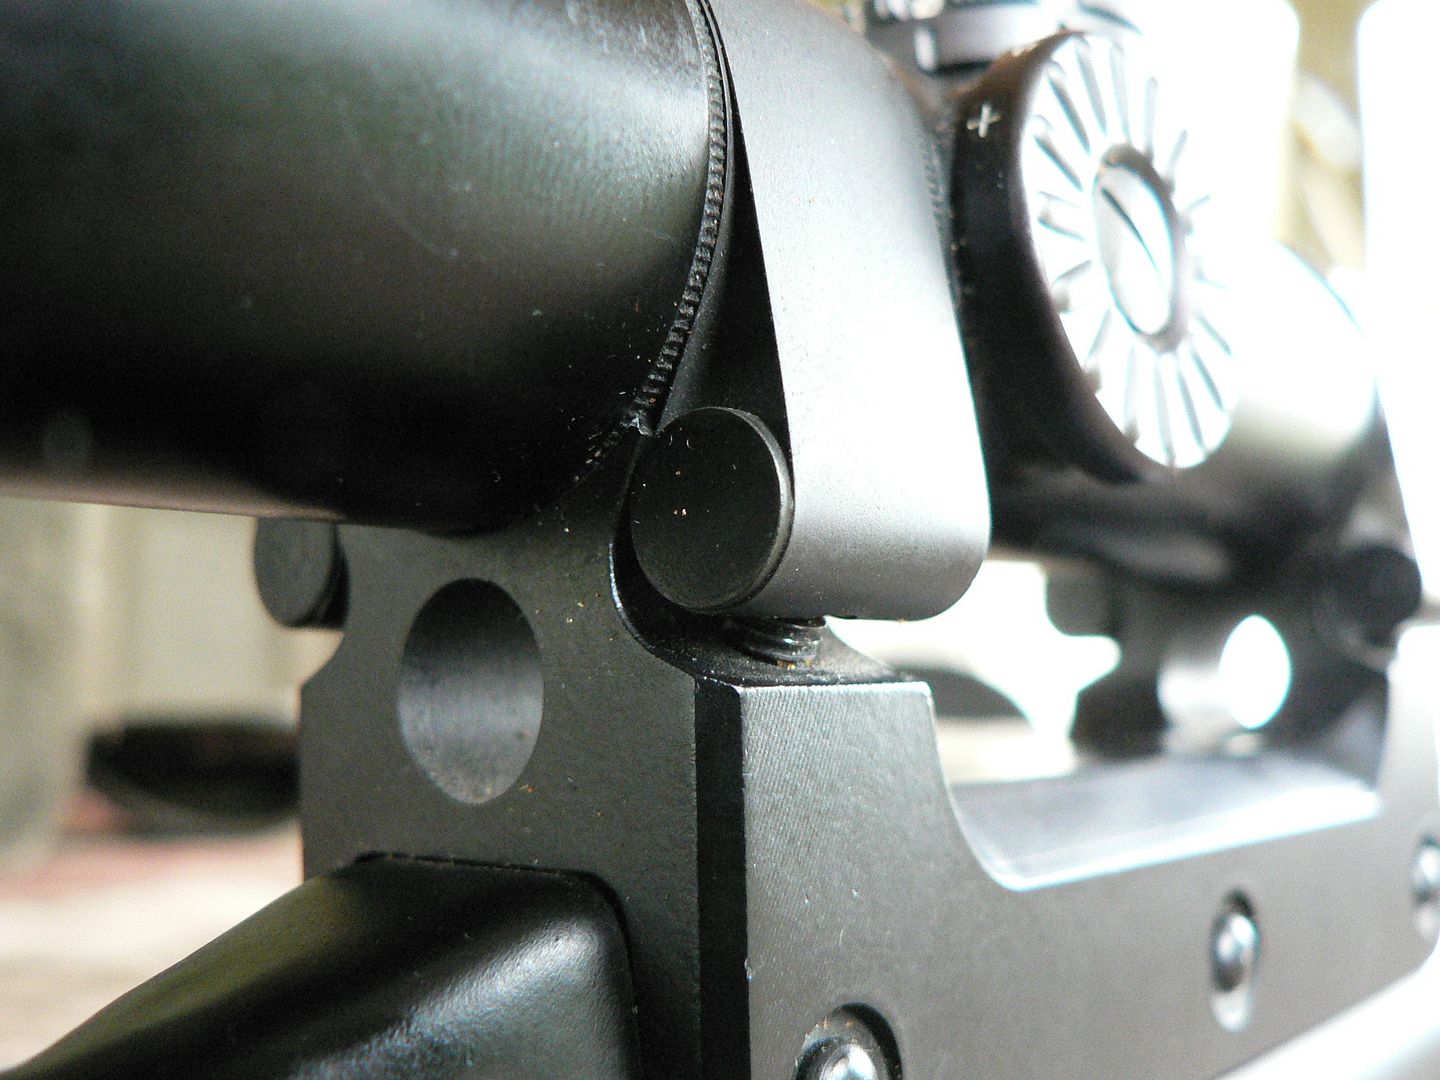
    Similar to but in a much superior design to a wartime arrangement, these bands are folded in half and placed over top of the scope body. The little dowel pin, which has a threaded hole on its underside, is inserted into the band and then the hex screws are tightened from below. The splines seen on the scope body help keep the scope from rotating under recoil once the band is fully tightened. These bands can be tricky. Too loose and the scope moves around. Too tight and they will snap. But unless you go full on gorilla when tightening them, you should be good to go.

    A close up of the front band:


    Notice how it fits into a groove machined into the scope body. This keeps the scope from moving forward or rearward under recoil.

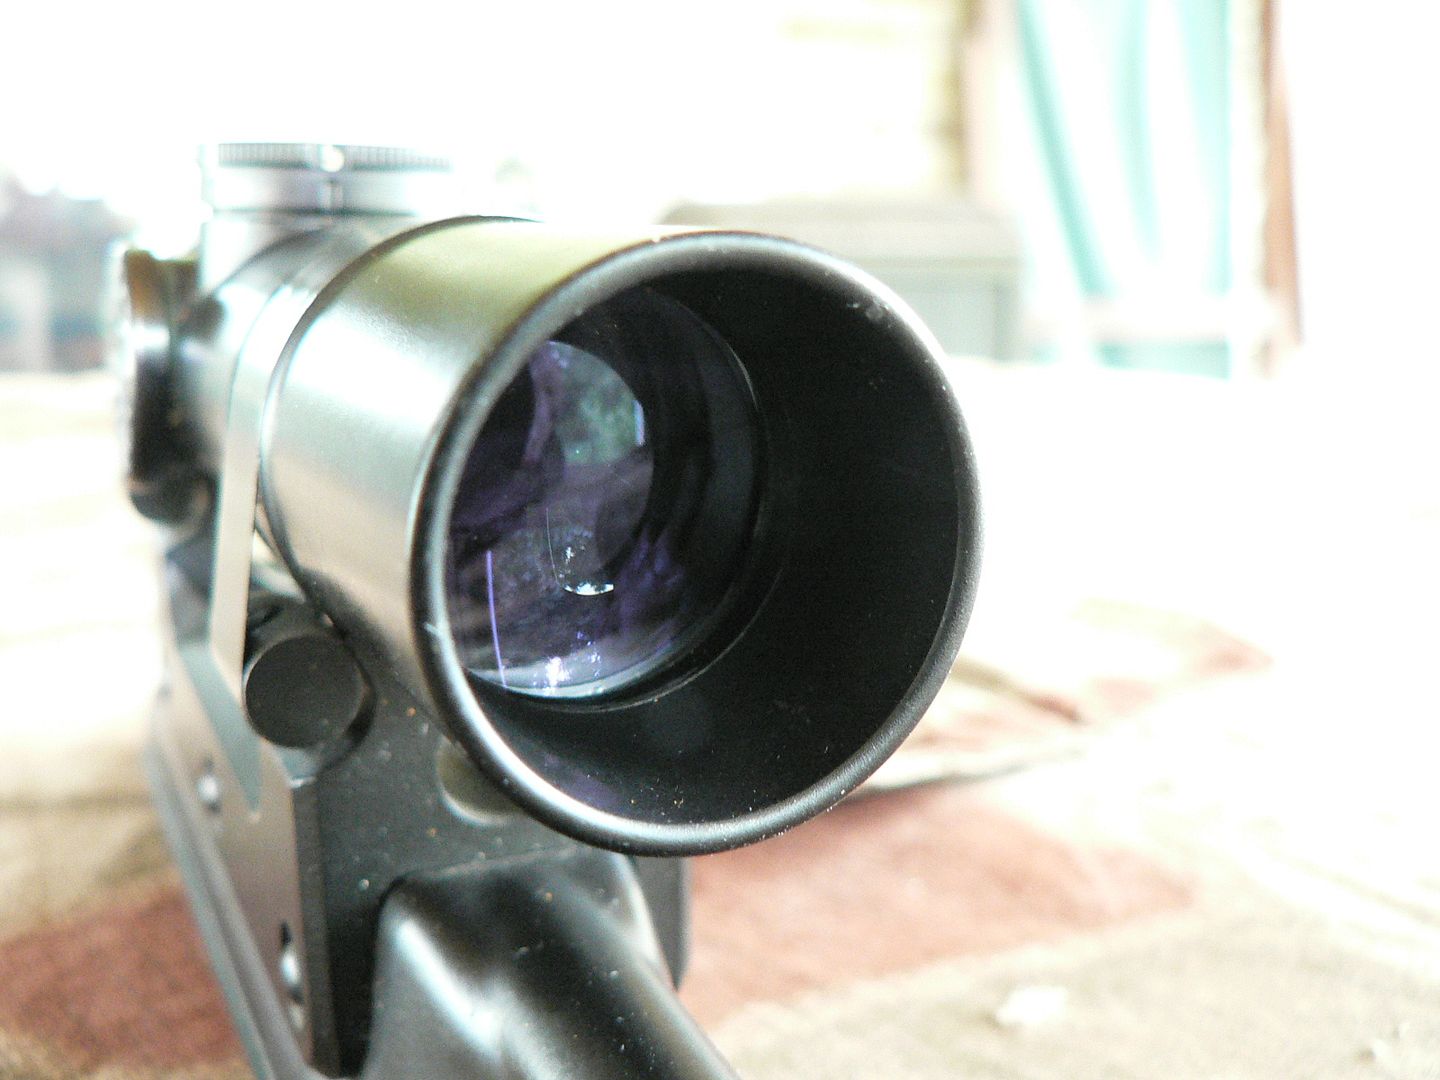
    The coated ocular lens:


    Nothing much to say other than there isn't a mark on it. I really got lucky finding this unit. I never thought I would get my hands on a beat up one let alone an essentially new one!

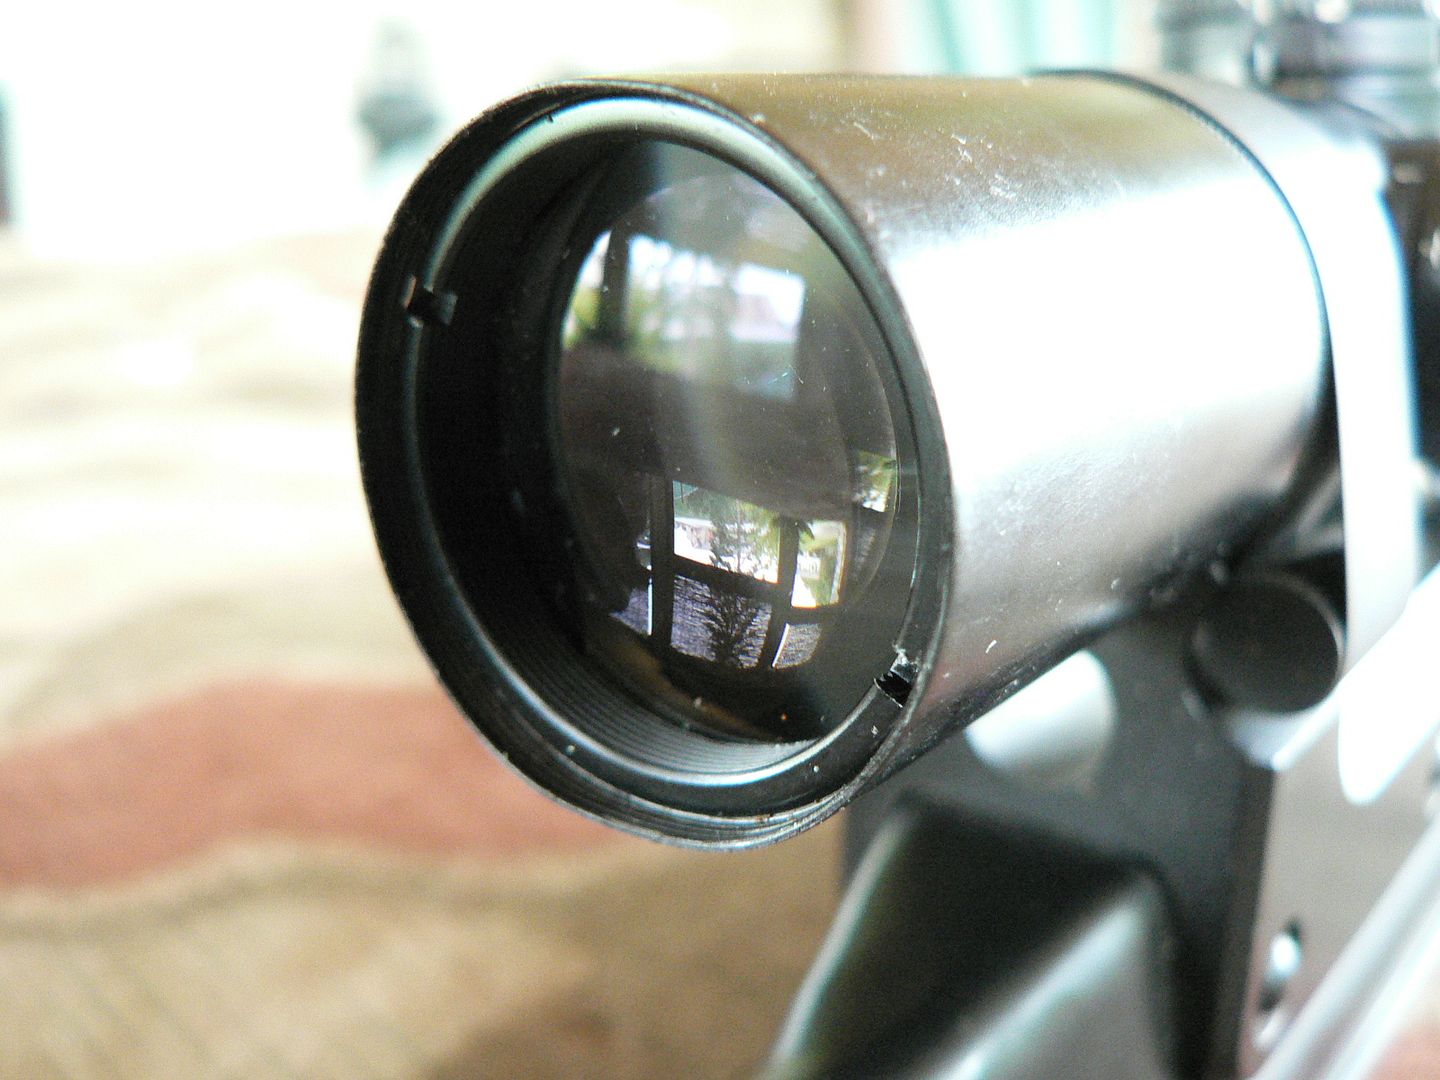
    The coated objective lens:


    Notice how it is sunk back into the body. This serves as a sunshield and reduces glare.

    A close up of the markings on the diopter knob:


    Also of note are the neatly painted adjustment markings, finely machined splines on the body and the double thickness of the band. You can also clearly see the detents on the elevation knob. All of this is the kind of German Quality typical of Zeiss' well earned reputation.

    A close in view of the windage knob and detent spring:


    I should be noted here that this scope is zeroed in a manner similar to a wartime scope and different from the later ZF4 scopes. On the Models 1, 2 and Z24, the turret screws are ONLY LOOSENED and a coin is used to zero the turret before retightening the screws. That is not the case with this unit. Instead, the screws and cover are REMOVED from the knob. This will reveal the zeroing screw underneath. After zeroing, the cover is replaced and the screws tightened down.

    The last picture is a detail shot of the elevation knob and model/service markings:


    That pretty much covers it I think. I will post some pictures of it mounted on a rifle once I get it to the range. I'll also post a picture of the target so we can see if it helps my tired old eyes! I don't have a G1 to mount it on but I do have a very early STG58 that will serve as a stand in. I know that the Austrians never mounted scopes on their STG's but it will have to do.

    Well, for once I managed to wrap it up in a timely manner. There isn't much to these old clunkers so that helped a bit. As usual, I hope that this information will help someone because that's why I do it. If anyone has questions, please feel free to contact me and I'll do what I can. Thanks for your time and God bless!

    Comment


      #3
      Since first posting this, I have had the good fortune of acquiring the Bundeswehr version of this scope complete with accessories missing from the BGS scope posted above. With this scope, the can matches the scope and while this new setup was mounted and matched to a rifle, it was either placed into storage immediately after sighting in or very soon after because it shows almost no handling marks at all. In fact, it still had packing paper under each lens cover and the storage wraps placed over the lens covers. Besides the markings in front of the elevation knob, there are some slight differences from the BGS unit as well.

      First off is the case. It is identical to the above case down to the mix of steel and brass rivets. Here's the lid showing the rifle serial number:


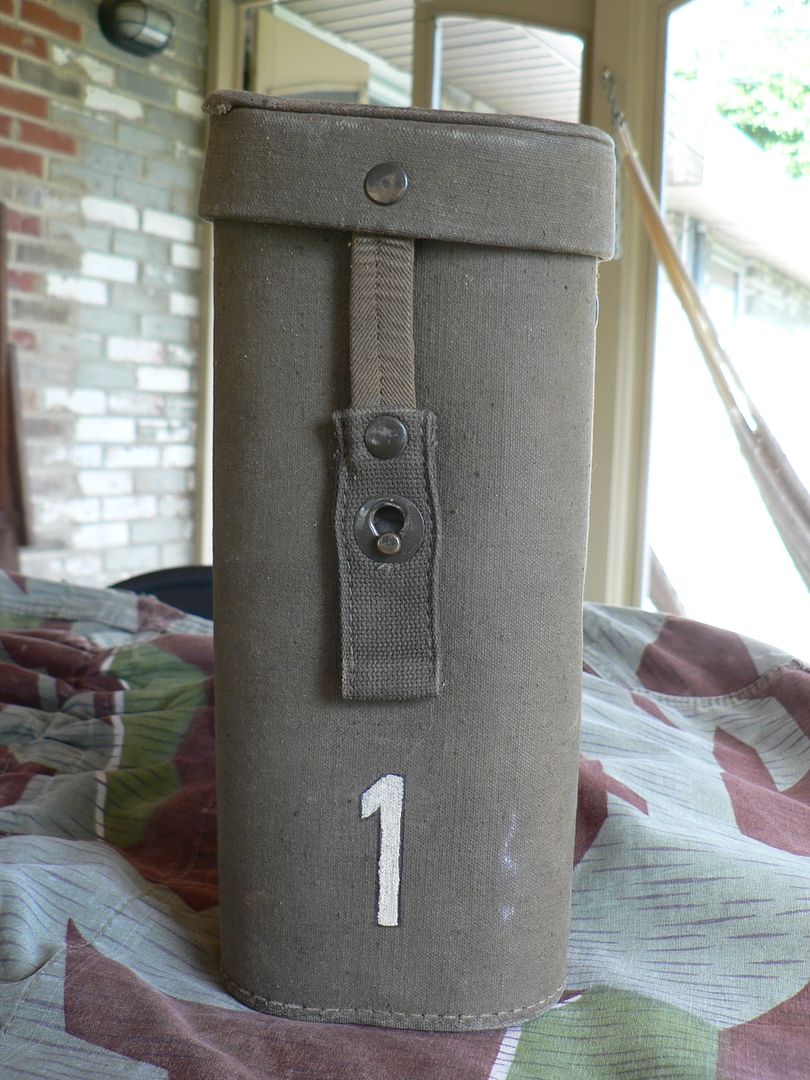
      And a front shot of the case with a "1" on it, the meaning of which I have no idea:


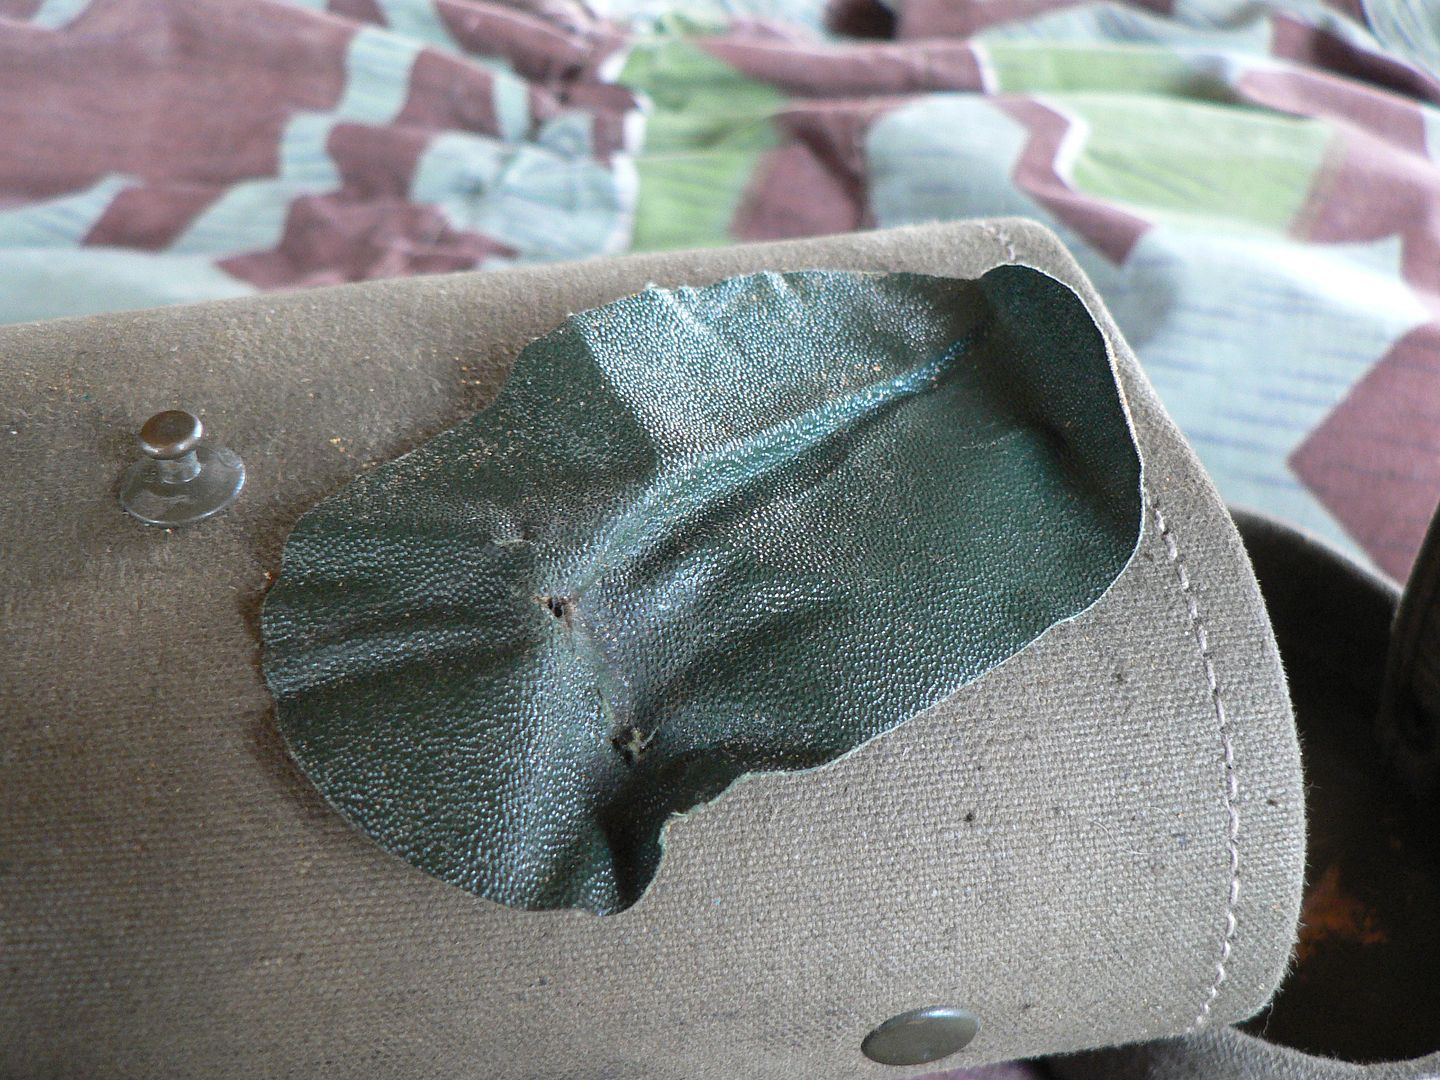
      Inside, everything was covered in a yellow-gold dust that was obviously the remains of deteriorated foam cushion. I traced this to the bottom of the case where the foam had been mounted to act as shock padding. This piece of vinyl impregnated cloth had then been placed on top of the foam to act as the bottom case liner:


      How thick this foam had been I'll never know.


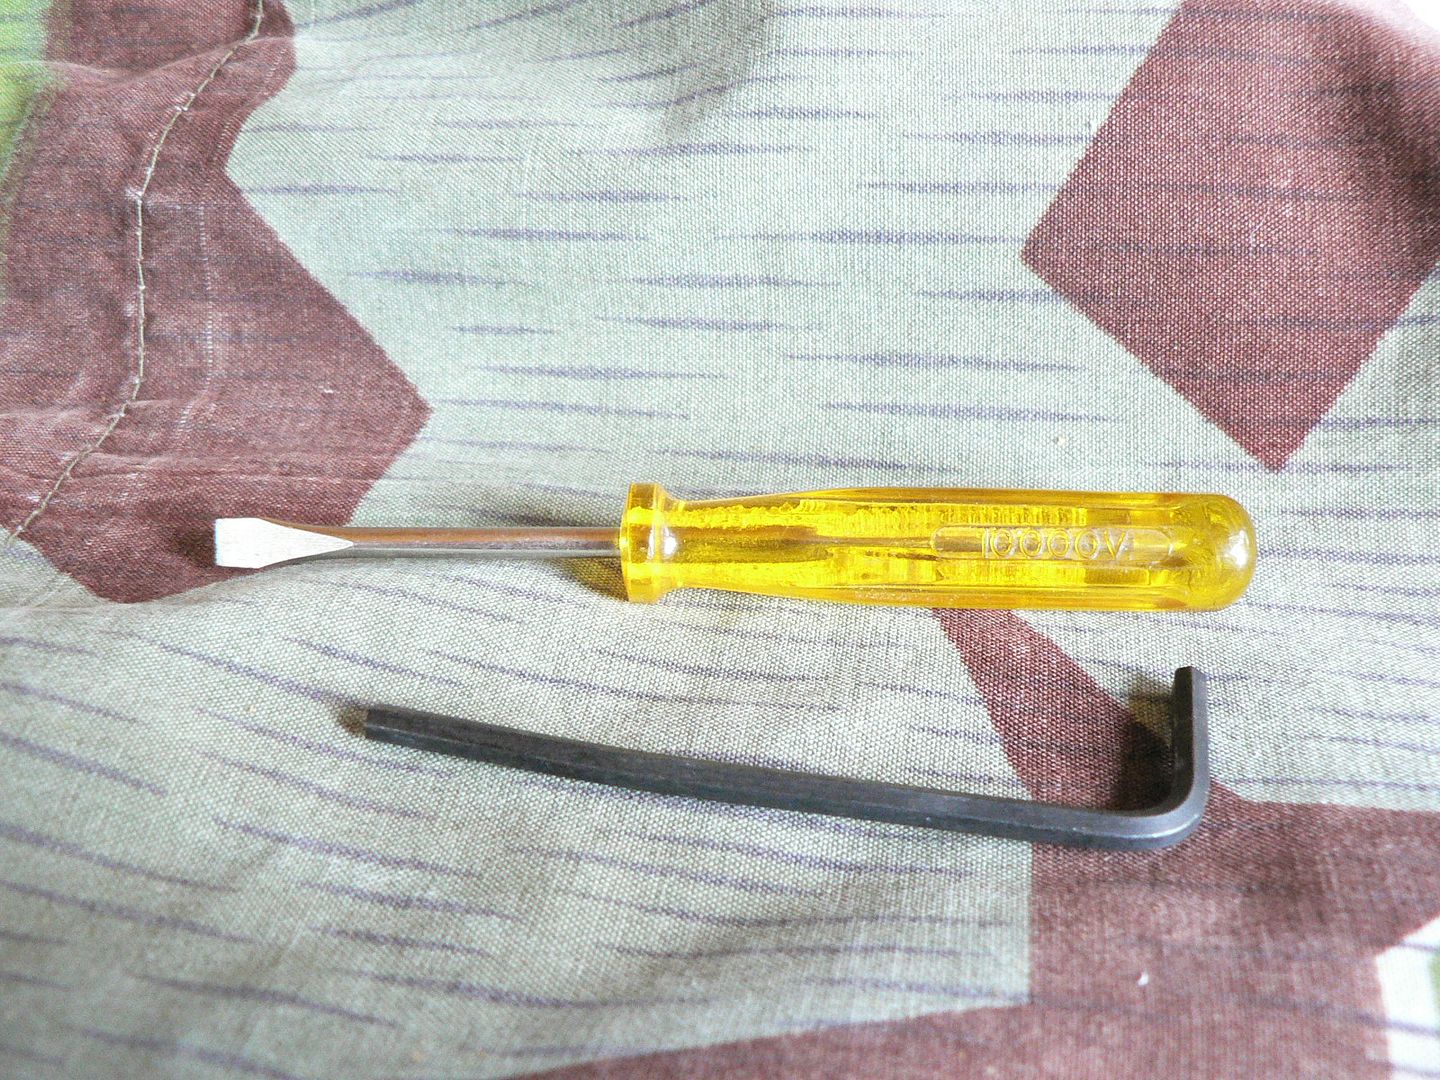
      Here are the screwdriver and hex wrench missing form the other case:


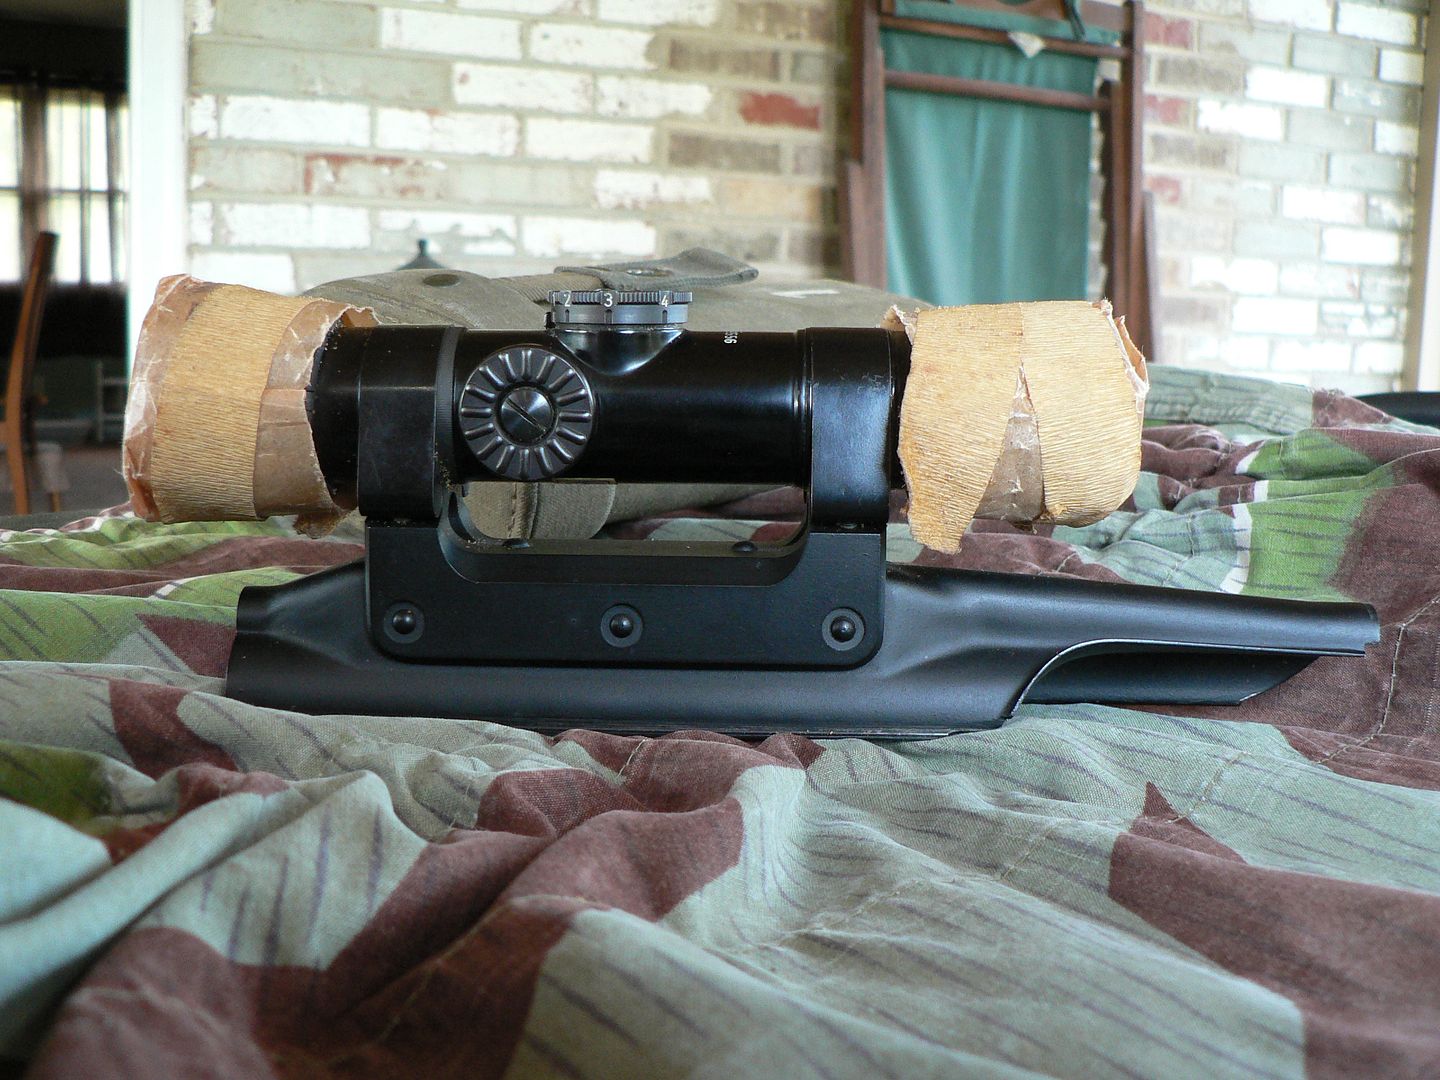
      Here is the scope with the paper and tape covers. These had been removed before by the previous owner but he had thought ahead and kept them. For that, I am very thankful!


      Here is the hinge side of the original front lens cover:


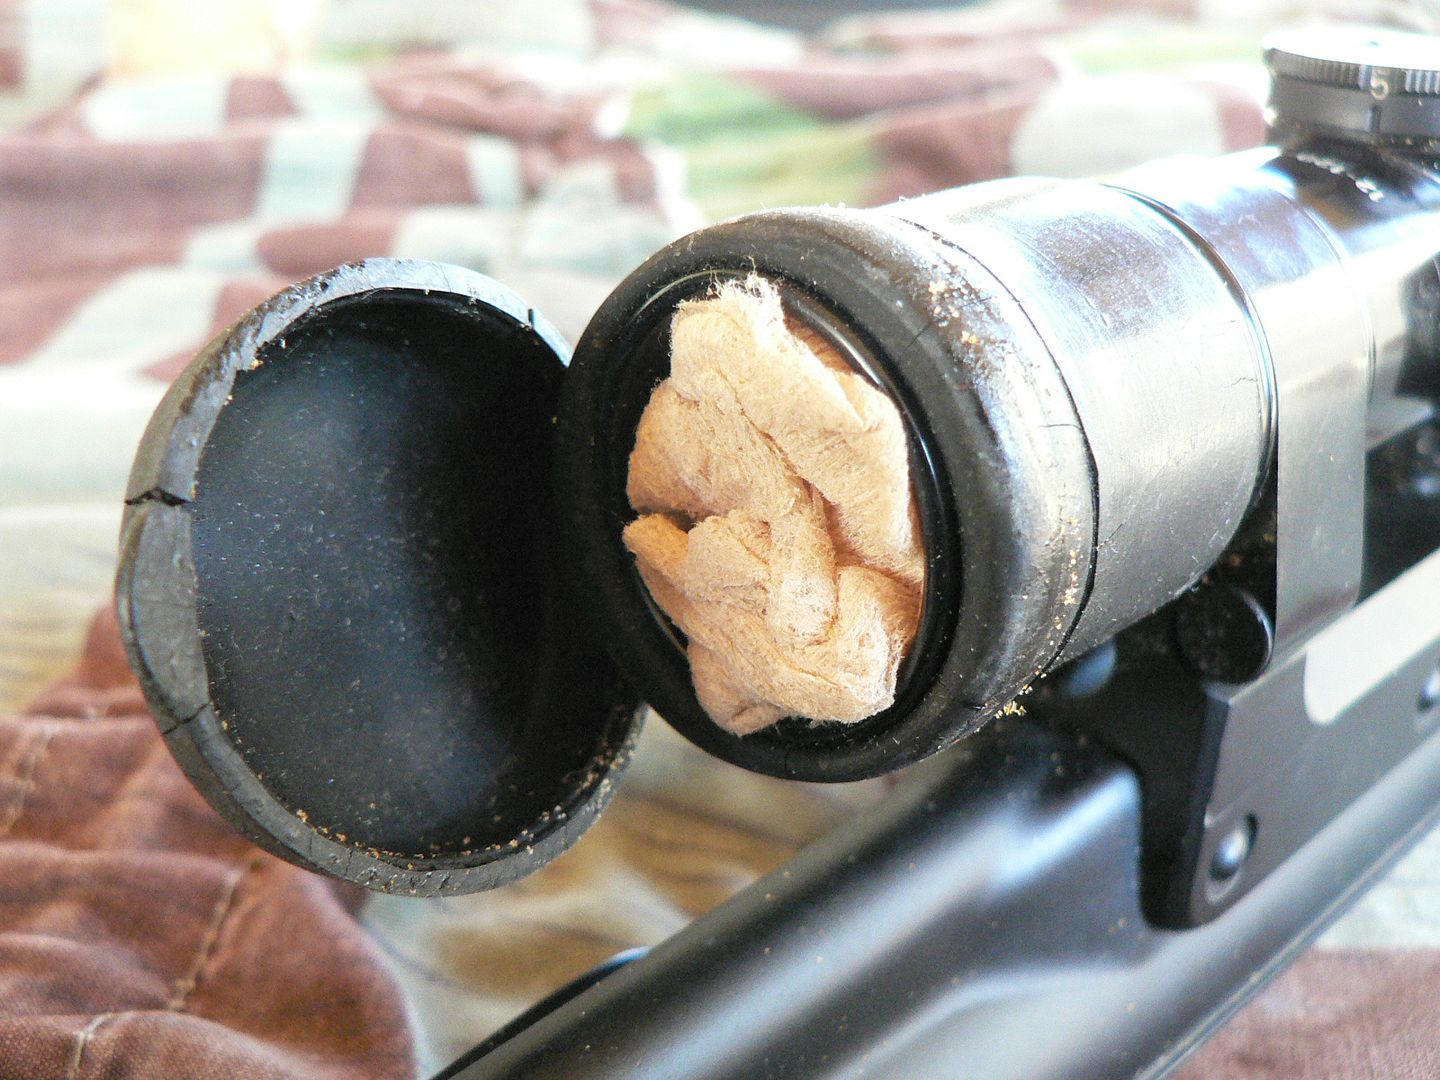
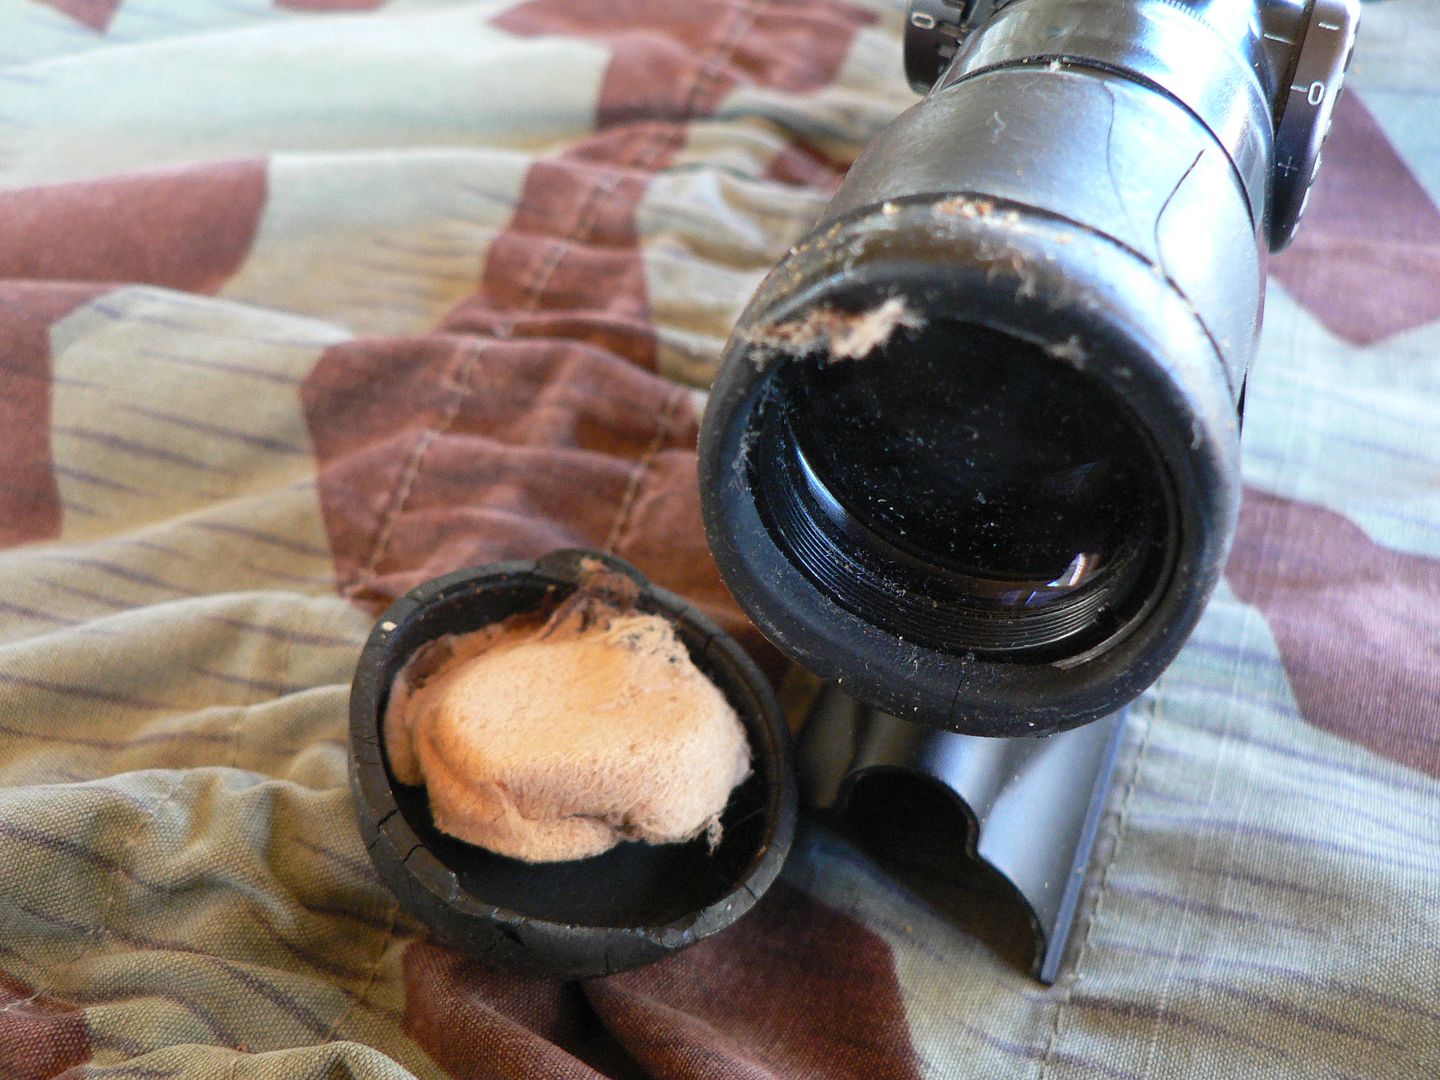
      The rubber covers are identical to those used on the later Model 1 & 2 units except that they are not notched because there is no mounting lug to clear as there is on the others. Unfortunately, these lens covers are at the end of their life span. The front one opens but the rubber hinge is barely hanging on and the rear cover hinge is already broken. To try and remove either one from the scope body will totally destroy it I'm sure.


      Here is the side with the little pull tab for opening the cover:


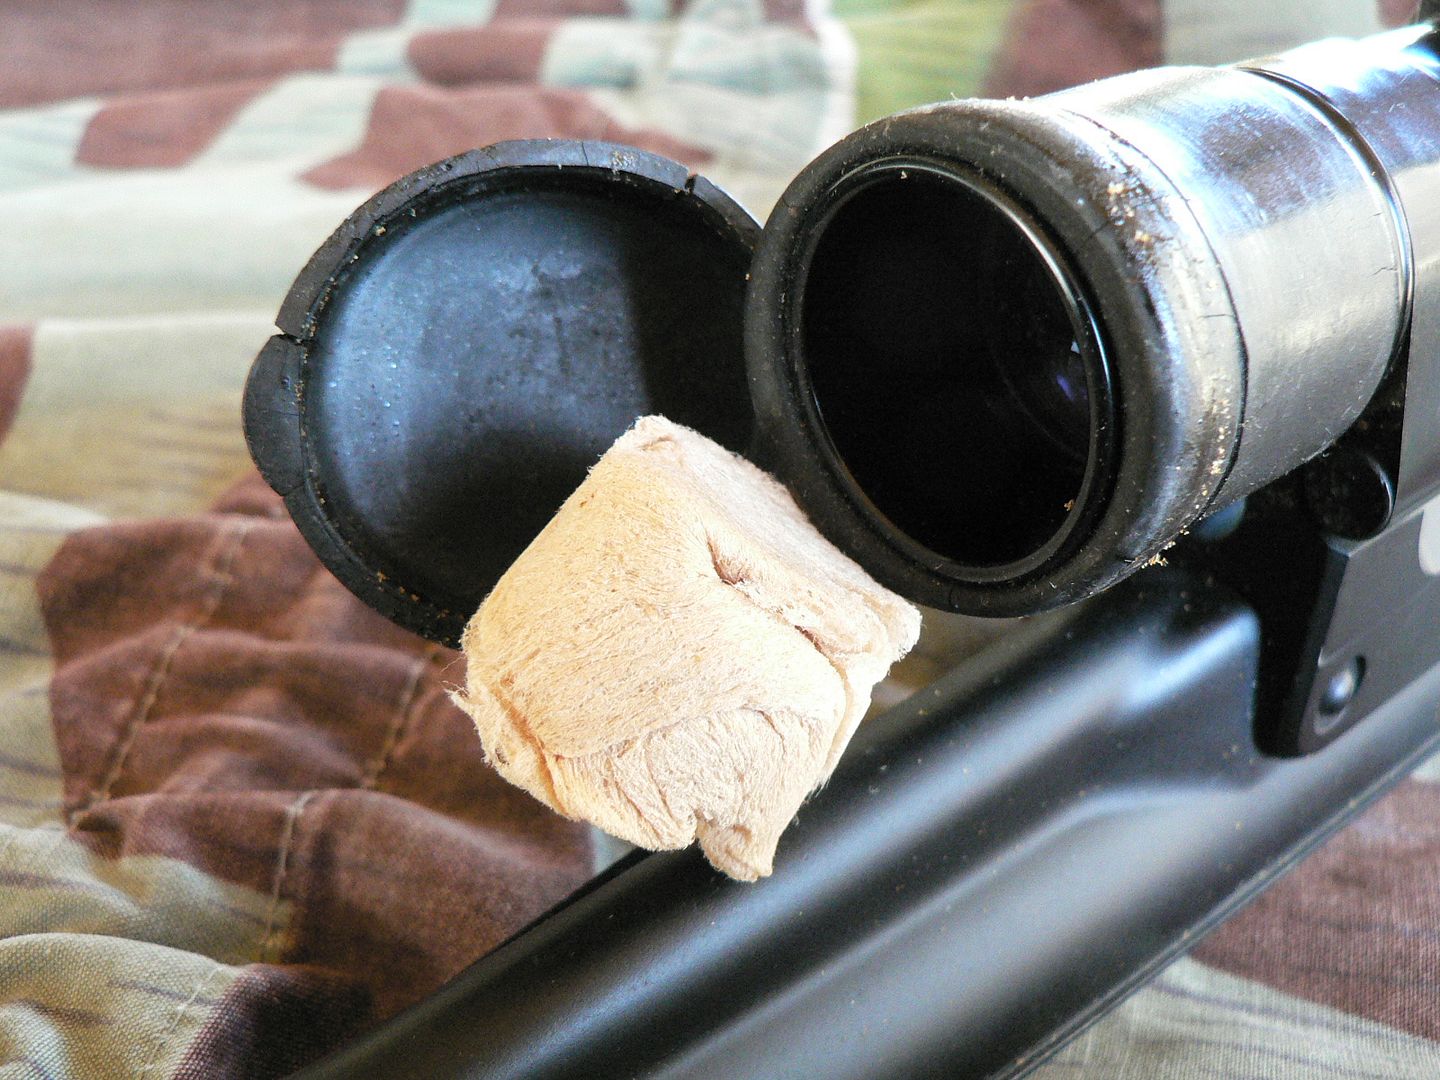
      Underneath of the front cover is a wadded up piece of storage paper:


      Here, that paper has been removed:


      It will be kept but not replaced because the front lens coating has started to show faint freckling from contact with the paper for the last 1/2 century. Almost all of the spots wiped off but a very few remain. Fortunately, the image through this scope is still crystal clear but if you focus really hard on the reticle instead of looking through the scope, some tiny spots are visible in the image.


      Broken rear lens cap removed showing the paper wadding:


      Notice that the rubber has started to become gummy and the paper glued itself to the cap. Surprisingly, no spots at all are present on the ocular lens.

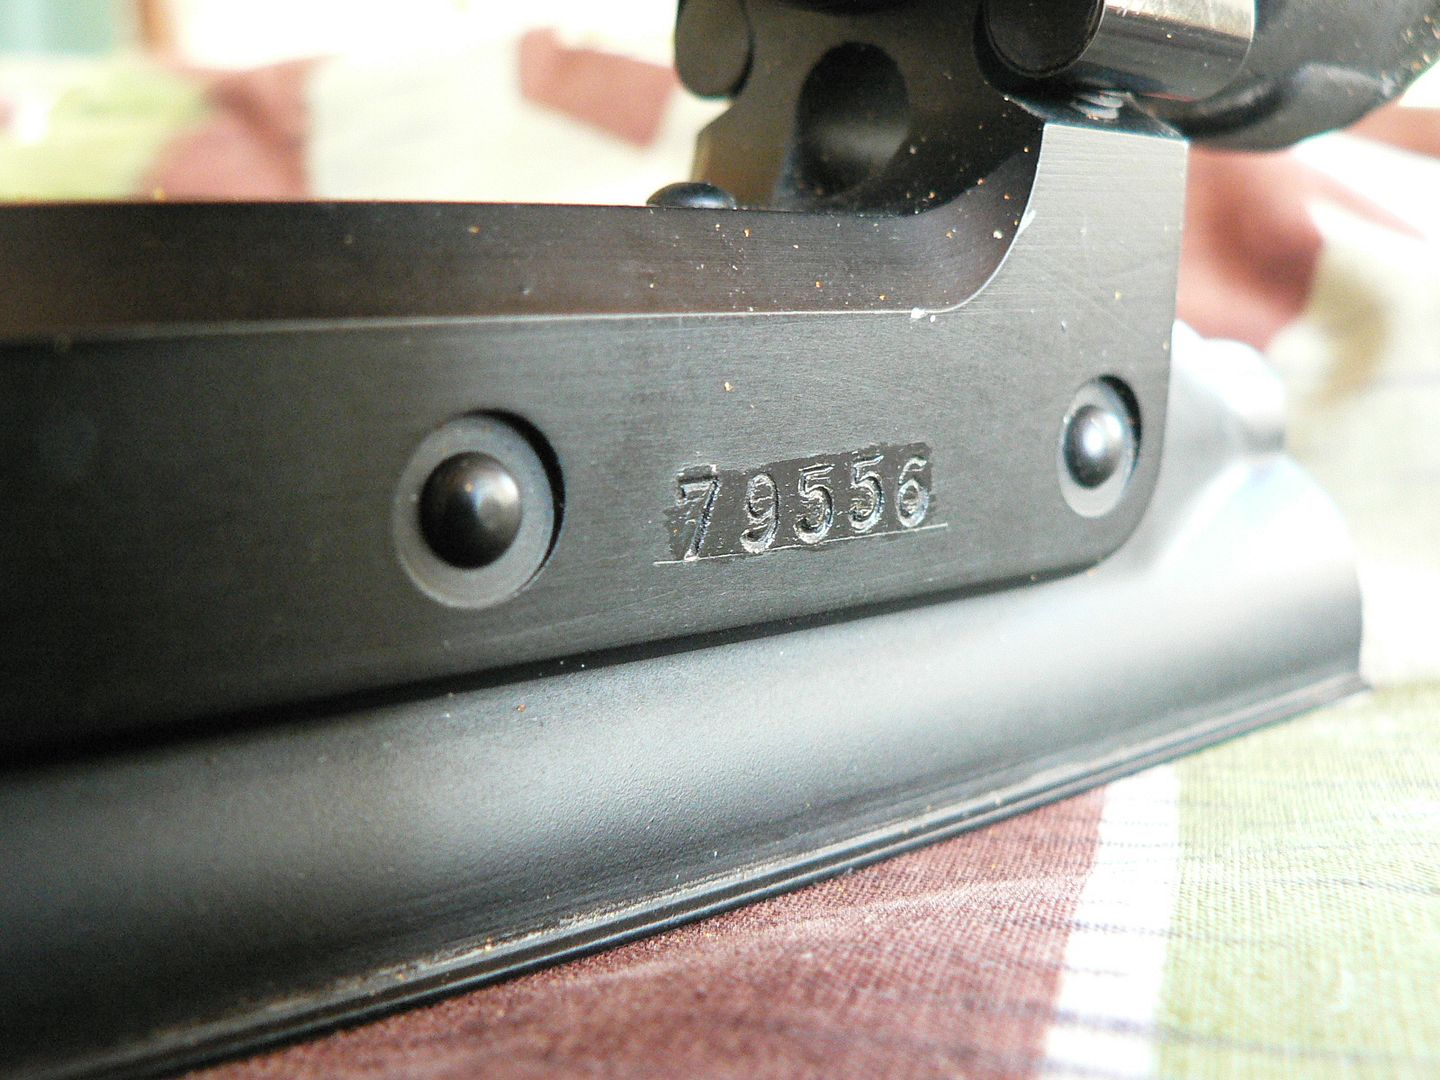
      Here, we can see black paint brushed over the area where the rifle serial number was stamped. This was done to hide the bright spots created when the punch pierced the pre-painted mount:


      The top of the scope showing the part number indicating that this was a Bundeswehr issued unit:


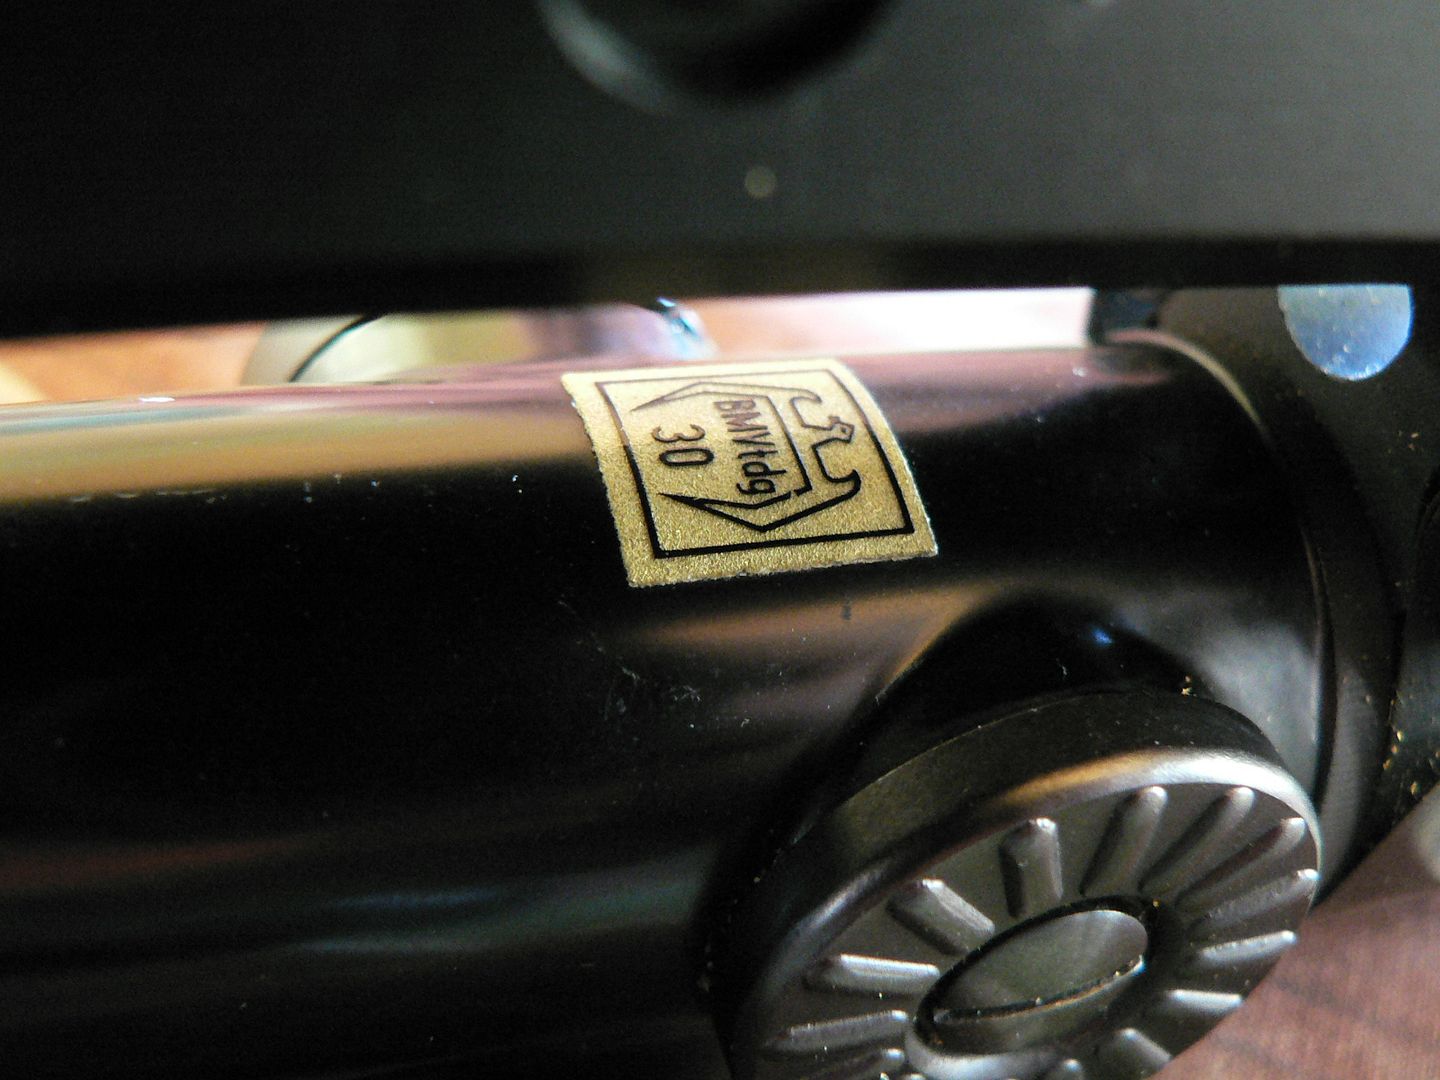
      On bottom of the scope body, we find the inspection/acceptance decal. Notice that it is a stylized federal eagle:


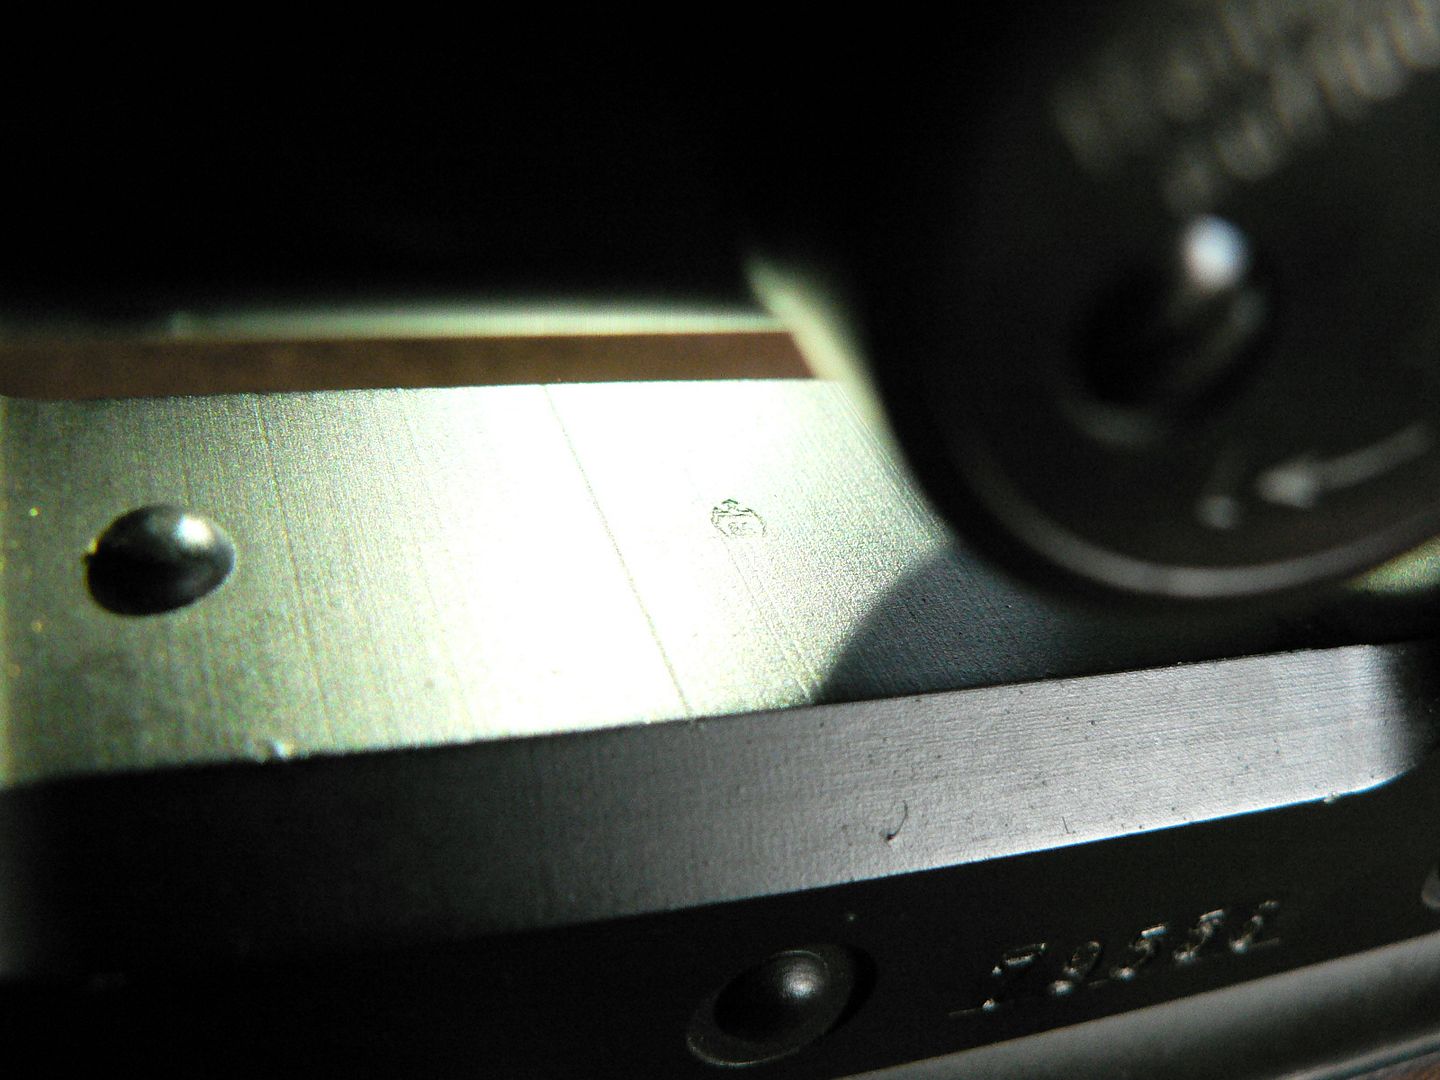
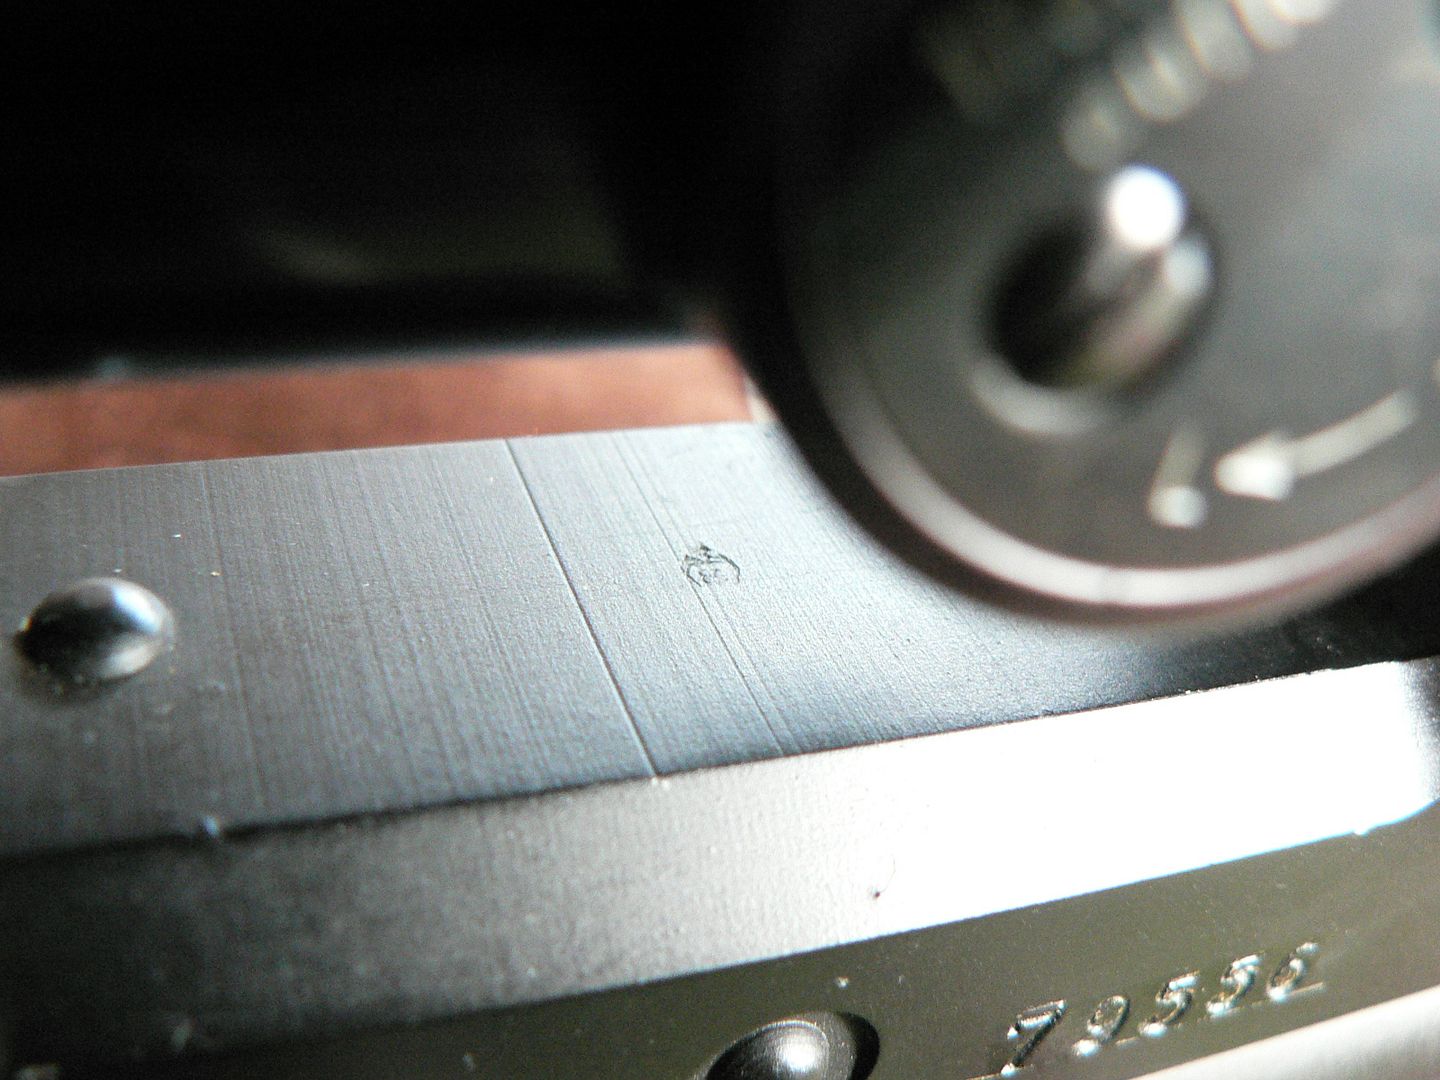
      On top of the aluminum mount there is an inspection/acceptance stamp. Similar to the decal shown above it is a stylized federal eagle. In this case, the wings are surrounding the number "84". Any time I see one of these inspection stamps, I call it a "Bundesamt" because they are really just the postwar equivalent of a waffenamt. It was hard getting a good shot of this stamp without dismounting the scope but I don't think that would be a good idea. Pictured below are three pictures of the same stamp using slightly different lighting so that you can get a good idea of what it looks like in person:


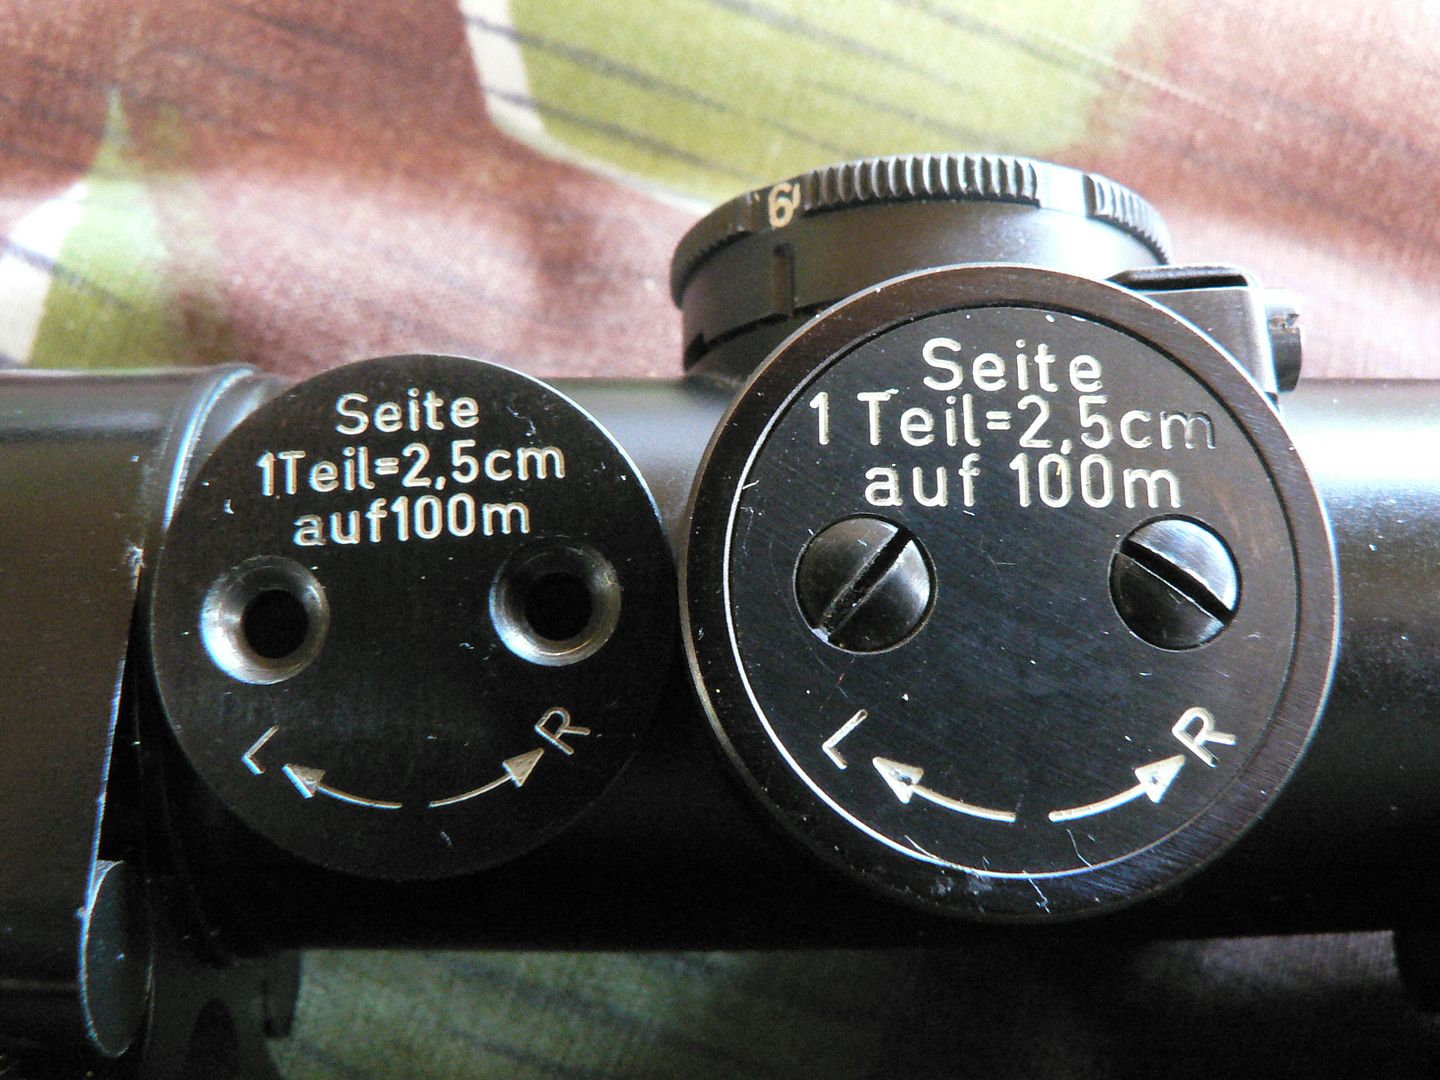
      An interesting variation between the BGS and Bundeswehr scopes is the marking used on the windage adjustment cover plate. Both have identical information but the size and spacing of the font is slightly different. The BGS plate is in situ on the right and the Bundeswehr plate has been removed from its knob and is seen on the left:


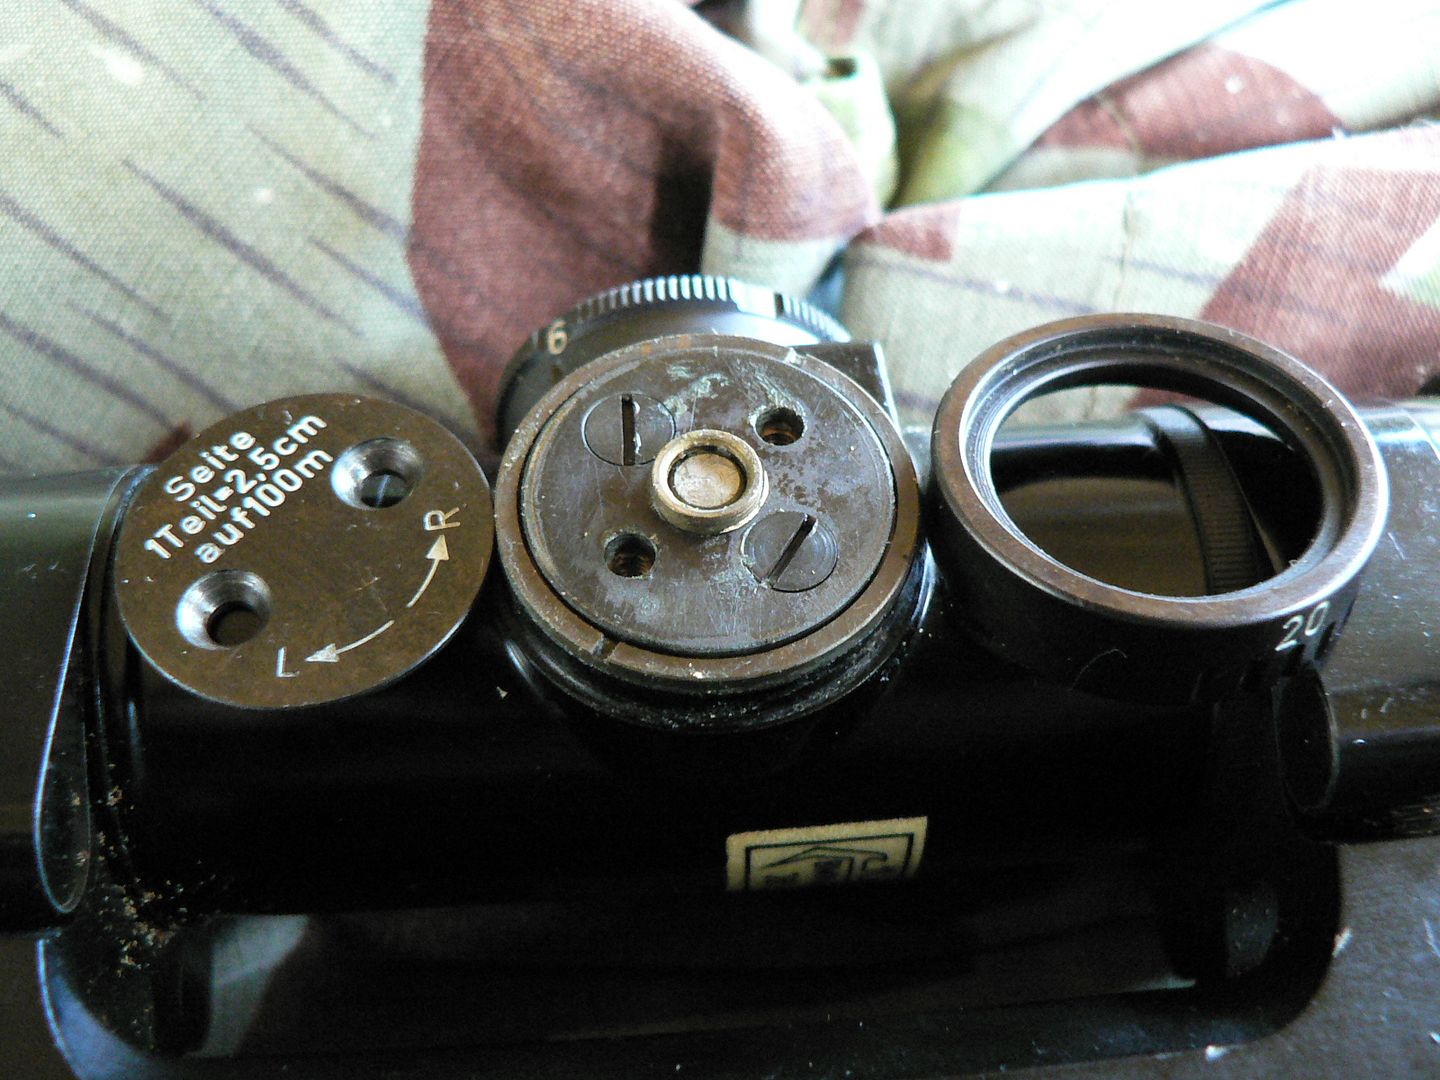
      Since we have it apart, here is a view of the knob disassembled on the Bundeswehr scope:


      The method I described for adjustment in an earlier post was wrong and should be disregarded. I assumed about how it was done without actually disassembling one to KNOW and that was a mistake. In actuality, the screws DO NOT have to be removed, only loosened. Proper adjustment is made by first turning the knob until the proper point of impact is achieved. Then the screws on the cover plate are loosened and the indexed knob body is turned to zero. The screws are then tightened. Sorry about the earlier screw up.

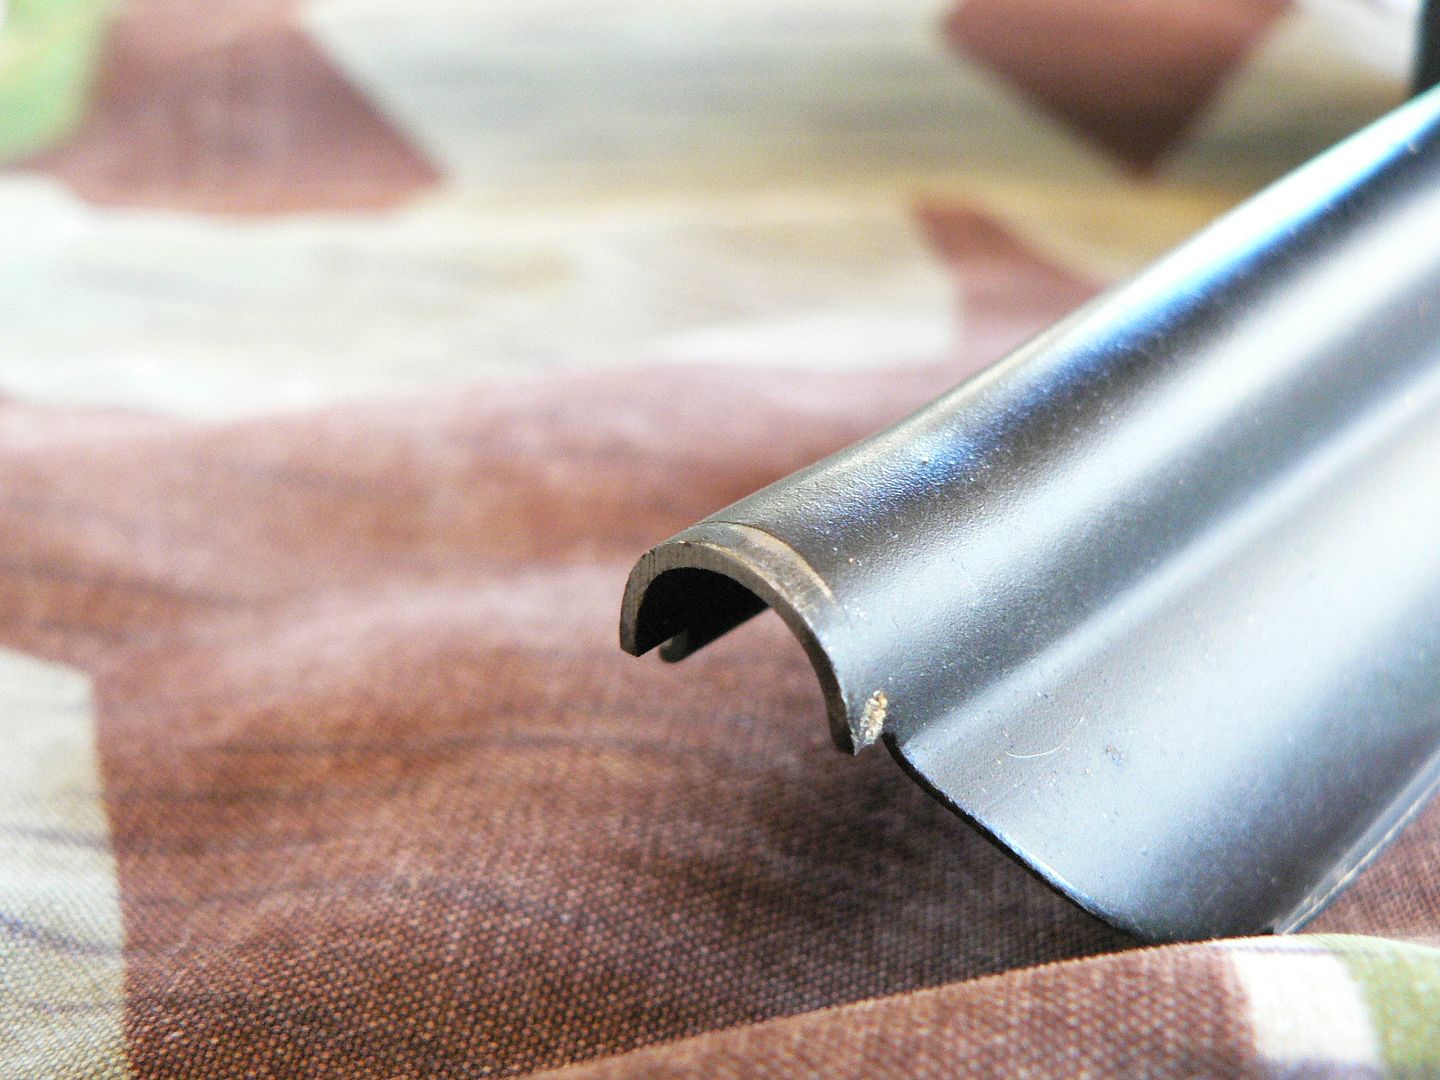
      Here, we see that the nose of the cover has been ground down to fit the rifle it was mated with:


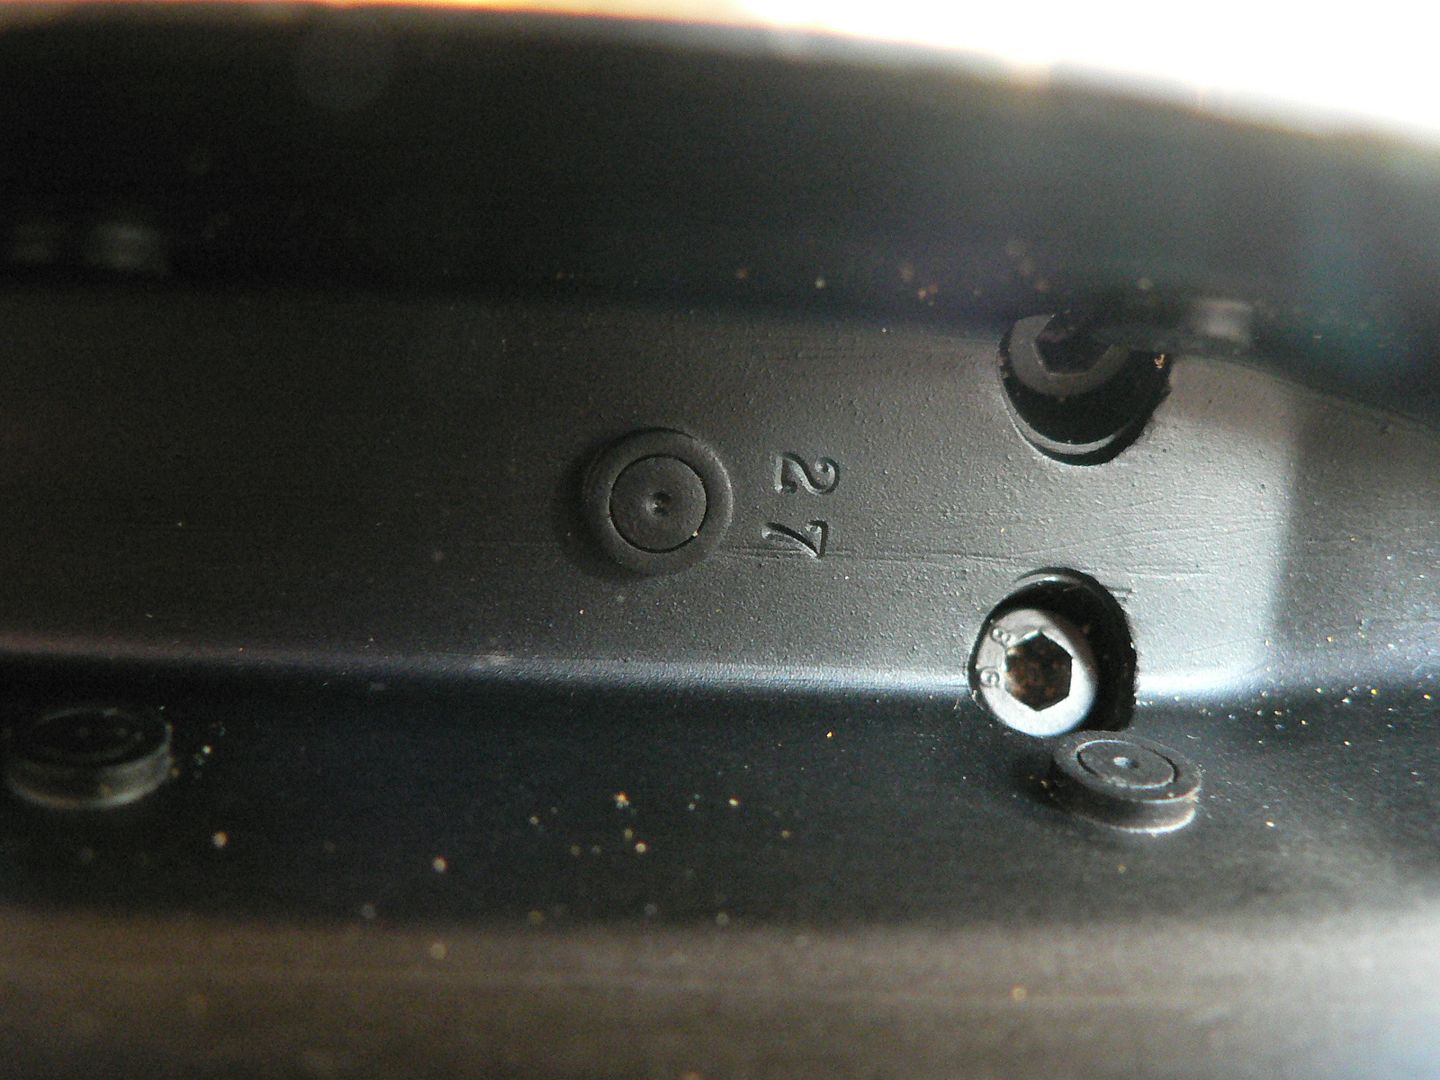
      A number "27" stamped underneath the cover near the rear band tensioning screws:


      In the above picture, you can see some of the deteriorated foam particles that I was talking about earlier. The BGS cover has a number stamped into it too. It is near the front tensioning screws but it is partially obliterated by one of the mount rivets (see the earlier post). It may very well have been a 27 too but that is only a guess.


      Okiedokie then. That's all I have for an update.
      Last edited by BWilhelm; 10-06-2014, 11:23 PM.

      Comment


        #4
        nice photo essay on the ZF4! You mention earlier leather scope pouch for BGS. I would be interested to see photo of one, if you have any.

        Regards
        Klaus

        Comment


          #5
          Unfortunately, I do not.

          Comment

          Users Viewing this Thread

          Collapse

          There is currently 1 user online. 0 members and 1 guests.

          Most users ever online was 10,032 at 08:13 PM on 09-28-2024.

          Working...
          X